Imagining our lives without Gmail is nothing short of sin these days. The Google email client has become an integral part of our work culture; it’s nigh impossible to think of communication in the corporate world without Gmail. Since it’s such a vital part of our daily lives, it’s essential to know how to organize Gmail to increase productivity.
A cluttered Gmail inbox can lead to a lot of confusion. For instance, mixing up promotional emails with your work emails might lead to a loss of time spent searching for the right email conversation. Hence, you must be aware of how to delete promotions in Gmail and also keep your inbox organized to avoid confusion.
How To Organize Gmail And Boost Productivity
Having an organized Gmail inbox means you can complete your email-related tasks faster than anyone else. Working faster without committing too many mistakes leads to better productivity. On that note, let’s check out the umpteen ways to organize Gmail.
1. Disable The Unused Tabs
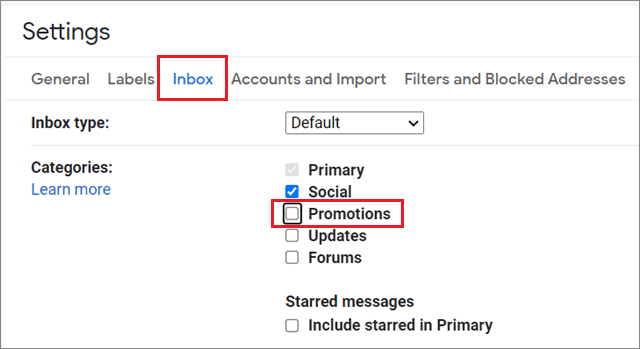
When you enter a Gmail inbox, you can see five different tabs at the top that display different types of emails. These tabs are Primary, Social, Promotions, Updates, and Forums.
Now, you can choose to disable any of these tabs except the Primary tab if they aren’t important to you. However, once you disable any tab, the emails related to that tab will show up in the Primary tab. So, make sure the tab you want to disable doesn’t receive too many emails, lest it might clutter your Primary tab.
To begin with, click on the gear icon in the top right corner and select See all settings.
Once you open the settings on the Gmail screen, go to the Inbox tab. If your Inbox type is Default, you will see the five categories. Just uncheck the tab that you want to disable. Here, we have disabled the Promotions tab.
2. Put Relevant Email On Top
Having relevant emails on top allows users to skip the hassle of navigating through the emails to find important messages. You can also save a lot of time by having the relevant emails on the top.
To select the preferences of the type of emails, go to the Inbox tab in the Gmail settings.
Next, select the type of emails in the Inbox type section.
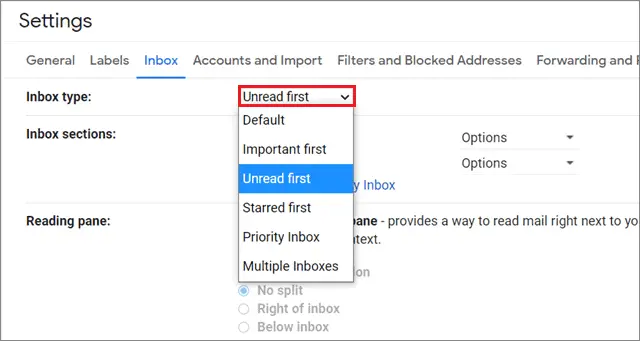
There are five types of emails:
1. Default: The usual layout of Gmail that we see on signing up for a Gmail account.
2. Important first: Google predicts the important emails in your inbox and places a yellow marker on them. All other mails are displayed after these marked messages.
3. Unread first: This option will show all the unread messages at the top of your inbox.
4. Starred first: If you use stars to prioritize your inbox, you can use this option. All other emails after the starred messages.
5. Priority inbox: Google learns which emails you interact with the most, and places them at the top. This is the best option if you have a lot of incoming messages every day.
3. Create Multiple Labels
If you want to know how to organize Gmail in the best way possible, make sure you don’t miss out on how to create a new label in Gmail. Also known as folders, labels are tags that you can attach to every email that you send or receive. You can sort your emails on the basis of a new or existing label. Users can also create a nested label to create complex conditions to filter messages.
4. Archive Emails For Future Use
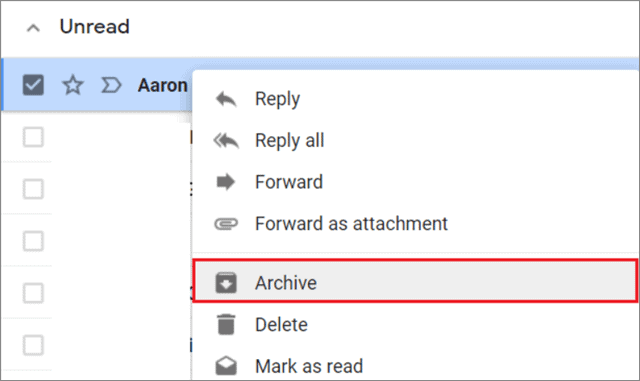
You can choose to archive emails in Gmail if you don’t want to read a particular email at any instant. When you archive an email, it vanishes from your email but doesn’t get deleted. You can search these emails using the inbox search bar as well.
To archive an email, right-click on the email, and select archive from the drop-down list.
5. Use Filters To Sort Email Properly
We have already seen how a Gmail label list helps us in sorting our emails into different categories. However, you may still need to sort your emails in specific labels manually. This is where you need to know how to create a Gmail filter to automate this lengthy task.
Filters allow users to sort their emails based on various criteria, such as sender name, subject content, and many more. Whenever an email matches criteria set by a filter, Gmail will automatically take an action that is pre-defined by the user.
6. Use Multiple Inboxes
Multiple inboxes come in handy if people want to consolidate multiple email accounts. They are also useful if you want to prioritize daily tasks or specific types of emails.
Multiple inboxes allow users to create multiple panes, each designed to display a certain category of emails, based on the email type, topic, or personal preference. For instance, you can create a separate inbox for all emails from a specific recipient that need urgent follow-ups.
To use this feature, go to the Inbox type tab and select ‘Multiple Inboxes’ from the drop-down menu.
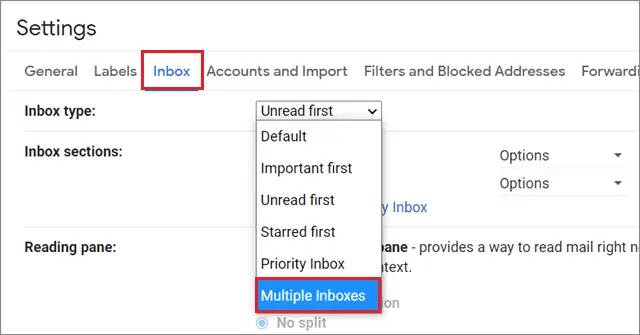
Then, you need to add a section for a particular inbox. For instance, here we have created a separate inbox for all emails that are starred. Make sure you scroll down and click on Save Changes to save the settings.

You can add multiple sections based on different criteria of emails.
7. Setup Desktop Notifications
If you prefer real-time engagement in your quest to know how to organize Gmail, then we strongly recommend setting up a desktop notification system. This way, you see notifications pop up in the top right of your screen every time you receive a new email.
To enable desktop notifications, go to the Gmail setting window by clicking on the gear icon in the top right corner.
In the general settings menu, scroll to ‘Desktop Notifications’ and enable the notification feature as shown below.
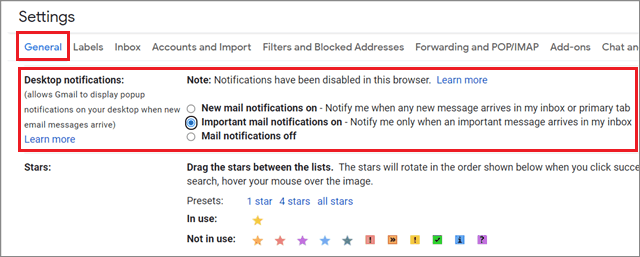
Scroll down and click on the Save Changes button to save the settings.
Sometimes desktop notifications can be irritating if you receive them constantly. However, you can avoid this issue if you turn on notifications only for the emails that are marked ‘Important.’
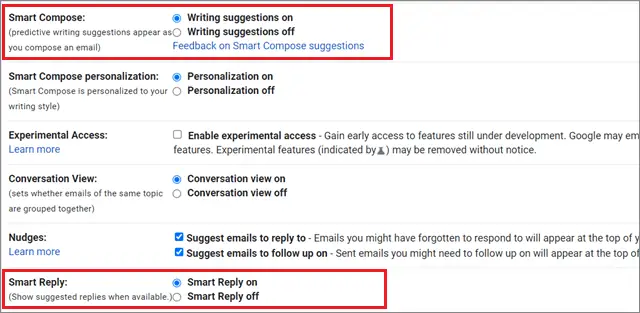
8. Turn On Nudges
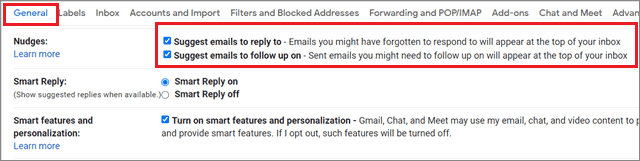
If you get a ton of emails every day, it is but natural to miss out on some important conversations in the vast sea of new emails. But you don’t need to worry much; the Nudges feature can help you in this case.
Nudges is a Google algorithm that earmarks important emails and brings them on top if you haven’t read or replied to them. If you need constant reminders for important email-related tasks to organize Gmail, make sure you activate this feature.
There are two kind of Nudges in Gmail:
Suggest emails to reply to – The emails you need to reply to will be on the top of the inbox.
Suggest emails to follow up on – The emails you need to follow up on will be on the top of the inbox.
You can edit these options by going to the Gmail settings in the General tab.
9. Star Important Messages
Google already has settings in the place where it marks important emails with yellow markers. However, sometimes it might miss out on important incoming mail. In such cases, you can star-mark it and view it later.
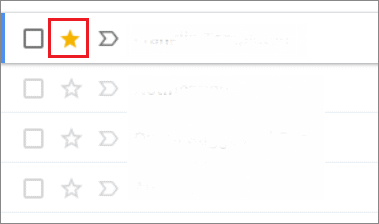
The importance markers, i.e., the yellow markers are used to mark an entire important conversation thread, while star marks are used to mark only a single message. It’s essential to know about this feature if you want to know how to organize Gmail inbox properly.
10. Mute Conversations
Muting conversations is an essential part of how to organize Gmail properly for better productivity. If there are too many incoming emails, you can choose to mute those conversations so that they don’t pile up in your inbox.
Once you mute a conversation, all emails in that conversation are archived automatically. You can view these messages from the Archives folder in Gmail or by searching them directly.
To mute a conversation, open the conversation and click on the three horizontal dots. Then, select Mute from the drop-down menu.
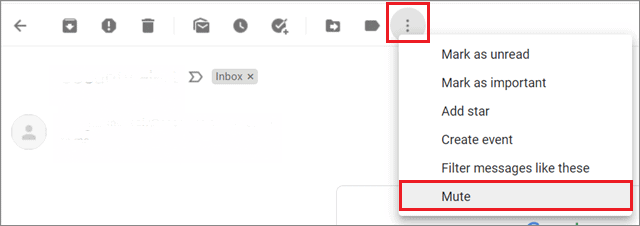
If you want to search for muted Gmail emails, enter ‘is:muted’ in the Gmail search box to search them quickly.
11. Use Smart Reply And Smart Compose
The Smart Reply is a feature you ought to have if you need to send fast replies to your email contacts. Whenever you are typing a reply, this feature will suggest short phrases to help you complete the replies.
Smart Compose is what you can call the sibling of Smart Reply; this feature allows users to compose full-length replies in contrast to the short phrases we saw earlier.
You can turn on the Smart Compose feature from the General tab in the Gmail settings window.
12. Use Gmail Keyboard Shortcuts
Gmail keyboard shortcuts allow users to perform basic actions like composing or sending mail without having to use the mouse. They help in increasing the speed of operation while using Gmail. Using a keyboard shortcut can also come in handy if your mouse isn’t working properly.
13. Use Search Operators
Using search operators is one of the best ways to search specific types of emails if you don’t clearly remember what they are about. You need to only insert a keyword in these operators and they will produce all the emails containing those keywords in a flash.
For example, if you want to search for an email in a specific folder, you can use the ‘in:[folder name]’ operator. You can refer to this list of search operators provided by Google for quick searches to organize Gmail.
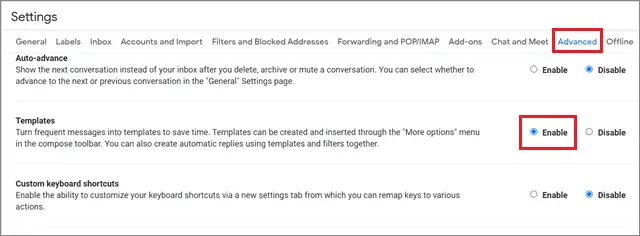
14. Use Canned Responses
In many cases, we may need to send the same message to multiple recipients for various purposes. Tying the same message repeatedly is a monotonous task, and to avoid that boredom, you can use the Canned Responses feature to organize Gmail inboxes.
Canned Responses are email templates that you can send to multiple Gmail accounts and save valuable time in the process. You need to enable the Templates feature for this facility.
Go to the Gmail settings and click on the Advanced tab. Then, enable the Templates section to create a canned response.
15. Use Undo Send
If you wish to know how to organize your Gmail in an inch-perfect manner, make sure you don’t forget to know how to unsend an email in Gmail.
With the Undo Send feature, you can cancel a sent mail in a given time period. The default period for canceling an email after sending it is 5 seconds. You can increase it to 30 seconds as per your preferences.
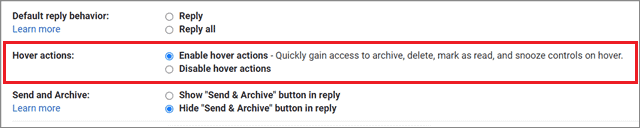
16. Enable Hover Actions
Gmail introduced Hover actions in 2018 to allow its users to perform certain actions with just a click on the spot.
There are four Hover actions, viz., Archive, Delete, Mark as unread, and Snooze. Hover actions help reduce the time required in organizing Gmail and make your interaction with emails way better and faster.
You can enable the Hover actions from the General tab in the inbox setting window.
17. Edit And Import Contacts In Gmail
If you have multiple email addresses with the same or different email clients, you can edit and import your email contacts from all addresses into your primary inbox with just two clicks.
Importing Contacts feature comes in handy especially if you use two or more email addresses for different purposes. By importing contacts, you won’t need to switch between addresses to check out the contacts that are saved on different email addresses.
18. Insert A Gmail Signature
Having a good Gmail signature is one of the essentials when you want to know how to organize Gmail inboxes. It allows users to include important contact information and also helps build a sense of authenticity and trust with their recipients. Having a logo image in a Gmail signature further enhances the trust factor when it comes to business communication via emails.
19. Integrate Google Calendar
Gmail users often send meeting invites to each other; these invites are known as ‘events.’ Any event you receive in your inbox is added to the Google Calendar, which is packaged together with Gmail.
However, for an even better organization, you can integrate the Google Calendar with Gmail to receive notifications in the top right corner whenever you receive an email containing an event. You can add these events to your calendar then and there itself.
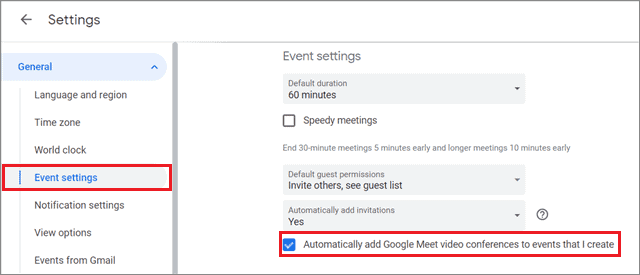
You can also add the Gmail events to your Google Calendar automatically.
Open the Google Calendar and go to Settings.
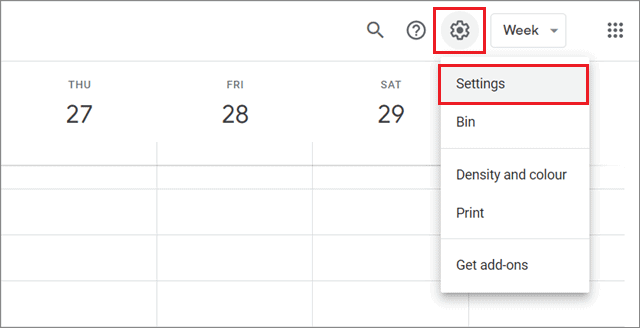
Then, choose Events from Gmail in the left sidebar. Next, check the ‘Automatically add events from Gmail to my calendar’ checkbox.
Final Thoughts On How To Organize Gmail
Organizing Gmail isn’t mandatory, but having a neatly structured email inbox goes a long way in avoiding confusion and loss of productivity. If you know how to organize Gmail, you can save valuable time that would otherwise be wasted in clearing out the confusion that arises out of a cluttered inbox. Also, you cannot make most of these settings on the Gmail app, so it’s better to use a PC for this job.
There is no single criterion that could define what an organized Gmail inbox looks like. Some may use Gmail filters to organize future incoming emails, while others would prefer to have archived emails. The layout may be important for some users, while others might focus on creating meaningful templates in Gmail. Thus, organizing Gmail is a matter of choice for every user.