Screensavers were famous when CRT (Cathode Ray Tube) monitors were used to protect them from burn-in. The LCD monitors reduced the use of screen savers as they came with technology that protected them against burn-in. You can still use screen saver settings in Windows 10 to configure the screensaver of your choice.
If you are still using a CRT display or want to feel nostalgic, you can enable a screen saver on your computer. Windows 10 allows and supports screen savers. However, if you have issues like the screensaver not working, you may have to fix that before enabling the screen saver.
Why is a Screen saver Used
Screensavers protect your monitor from burn-in by continuously moving graphics on your screen. When the CRT display is stuck with the same display for a longer time, there are chances of burn-in.
Well, you can use a screensaver for fun as well. You don’t need a CRT display to use screensavers. You can learn all about how to change, configure and disable screensaver settings on Windows 10 in the section below.
How to Change and Configure Screen Saver Settings in Windows 10
It is fun to see running tubes, moving names, and rotating images on the screen when you are not using your computer. You can configure the Windows 10 screensaver settings as per personal preference.
There are many ways to change screen saver settings in Windows 10 – you can use the Settings app, Control Panel, Command Prompt, and many others. However, we recommend using the Windows Settings app because of its user-friendly interface and easy-to-access settings.
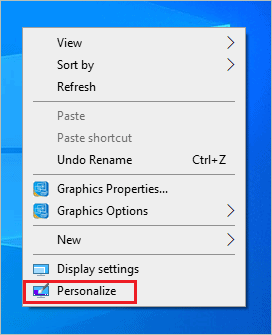
Press Windows key + I to open the Settings app and go to the Personalization settings. Alternatively, you can right-click on the Desktop and select Personalize from the context menu for a shortcut approach.
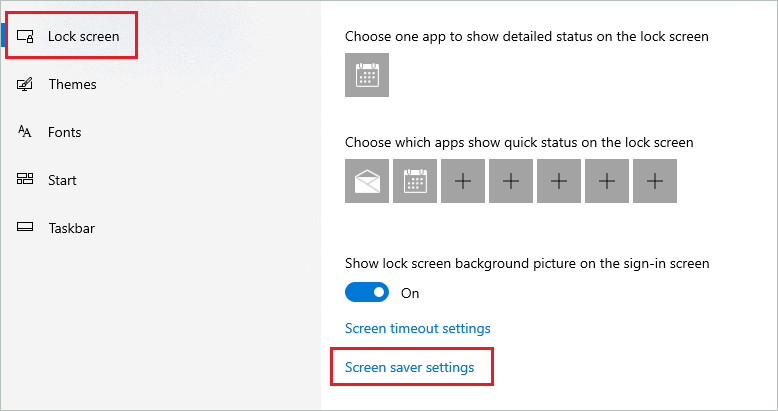
Navigate to the Lock screen section from the left pane and click and open Screen saver settings in the right pane.
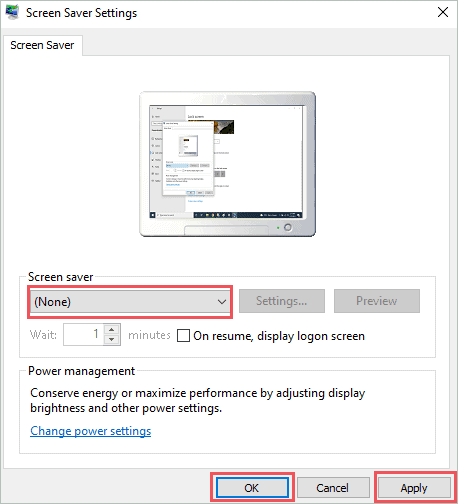
When the Screen Saver Settings window opens, select the screen saver option you want from the Screen saver drop-down menu. The default setting will be set to None.
If you want a black screensaver, you can choose Black from the screen saver options.
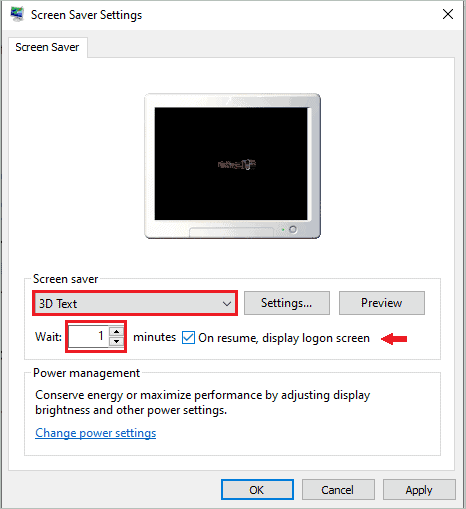
The Wait is the time after which the screen saver will be activated. You can set it as per your wish based on when you need screen saver activation. Also, if you want to lock the screen after the screen saver is activated, check the check box next to ‘On resume, display logon screen.’ This will enable lock screen option.
Windows 10 allows you to make changes to the selected screen saver via settings. Click on the Settings button once you finish choosing the screen saver for additional options.
Now, you can make changes according to your wish. The Settings screen may differ according to the screensaver you selected. In the case of 3D Text, it is as shown below.
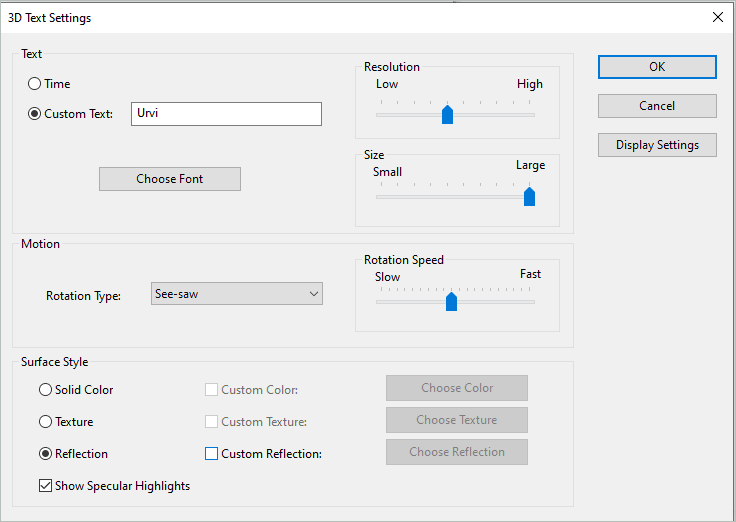
You can give the custom text and also set the motion of the 3D text. In addition, there is an option to change the font style, resolution, size, and rotation speed.
Once all the customization is done, click on OK. Next, you can check the preview by clicking on the Preview button in the Screen Saver Settings dialog box. To exit screen saver mode, press any key or move your mouse. After you are satisfied with the changes, click on Apply and OK to enable the screen saver.
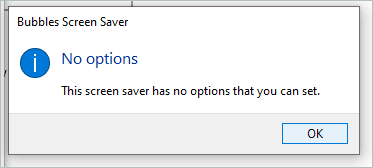
If you select Bubble from the drop-down menu, you won’t be able to customize anything. When you click on the Settings button, you will see ‘This screen saver has no options that you can set.’
And in the case of Photos, you will be given the option to select the folder from where the Windows 10 screen saver images will be used. Also, you can set the slideshow speed.
If you don’t want to use the default screen saver options, you can download some of the best screensavers for Windows 10 from the web. You can then use the screen saver settings in Windows 10 to enable downloaded screensaver.
How to Disable Screen Saver in Windows 10
If you are done with the Windows screen saver and wish to disable it, you can do so conveniently in Windows 10. The same screen saver settings in Windows 10 are used to enable and disable the screen saver.
Open the Settings app and go to the Personalization ➜ Lock screen. Next, click on the Screen saver settings link.
Select None under Screen saver in the Screen Saver Settings window and then click on Apply, followed by OK.
You will no longer see a screen saver on your computer screen once it is disabled from the screen saver setting in Windows 10.
Conclusion
Screen savers saved your screen in times when CRT displays were used. However, with LCDs, screen savers became unpopular. If you are still a fan of screensaver, you can enable it on your Windows 10 computer. It is easy to play around with screen saver settings in Windows 10 to explore different options of screensavers.
And it is always better to stare at family pictures or animation instead of a blank screen when thinking about something in the middle of work. Windows 10 allows you to download screensavers and use them on your computer.


