Key Takeaways:
- Quick Settings is seen in the bottom right corner of your screen.
- You can add and remove Quick Settings options for better usability.
- This Windows 11 feature makes it easy to manage common PC settings.
Windows 11 Quick Settings has functionality similar to Windows 10 Action Center. You can make quick changes to your computer settings via the Quick Settings window. Once you know how to customize Windows 11 Quick Settings, you can make the most out of this small panel.
Customization will also save you a lot of time, as you don’t need to open the Windows 11 Settings app and navigate through various sections to make one minor change.
What Do Windows 11 Quick Settings Contain
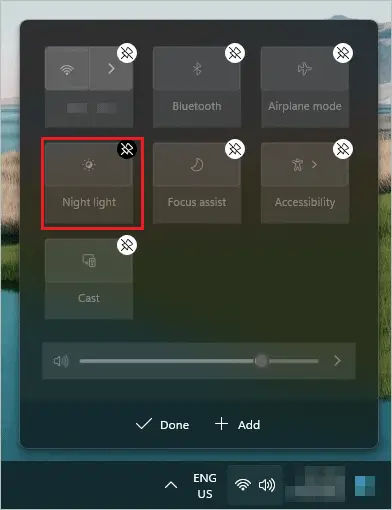
Before knowing how to customize Windows 11 Quick Settings, knowing what is available in the panel is essential. You can see all the available options of Quick Settings in the below screenshot.
It may differ from system to system based on their requirements. However, the below one has all the setting options added to it.
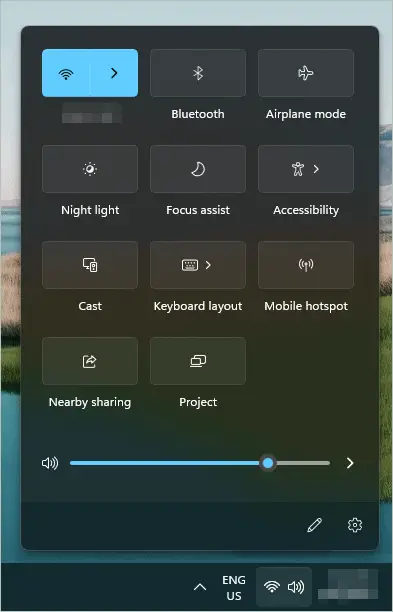
Well, the above Quick Settings panel belongs to a desktop computer. If you use Windows 11 on a laptop, you may also see a brightness slider and battery saver options.
You can find all the below-mentioned options in the Quick Settings:
- Wi-Fi
- Bluetooth
- Airplane mode
- Night light
- Focus assist
- Accessibility
- Cast
- Keyboard layout
- Mobile hotspot
- Nearby sharing
- Project
- Volume control
If you are a regular Windows user, you already know what these settings do. In brief, you can connect to the Internet and Bluetooth devices, enable Airplane mode and mobile hotspot, change keyboard layout, cast and project your screen, and control the volume and brightness of your computer.
In a nutshell, you can manage every minor configuration from the Quick Settings menu. You don’t need to remember complicated keyboard shortcuts to make fundamental changes.
How to Access Windows 11 Quick Settings?
Quick Settings can be seen in the corner of taskbar of your screen. There are two ways to access the Windows 11 Quick Settings panel. One is to use the keyboard shortcut, and another is to access it via the Windows 11 taskbar.
Press Windows key + A hotkey to open the Quick Settings. When you press the keyboard shortcut, a small window with rounded corners will appear in the bottom-right corner of your screen. It is convenient to access the Quick Settings panel without using your mouse.
If you don’t wish to use a keyboard shortcut, you can click on the network, battery, or volume icon on the taskbar to launch the Quick Settings menu.

In the case of desktop computers, you can click on the network or volume symbol.
How To Customize Windows 11 Quick Settings?
You can add and remove the settings you want from the Quick Settings panel. If you don’t use any specific settings, it is possible to get rid of them to avoid clutter. Also, if you feel some settings are missing, you can add them.
Add Options to Quick Settings Panel
It is easy to customize Windows 11 Quick Settings by adding a few more options. Follow the steps below to add your favorite settings.
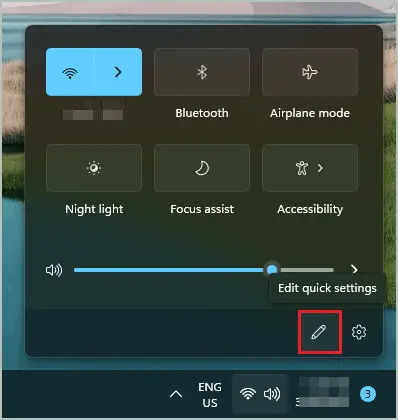
Step 1: Open the Quick Settings panel and click on the pencil icon at the bottom of the panel to edit quick settings.
Step 2: Click on “Add” button and select the settings you want to add to the Quick Setting panel.
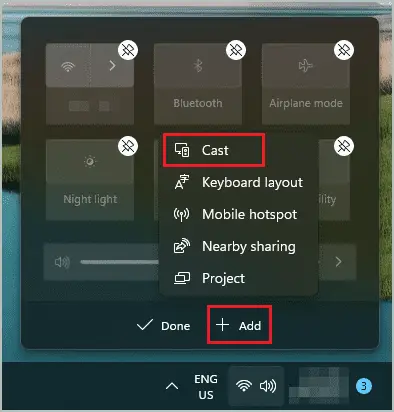
You can repeat this step to add more than one setting at a time.
Step 3: Once all the additional options/settings are added, click on “Done” to save the changes.
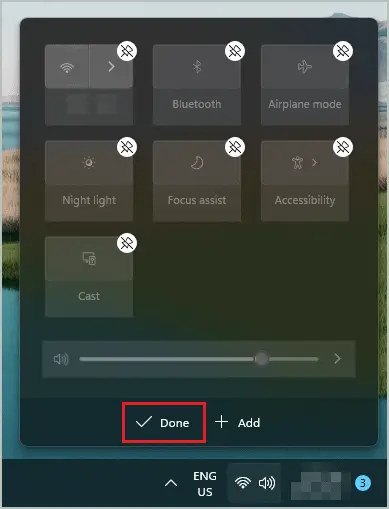
You will now see all the newly added settings in the Quick Settings panel.
Remove Options from Quick Settings
If some settings are no longer required, you can simply unpin them. This can save space in the Quick Settings panel on Windows PC.
Launch the Quick Settings menu and click on the Edit icon (pen symbol). Now, click on the pin icon in the corner of the setting option you wish to remove.
Once the required settings are unpinned, click on “Done” to save the changes.
You now know how to customize the Windows 11 Quick Settings by adding and removing the options seen on it.
Rearrange the Setting Options Seen in Quick Settings
If you don’t like the default arrangement of settings in the Quick Settings panel, you can rearrange it easily.
Firstly, click on the “Edit quick settings” (pen icon) option to open the editing panel.
Next, click and drag the option you want to rearrange and then drop it to the preferred position of your choice in Quick Settings.
In this way, you can arrange all the options one by one as per your preference. Make sure you click on Edit before dragging and moving the options; otherwise, the options won’t move.
How to Open Related Settings via Quick Settings?
You can open the related settings directly via the Quick Settings panel. This can be helpful when you want to make major configuration changes and can’t do it through Quick Settings.
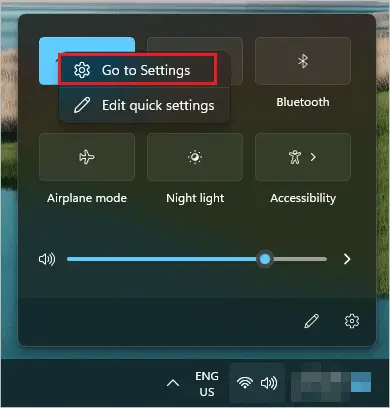
Launch the Quick Settings panel and right-click on the option you want to open related settings for.
Select “Go to Settings” from the right-click menu to open a related section in the Windows Settings app.
You can open the related settings for multiple options in a similar way. If you just wish to open the Settings app, you can click on the gear icon next to the Edit button in the Quick Settings panel.
Conclusion
Quick Settings can give you quick access to frequently used settings on your Windows 11 PC. For example, you can connect to Wi-Fi and Bluetooth devices with one click. This Windows 11 feature brings more convenience and ease. You can add, remove, and rearrange the options seen on Quick Settings as per your preferences.
Once you know how to customize Windows 11 Quick Settings, you can change it as and when required. The above guide can help you use and customize Quick Settings for a better user experience.
FAQs
Is there an Action Center in Windows 11?
The Action Center has a new name and look in Windows 11. It is known as Quick Settings and can be accessed by pressing Windows key + A.
How do I go to Settings in Windows 11?
You can press the Windows key + I hotkeys to go to Settings in Windows 11. Also, there are different ways to open the Settings app in Windows 11; you can try them all.
Where to find Quick Settings in Windows 11?
The Quick Settings panel is found in the far-right corner of your monitor screen. You can click on the volume or network icon to open it.
How to change the Quick Settings panel in Windows 11?
Click on the pen icon (Edit quick settings) to change the Quick Settings panel in Windows 11. You can add, remove, and rearrange the panel as per your preference once you are in edit mode.


