Key Takeaways
- Windows 11 offers a default sound scheme for all PCs
- The sound settings on Windows 11 let users do customizations to enhance audio
- You can configure the sound settings to create a custom sound scheme
We always believed that sound settings on Windows 11 are taken care of by the OS, and we have nothing to do with it other than adjusting the volume level. But the latest version of the OS comes with a bunch of sound features that can be exciting to experiment with. So whether you want spatial audio, mono audio, or customized system sounds, Windows 11 is all game.
Issues with the sound produced by the PC often compel you to change the audio settings to make it more customized. You can change the default sound scheme that comes with the OS by opening the Windows 11 sound settings. The Settings window is also helpful for changing Windows 11 power settings.
How To Manage Sound Settings On Windows 11
Once you open the sound settings on Windows 11, you will find an array of options to customize. These settings improve the sound quality and make it more pleasant to your ears. Find out more in the sections below.
Change Default Audio Output for the System
The sound settings on Windows 11 allow selecting a particular audio output device as the default one. Look at the four ways you can select a default output device.
Using Windows Settings
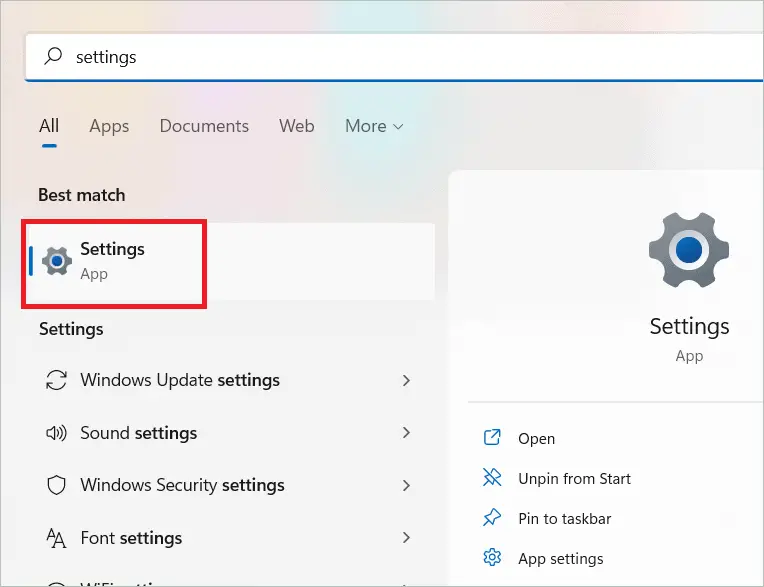
Type “Settings” in the search bar and open the Windows Settings app.
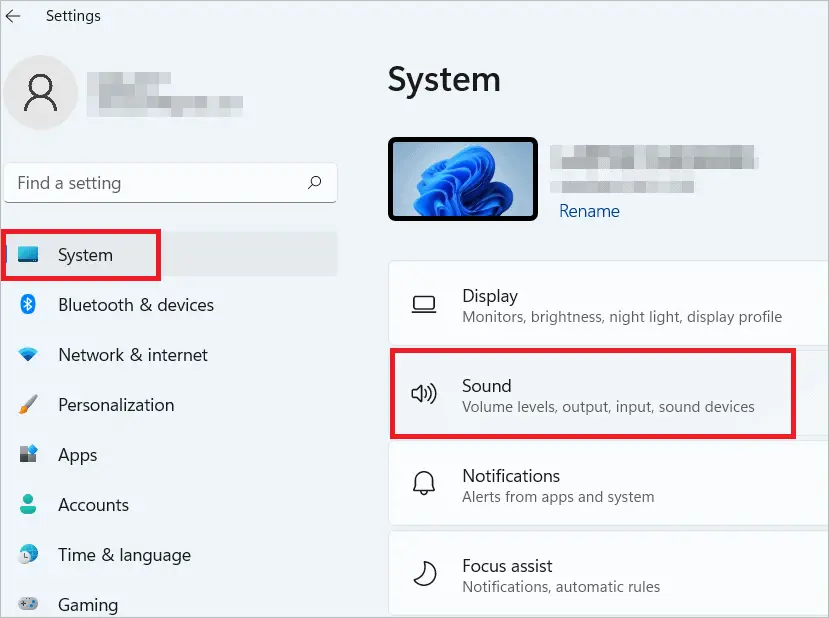
Next, select “System” in the left menu and “Sound” on the right to open the sound window.
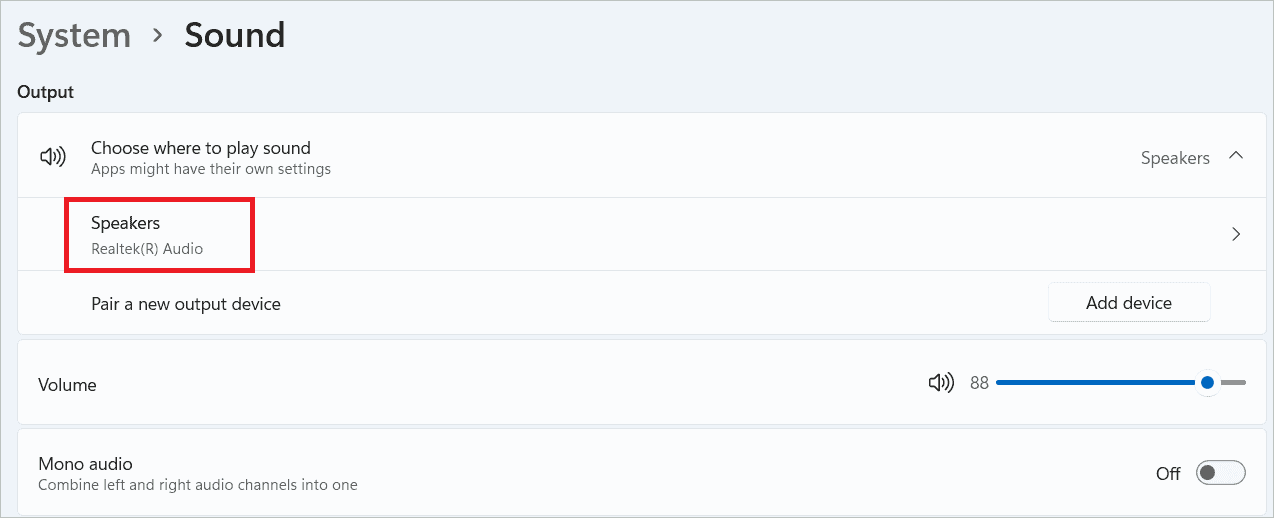
Click “Choose where to play sound” under the output section.

Here, you will find the devices you have added. Select the speaker, headset, or headphone, whatever you want to be the default sound device.
Using Quick Settings Panel
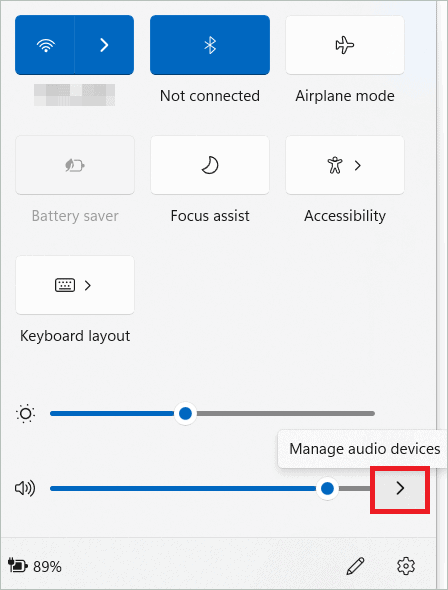
Click on the Wi-Fi, battery, or speaker icon to open the panel where you will find an arrow beside the volume slider. Click it to open the Manage audio devices window.
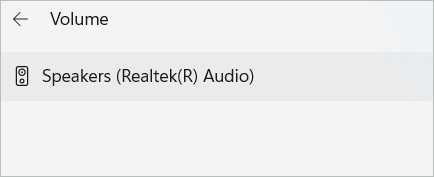
Your output sound devices will be listed here, from which you can select the desired one.
Using Xbox Game Bar
Using the built-in customizable game overlay provided by Windows 11, Xbox Game Bar, you can open audio controls, game capture tools, and more. Here are the steps to change your default audio device using Xbox Game Bar.
Press the Win and G key combination to open the Xbox Game Bar overlay.
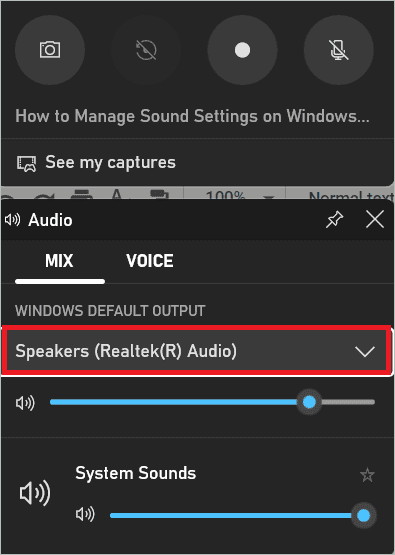
Select the Mix tab in the Audio window.
From the dropdown menu under Windows Default Output, select your output device.
To exit the overlay, press Esc.
The device you selected will be the default output audio device.
Using SoundSwitch
The third-party volume control app, SoundSwitch, assists in switching between the output devices. You don’t have to open the sound settings on Windows 11, as the app lets you create custom volume control hotkeys that can instantly switch between devices.
Open the SoundSwitch page and download the installer. Complete the installation and start working with the app.
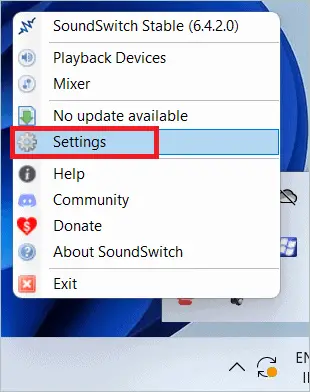
Click the up arrow in the taskbar and right-click on the headphone icon. Next, select “Settings” from the context menu.
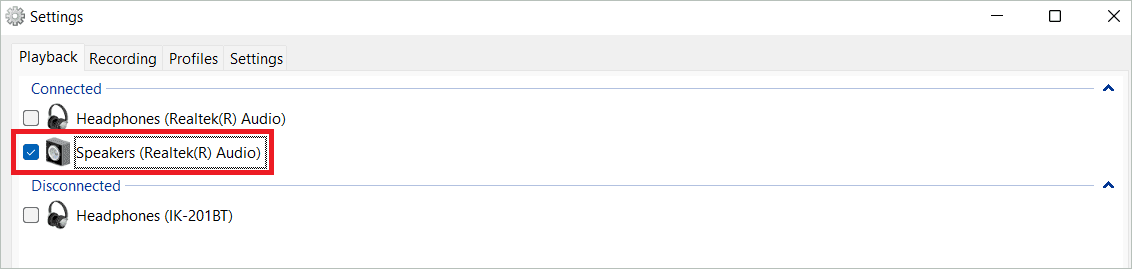
Select the default playback device in the Playback tab.
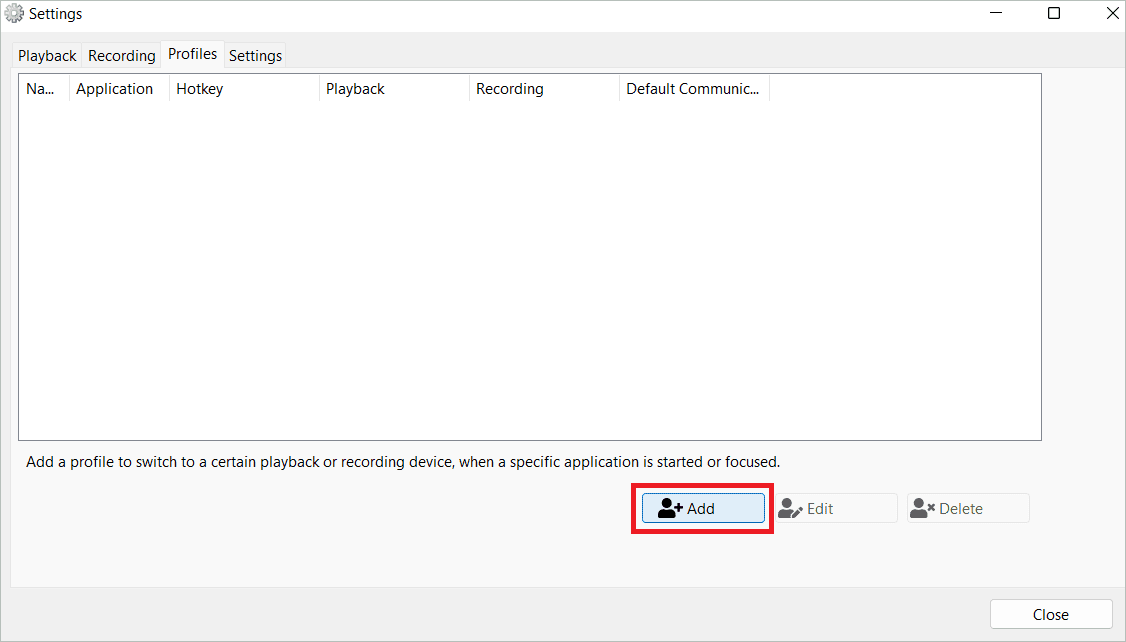
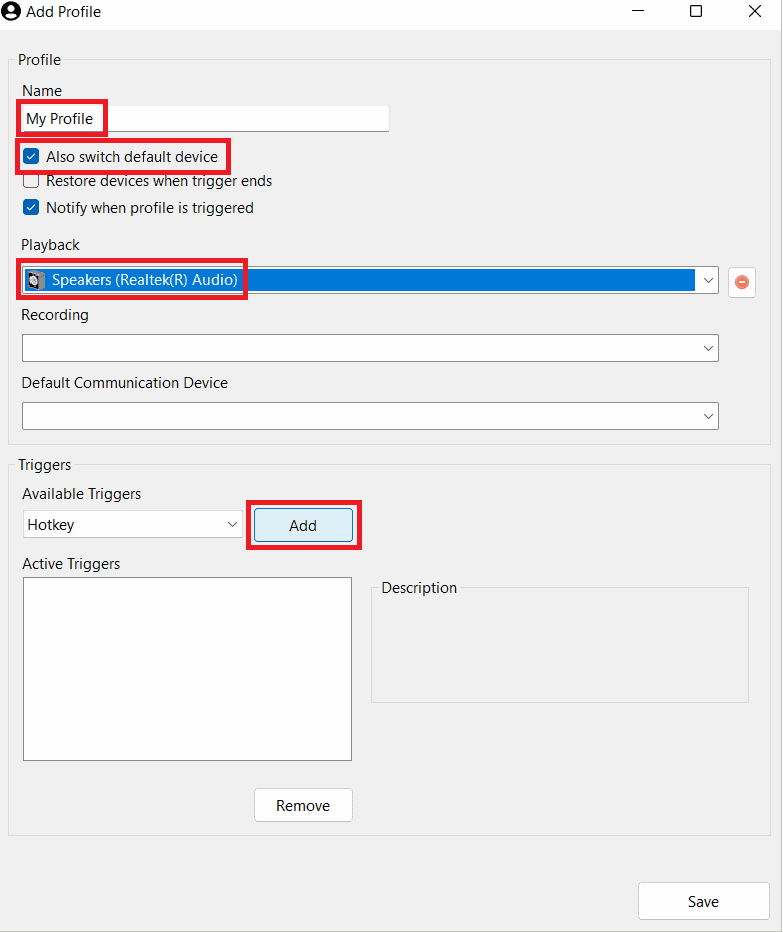
Open the Profiles tab and click the “Add” button. This step lets you create a new profile for the output device.
In the next window, give a profile name and check “Also switch default device.” Then, choose your device in the Playback drop-down box. In the Available triggers drop-down box, select Hotkey and click “Add.”
Click on the textbox for hotkey and press the key combinations you want to set as hotkey. Next, click “Save.” Your profile is now added successfully.
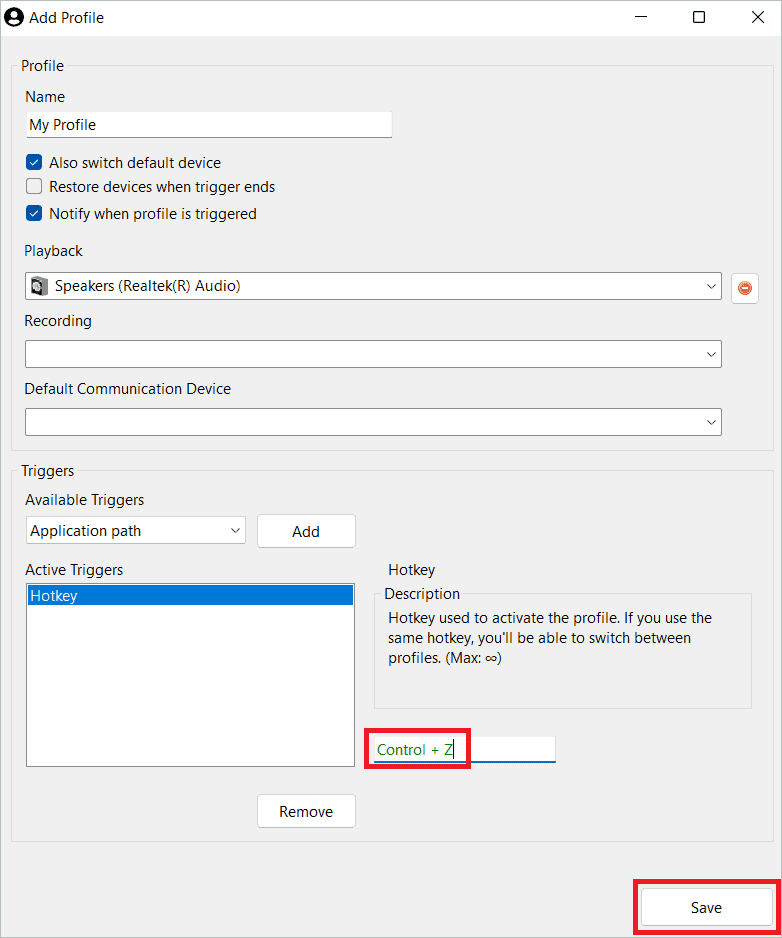
You can add keyboard shortcuts for other devices using the same steps.
Choose Default Output for Each Application
It is possible to change each application’s sound settings on Windows 11 using the Settings window. Here is how.
Open Windows Settings and go to System > Sound to open the audio settings window.
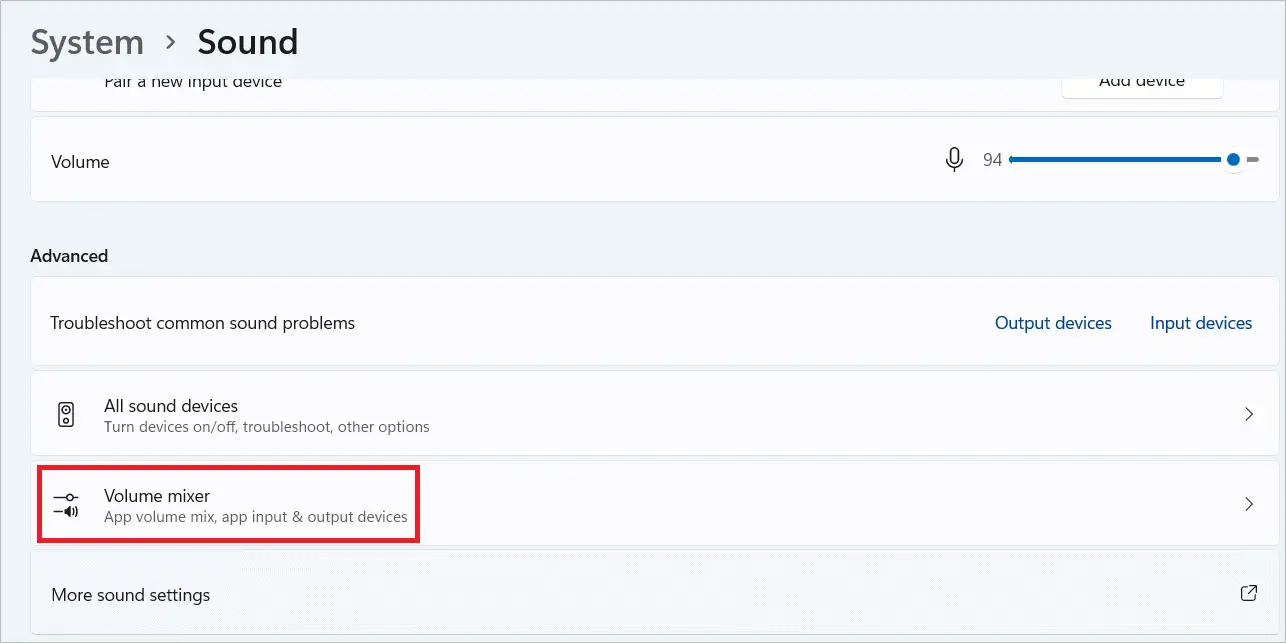
Scroll down and click “Volume mixer” under the Advanced section.
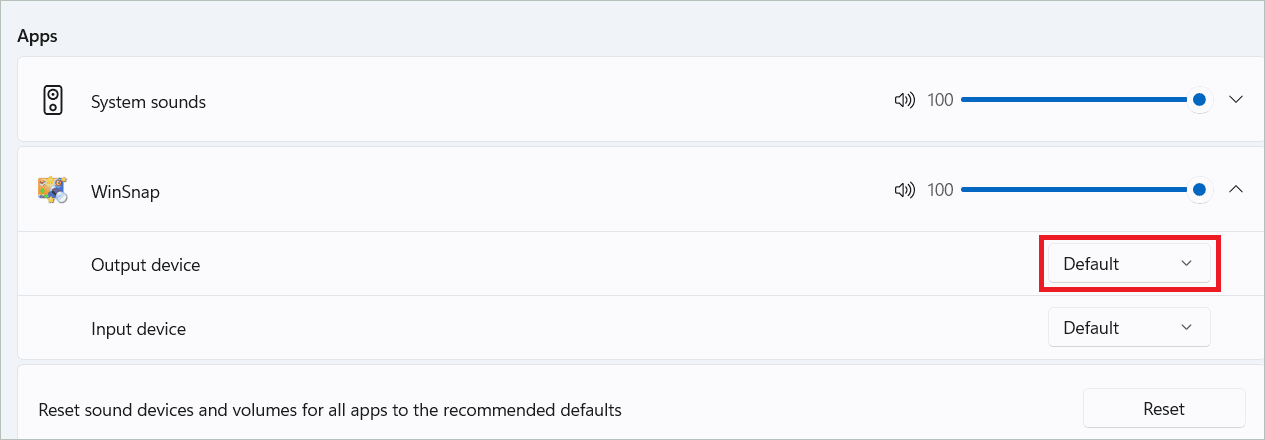
The applications will be listed under the Apps section. Select the desired app and select an output device from the drop-down menu.
Now, the app will output sound on the selected sound output device.
Enable Spatial Sound in Windows 11
Usually, when sound is played from your computer, it feels like coming out of your chosen device. But when you enable spatial sound settings on Windows 11, the sound appears to come from around the room. This makes way for a better audio experience as if you are right in the middle of the scene from which the sound is coming. Follow the correct steps given below to enable spatial sound.
Open Settings and go to System > Sound.
Select “Speakers” under the output section.
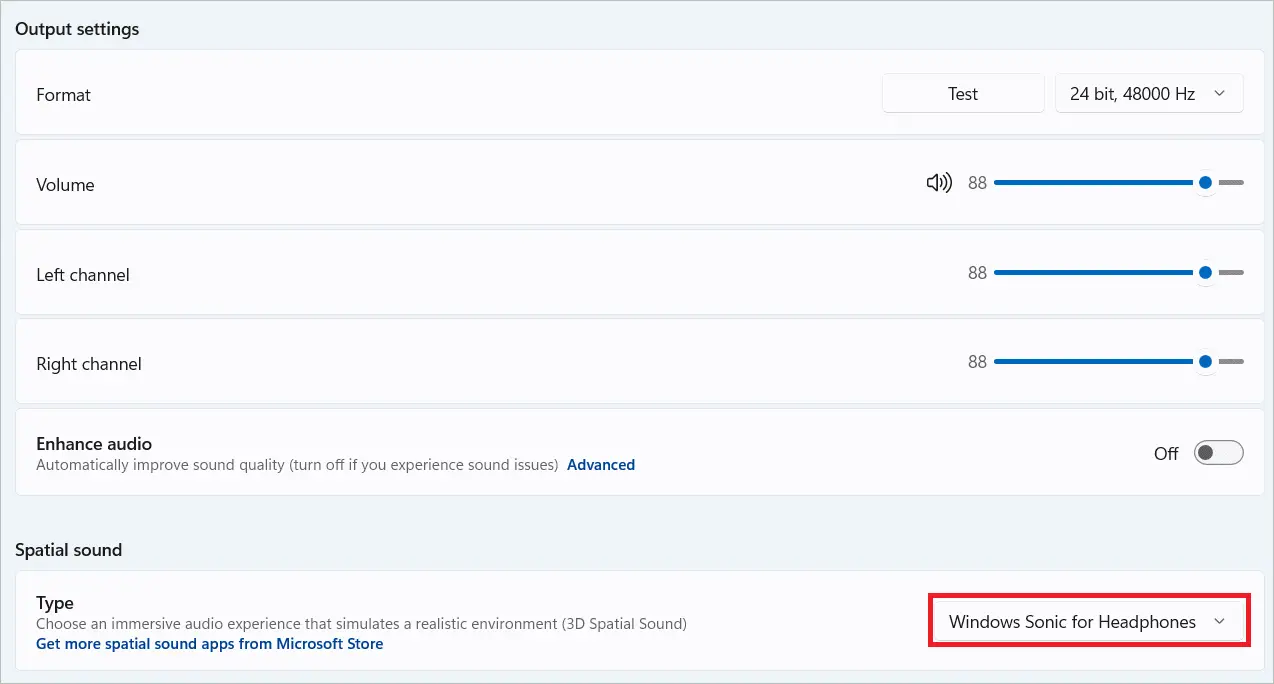
Scroll down and look for the Spatial sound section. Then, select the Type “Windows Sonic for Headphones” from the drop-down menu.
Enjoy the immersive sound experience from now on!
Enable Enhanced Audio
If you are an audiophile, you will not miss any chance to do audio enhancements. Sound settings on Windows 11 have an enhance audio feature with a toggle button to give you better sound quality. See the steps below. Additionally, you can download audio equalizers for the best equalizer settings in Windows 11.
Go to Settings > System > Sound.
Select “Speakers” under the output section.
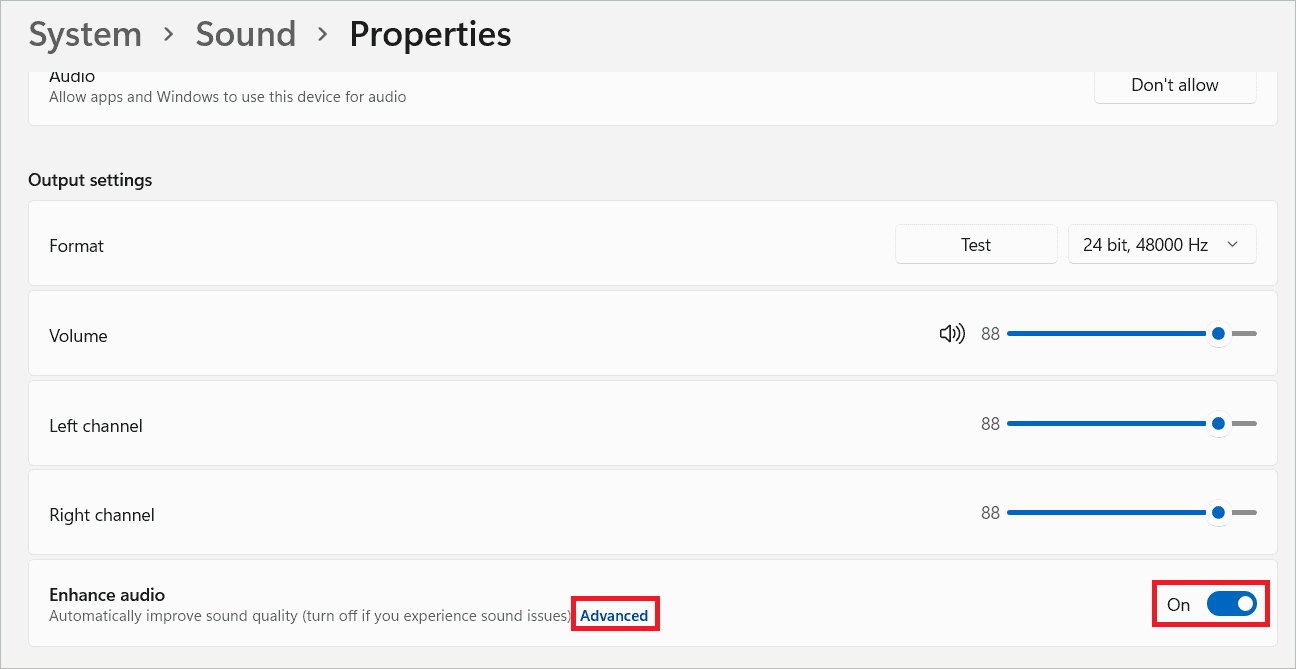
Slide the Enhance audio toggle switch in the Output settings section to On and click the Advanced option.
Caption:
In the Advanced window, some machines will have an Enhancements tab to select additional features like Bass, Virtual Surround, Room Correction, and Loudness Equalization. If these options are available for you, select the ones you want, click “Apply” and then “OK.”
Note: If you want to disable enhanced audio, toggle the switch to Off.
Disable Output Device
Using sound settings on Windows 11, you can decide whether or not you want the system and the applications to access an output device. For this, it is not required to disable the driver; you just have to give the right instructions to the OS. Let us see the steps.
Go to Settings > System > Sound.
Select “Speakers” under the output section.
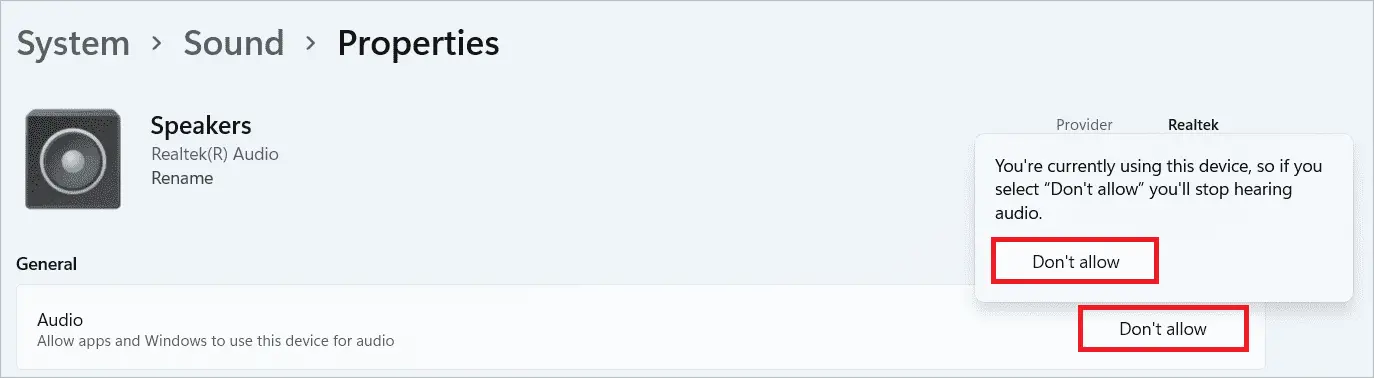
Under the General section, you will see Audio. Click the “Don’t allow” button to prevent the system from using the out device for audio. Click “Don’t allow” again to confirm.
Now, you will not hear any sound played on that device.
Note: Click the “Allow” button to enable the output device.
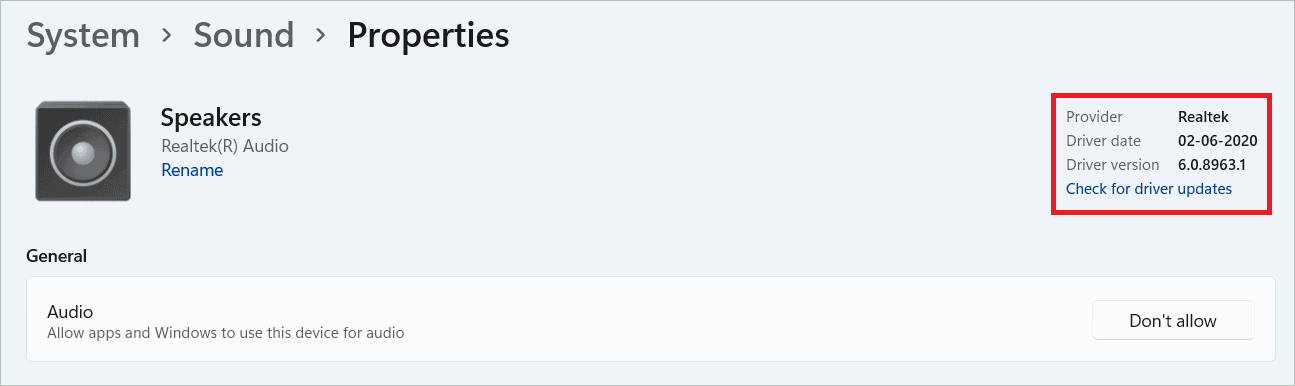
Check Sound Driver Version
The audio driver or sound card driver in windows 11 is the computer hardware that makes the working of audio devices smooth. Without these drivers, you cannot hear any sound from your computer. If you want to check what version of the audio driver is installed on your PC, go to the sound settings on Windows 11, as explained below.
Go to Settings > System > Sound.
Select “Speakers” under the output section.
You can view details like Provider, Driver date, and Audio Driver version on the top-right corner of the window. Also, check for updates by clicking “Check for driver updates.”
Note: There are four methods to update audio drivers: update Windows 11, go to the Device Manager to do the update, download a driver update software, and download the driver from the sound device manufacturer’s website.
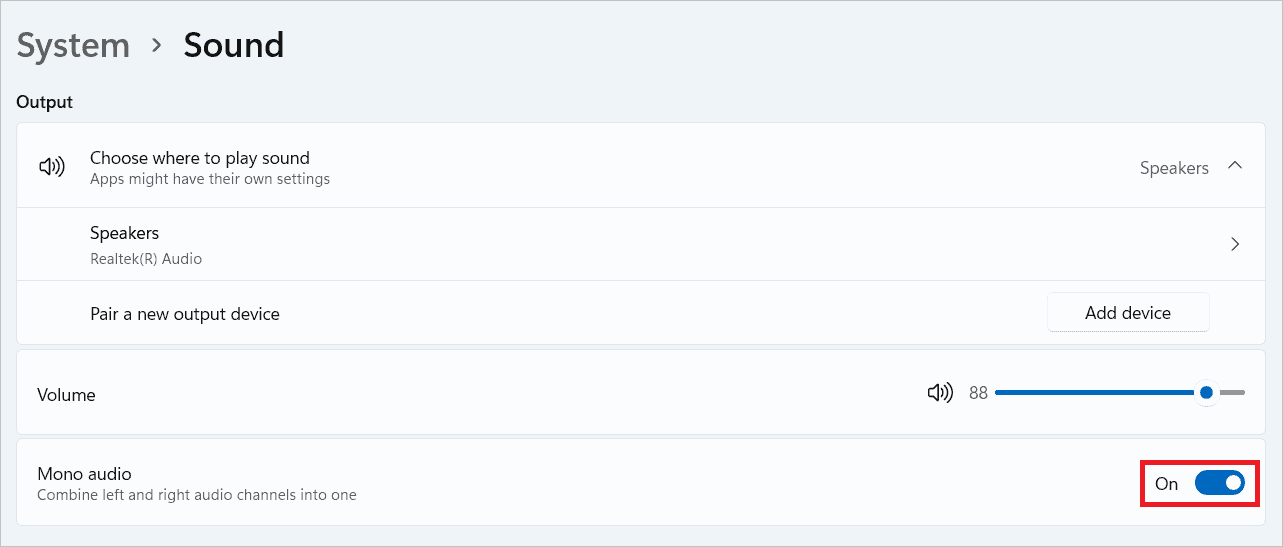
Enable/Disable Mono Audio
The sound settings on Windows 11 feature a toggle button to enable mono audio. Mono audio lets you clearly hear every detail of the sound as the stereo sound is converted into a single channel. This feature is beneficial in scenarios where you are using only one headphone.
Go to Settings > System > Sound.
Under the Output section, you will see Mono audio. Slide the toggle button beside it to On/Off, depending on your requirements.
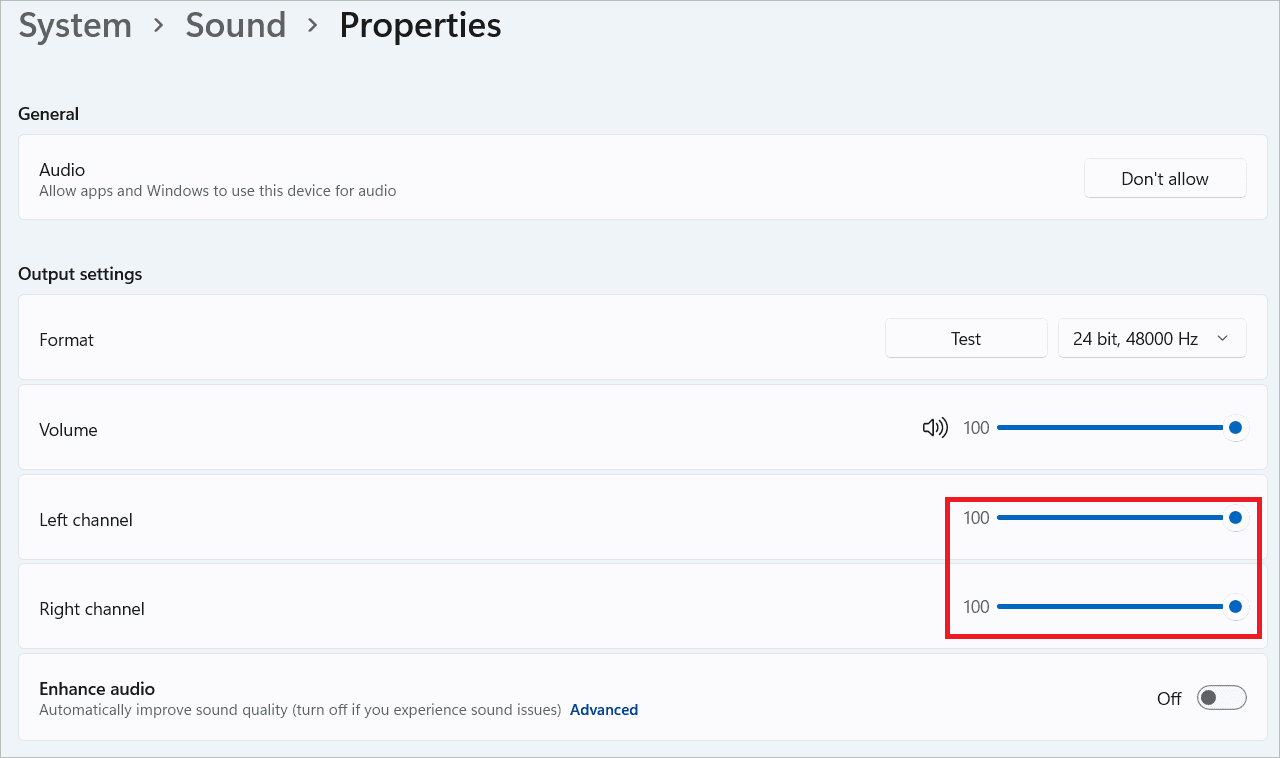
If you have disabled Mono audio, you can do channel volume balancing by changing the volume levels of the left and right audio channels.
Go to Settings > System > Sound.
Select “Speakers” under the output section.
Under the Output settings section, move the volume slider near the left and right channels.
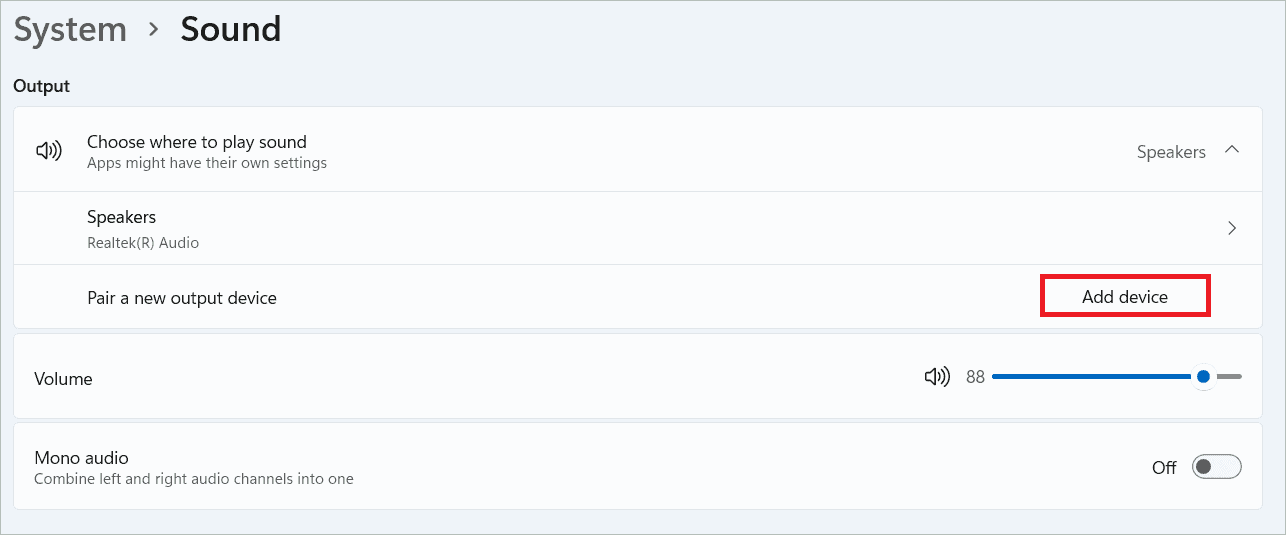
Pair a New Output Device
You can pair a new output device like headphones or speakers to your device to select one other than the default audio device. Here are the steps.
Go to Settings > System > Sound.
Under the Output section, click the Add device button beside Pair a new output device.
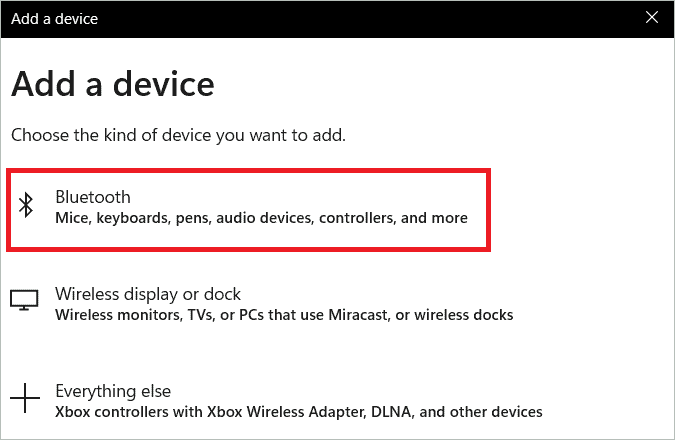
In the next window, select “Bluetooth.”
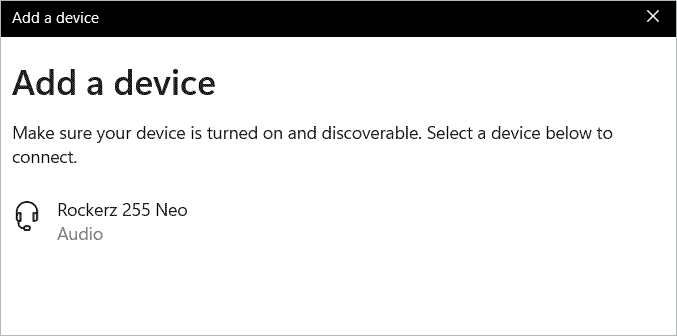
Select the output device you want to pair and follow the on-screen instructions.
Adjust System Volume
You might know how to adjust system volume using the keyboard volume control. Here we will see how to change the volume settings using the quick settings panel and sound settings on Windows 11.
Using the Quick Settings Panel
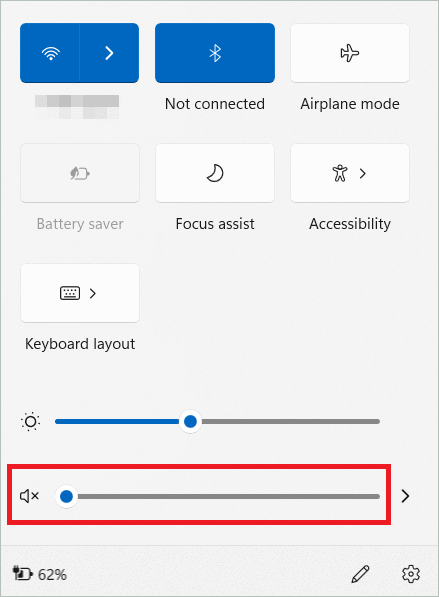
Open Quick Settings by clicking the Wi-Fi, battery, or volume icon in the lower-right corner. Next, move the volume slider right or left to increase and decrease the volume, respectively.
Using Sound Settings
Go to Settings > System > Sound.
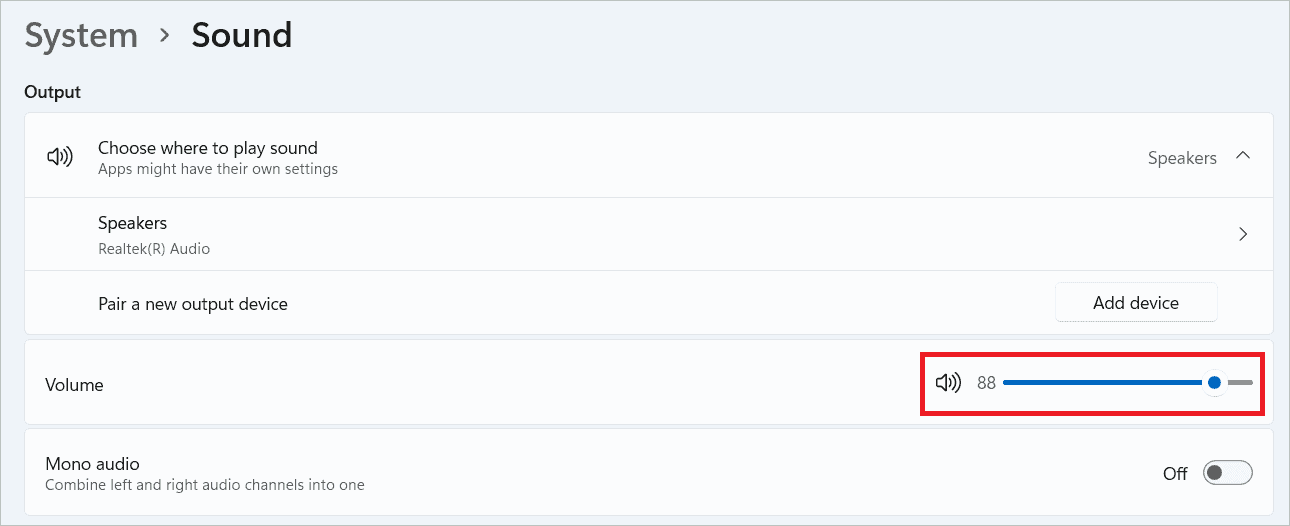
Move the volume slider under the Output section to configure volume levels.
Select “Volume mixer” under the Advanced section.
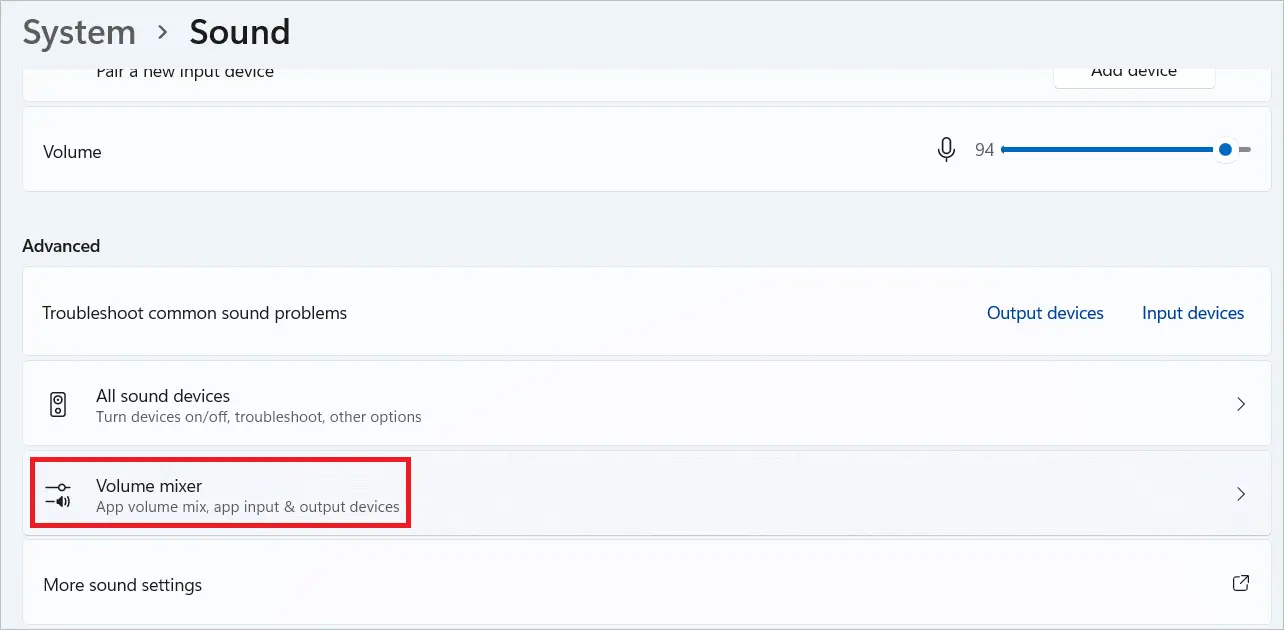
Caption: Select Volume mixer
Under the Apps section, move the volume slider near System sounds to control the system’s volume. You can also manage the volume of each app by moving the slider near the app.

Note: If you want to change the input and output devices for each app, click on the app and select the devices from the drop-down menus.
How To Change Sounds
Windows 11 comes with a set of soothing notification sounds that are assigned to program events like menu pop-up or open program. For the light and dark modes, the sounds are different. Using the sound settings on Windows 11, you can change the sounds configured for different events in Windows. Let us see how.
Go to Settings > System > Sound.
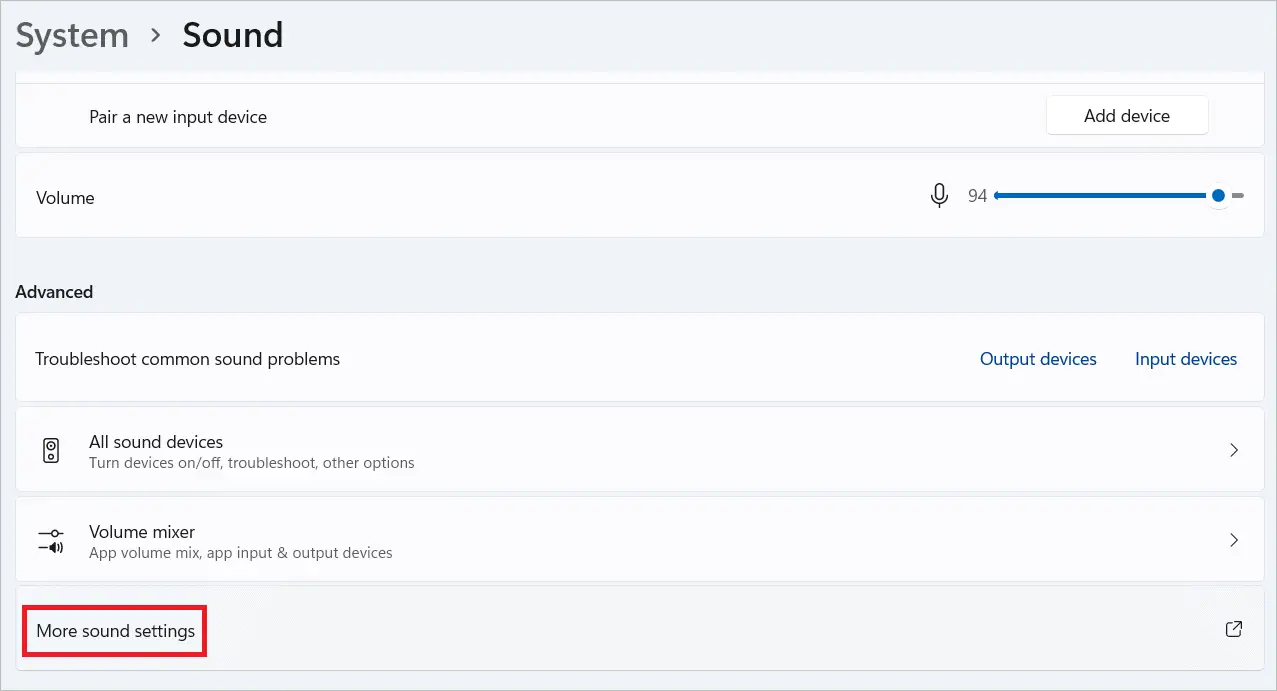
Scroll down and click “More sound settings” under the Advanced section.
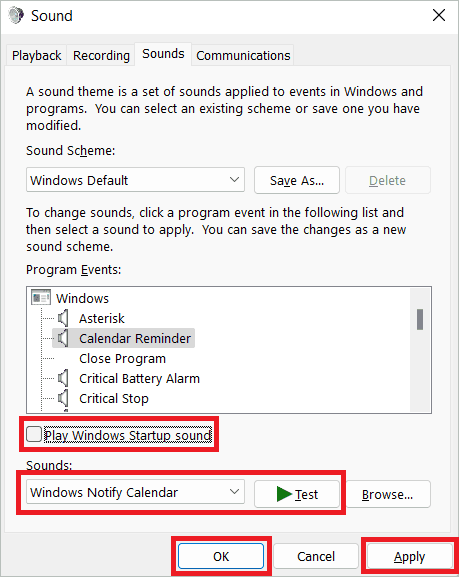
In the window that appears, select the Sounds tab. You will see many program events like Asterisk, Calendar Reminder, and many more. We selected Calendar Reminder, and the sound assigned to it is Windows Notify Calendar. You can change the sound by clicking the menu arrow near the name of the sound.
Click “Test” to hear the sound. If you don’t want to assign any sound to an event, select None from the drop-down list. And if you don’t want to hear the startup sound every time the system boots, uncheck “Play Windows Startup sound.”
After all the settings are configured, click “Apply” and then “OK.”
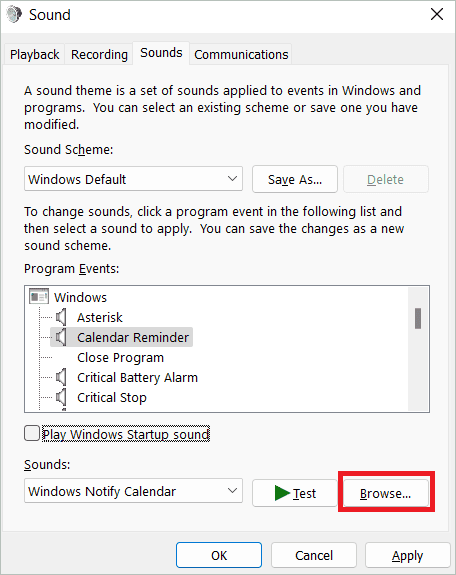
Note: You can also set a new sound other than the ones provided by Windows. The only condition is that the sound file must be in WAV format. For this, click the “Browse” button to open the file explorer and select a WAV file.
How To Troubleshoot Sound Issues
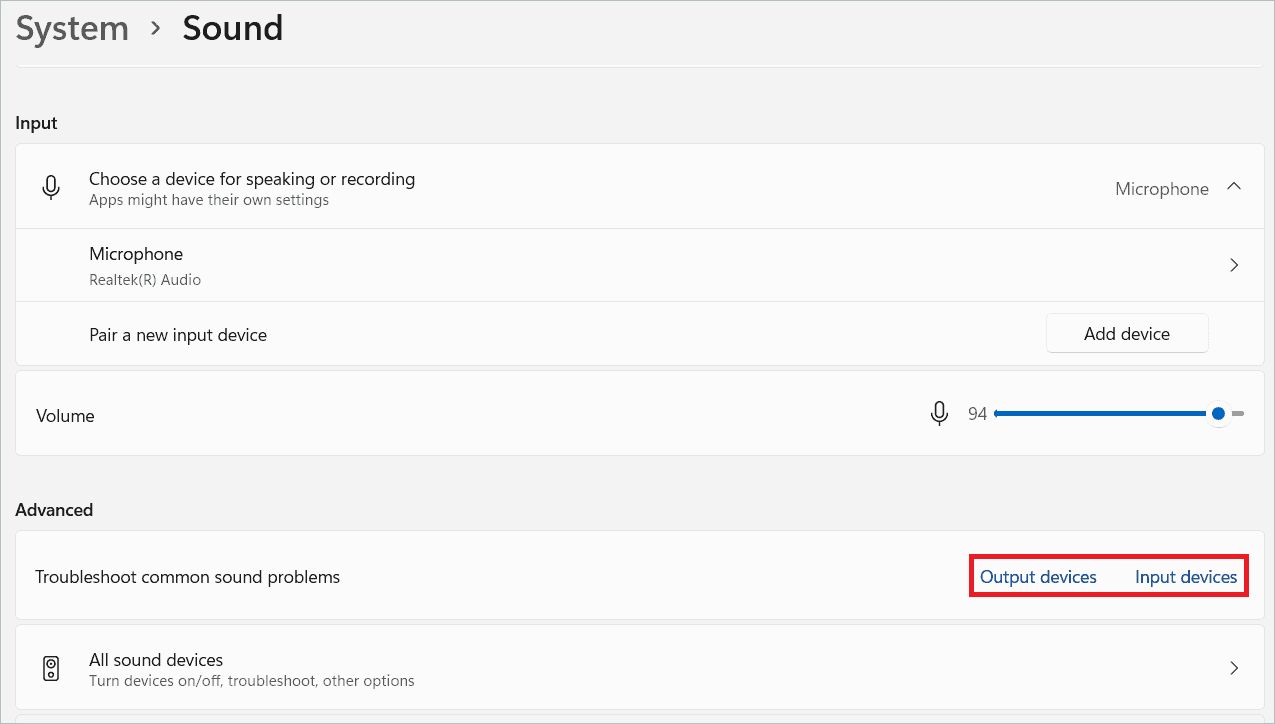
When working on a PC, you will often face some audio issues. Luckily, a built-in audio troubleshooter can be accessed via the sound settings on Windows 11. The steps to access the same is given below.
Go to Settings > System > Sound.
Under the Advanced section, you will see Troubleshoot common sound problems option. Then, click the Output devices or Input devices button to find problems regarding the output devices and input devices, respectively.
Next, follow the on-screen directions, and you will get the solution to your audio issues.
Final Thoughts On Sound Settings On Windows 11
While previously, sound from a TV or computer was just for understanding what was being told or sung. But now, sound enthusiasts have coined the term sound experience, which reflects how important audio has become to a movie or gameplay.
Access sound settings on Windows 11 and make all the changes you want to enhance your PC’s audio playback. Many options in the settings window let you configure a custom sound scheme. Once the changes are made, you are in for the best sound you have ever heard.


