As we all know, Google Sheets can be used for various purposes when it comes to storing, analyzing, and processing large chunks of data. The complete information is stored in rows and columns. If you are using Google Sheets, split text to columns is one of the most vital features you need to be aware of.
Users have several options for formatting the data in Google Sheets. Users can also transpose data in Google sheets. Google sheets transpose is nothing but changing the orientation of a sheet where the rows and columns are switched. In all, there is no shortage of features for formatting available at your disposal.
What Is The Importance Of Split Columns In Google Sheets Feature?
Users who work with small datasheets might hardly have to use this feature. The split columns feature is mostly used in extensive datasheets for separating the terms listed in one column. For example, if you have a list of names in a document, you can split them by separating the first and last names and storing them in two different columns.
The same technique can also be used if you are handling an extensive mailing list, and you want to extract the first names of all the recipients in a sheet. If you have content of software like Tally in a comma-delimited format, you can use the split cells in Google Sheets feature to separate terms as per your requirements.
Use The Google Sheets Split Text To Columns Feature For Better Data Organization
You can also turn to the splitting feature to manage and organize your data in a neat manner. Having proper data arrangement always ensures seamless navigation and an excellent user experience while using the datasheet. Also, a neatly organized datasheet means you will be less prone to making mistakes while crunching numbers.
The Google Sheets split text to columns feature ensures that users can easily comprehend and work around the data. On that note, let’s have a glance at how to use this feature for various purposes.
Use The Google Sheets Split Text To Columns Feature For Separating Names
If you have a list of students or employees and want to extract their first and last names, the data ‘split text to column’ feature will be beneficial. You can separate the last name from the first name and store it in a separate column.
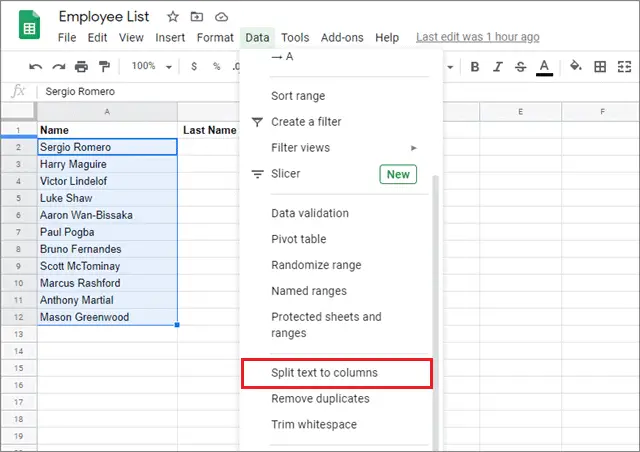
To begin with, select the data in which you want to split. Here, we have chosen a bunch of full names to separate their first and last names. Navigate to the Data menu and select Split text to columns from the dropdown list.
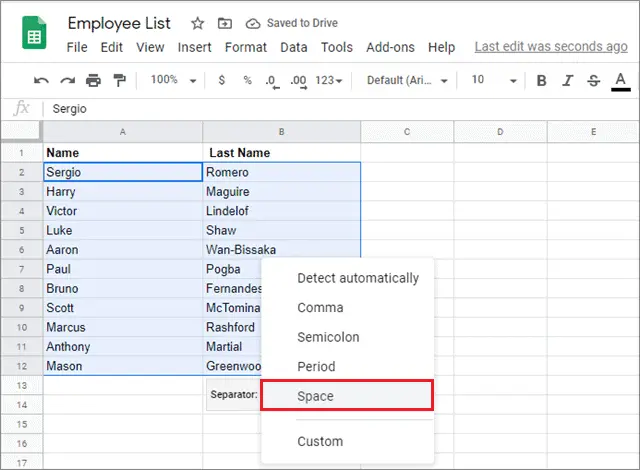
You will now see a separator dialog box where you have to confirm the marker that separates your data. In our list, the first and the last names are separated by a space. Hence, we will select space as our separator in the dropdown list.
Once you do this, the data will immediately get separated according to your commands.
That’s how easy it is to split text to columns in Google Sheets. In this method, it’s all about selecting the correct separator to extract the data you want.
How To Split Domain Name And URL
Suppose you have a large datasheet of your website containing links to several pages and posts. Some of these URLs only have the main domain, while others are links related to posts and other pages.
The process of using the Google Sheets split text to columns feature is similar to what we saw in the first method. The difference lies only in choosing the correct separator in this case.
Once you have navigated to the Data tab and selected Split text to columns, you will notice that the forward slash is not available in the list of separators. Hence, choose the Custom option and enter the symbol. The forward slash will act as the separator in this case.
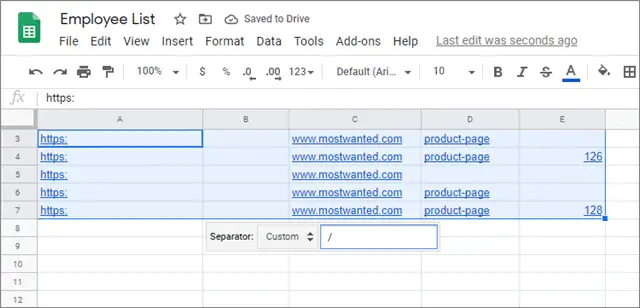
You will see that the extracted content will be displayed in column C and not column B. That is because there are two forward slashes present after the HTTPS in any URL. In this case, each forward slash is considered a separator, and hence, the second column is skipped while storing the extracted data.
If you have one domain with HTTP and one without it, you will still get the domain names in different columns.
How To Split Cells In Google Sheets For Email Lists
Suppose you are entrusted with the task of separating the usernames from their email domain names. You can use the same method mentioned above to separate the two entities.
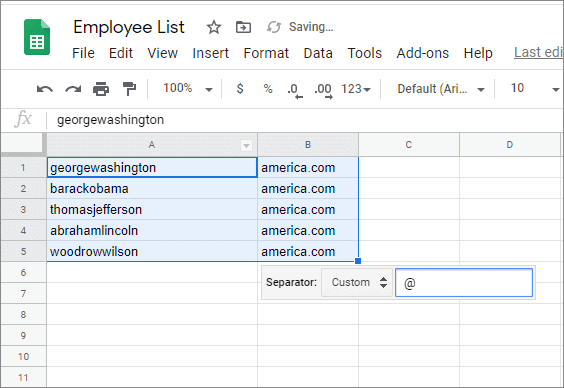
Now, an important point to note here is that the separator of the username and the email domain will be the ‘@’ symbol. However, this symbol is not available in the separator dropdown list. So, select the Custom option and add this symbol as the separator.
After executing this step, you will see that the usernames and the email domains have been separated.
This method will overwrite the original dataset. Hence, make sure you have a copy of the same if you need it for future reference.
How To Use The Split Function
There are various methods to use the Google Sheets split text to columns feature. If you wish to use a different way than the one mentioned above, you can go for the SPLIT function.
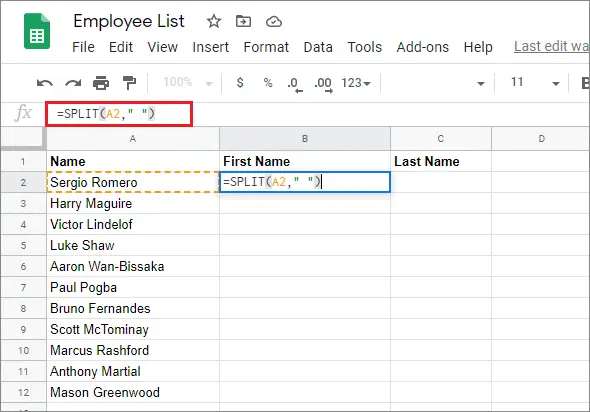
Let’s take the example of the first method. Suppose you want to separate first name and the last name, you can use the SPLIT formula given below:
=SPLIT(A2, ” “)
In this formula, the first argument is the text that has to be separated. It is the cell number in which the content to be separated is stored.
The second argument is the character used for separation of terms, also known as the delimiter. In this case, the delimiter is the space that separates the first and the last names, respectively.
All you have to do is select the text you want to split, and use the formula in the adjacent cell.
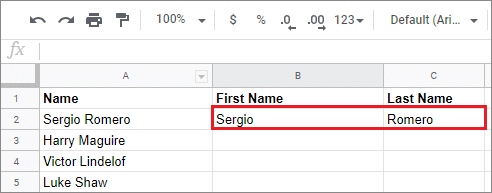
Once you press Enter, the text will be split, as seen in the image below.
If you are working on bulk data where you have to apply the Google Sheets SPLIT function, you can use the fill down function to apply the formula to all the other required cells.
Use The Array Formula Along With The SPLIT Function
If you are unaware or don’t want to learn the fill down method in Google Sheets, you can use the array formula to split text to columns in Google Sheets. However, beware that you must know the formula accurately to use this function.
First, open the Google Sheets document in which you want to split the text into columns. Then, go to the formula bar and enter the given formula:
=ArrayFormula(split(A2:A12, “ “))
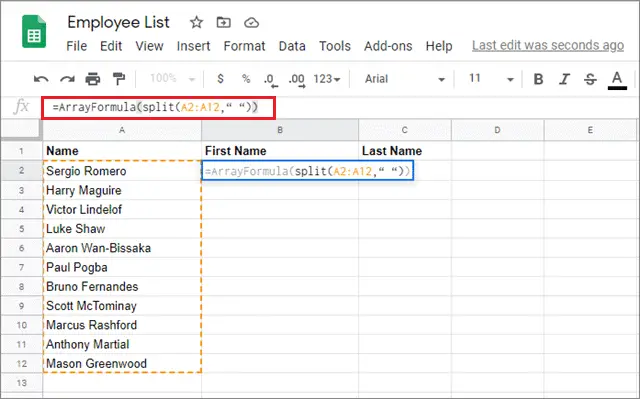
A2:A12 is the range of the data that must be entered as per the user’s requirements. Once you use this formula, the text will be split accordingly.
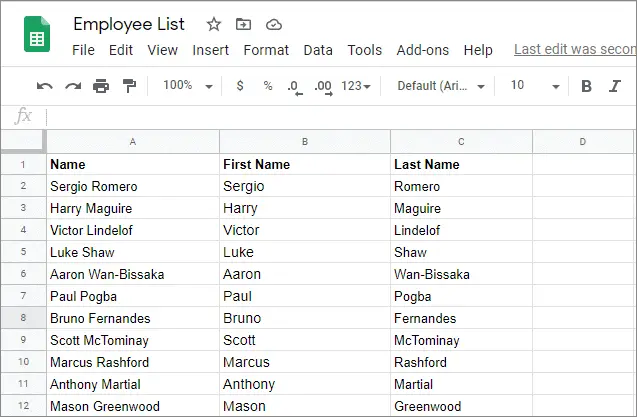
All you have to do is use the SPLIT function in the array formula to edit multiple columns in one go.
How To Split Text To Rows
We have studied how to split text to columns in Google Sheets, but what if you have to split the same data into rows instead of columns? Well, there’s a nice little trick you can apply in this case.
First and foremost, select and convert text into columns using any of the methods mentioned above.
Then, use the Google Sheets transpose function given below:
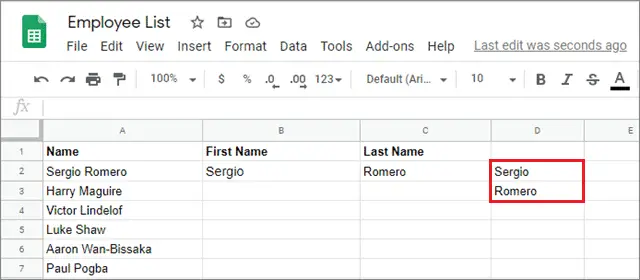
=transpose(split(A2,” “))
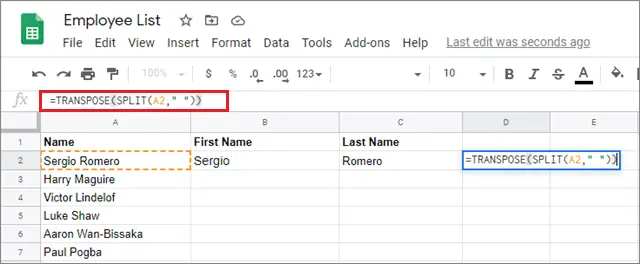
You will see that the data has been successfully split into rows in the Google Sheets document.
That’s all about how to use the Google Sheets split text to columns and rows feature in Google Sheets.
Conclusion
If you use Google Sheets for data storage and analysis frequently, you might want to know how to use the Google Sheets split text to columns feature. Using this feature helps users maintain and organize data in a neat manner, leading to easy navigation throughout the spreadsheet and enabling an excellent user experience.
We have listed the ways to split the data into columns as well as rows in Google Sheets. Also, we have shown how this function can be used for various purposes. We hope that the methods in this article will help you solve your queries and enable you to work on your datasheets seamlessly.
(Updated on 7th January 2021)


