The USB drive or memory card is the most common removable storage device used by many people around the globe. It is used to store important files or data backup. But what if you want to organize the space? Creating a partition can be a solution here. Whenever you plug-in USB drive to your PC or laptop, do you think about how to partition a USB drive?
Partitioning USB drives can help you sort your data by separating essential tools or files from backup data. Partition flash drive can be done by using diskpart command or by making changes in Disk Management.
And, for the ones who are wondering what is thumb drive, it is nothing different from your USB drive. USB flash drive is also known as a thumb drive due to its small size.
How to Partition a USB Drive in Windows 10
There are also different USB partition tools available in the market to perform partitioning without getting into Disk Management. Let’s see how to partition a USB drive in Windows 10 using the three ways mentioned below.
1. How to Partition a USB Drive Using Diskpart Command
Note: You need an Admin account to partition your flash drive successfully.
If you want to access the diskpart command to partition your USB drive, use the command prompt.
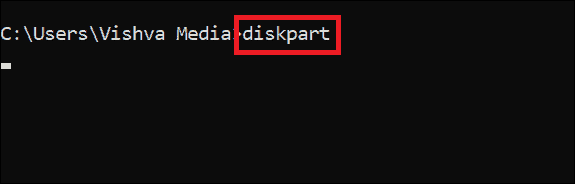
Press Windows key + R, type cmd and click on OK to open the command prompt.
Once it opens, type diskpart and press Enter.
You need to hit Enter after every command you type.
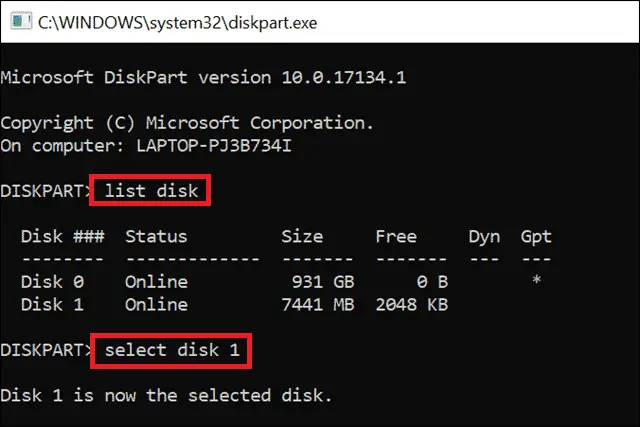
Now a new window opens, which looks similar to the command prompt, type list disk to list all the available drive on your system.
Select the flash drive to partition.
Use command select disk * (here * means the disk no, it is 1 here, but it can be different for your system) to select the disk.
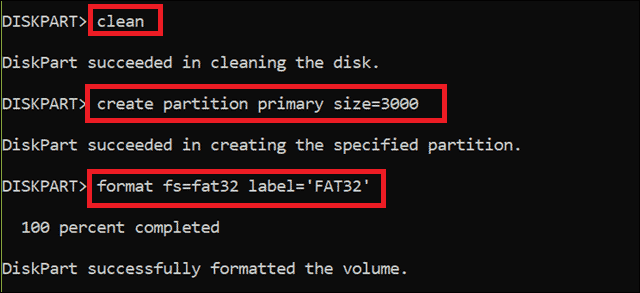
Once the disk is selected, it’s essential to clean the partitions, if present before.
You can use a clean command to carry out the task.
Now create partition by specifying the size in MB.
For example, let the size of partition be 3GB, so type the command as create partition primary size=3000. To create the file format of type FAT32, use the command format fs=fat32 label=’FAT32’.
Here, the label is optional, as it is just used to give a name to the new volume.
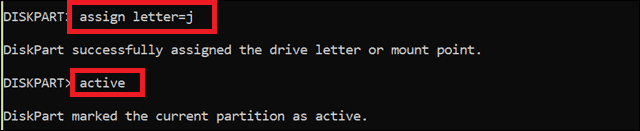
To assign a letter to the new volume created type assign letter=j
Now, use an active command to mark the current partition as active.
To create a partition of remaining space use command creates partition primary.

Follow the same procedure as above to create NTFS file type with a slight change in command, format fs=ntfs label=’ntfsfile’.
Assign the unique letter and use list vol command to see the change.
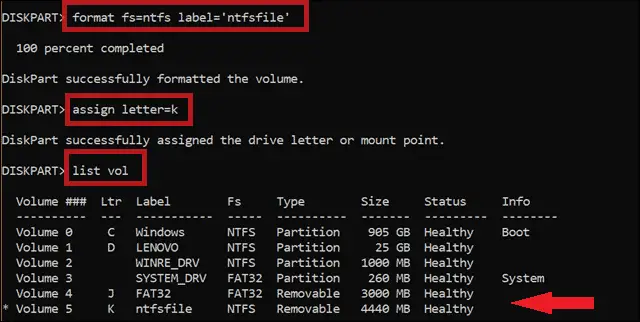
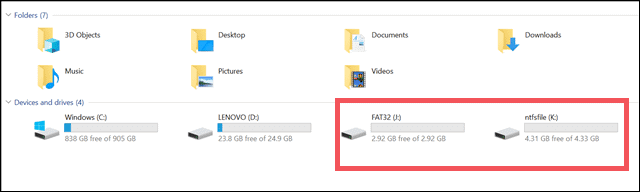
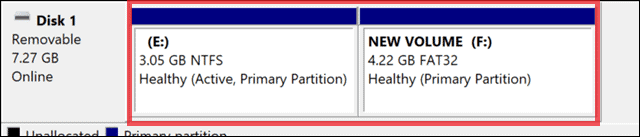
If this is not clearly explaining the partition of a USB drive, you can navigate to This PC and see disk partitioning.
Note: You can see all the partitions of USB drive in This PC only if Windows 10 has version 1703 and above. Otherwise, only the active partition is visible.
You can change the active partition using select partition and active commands in the command prompt. So, you can now see the partition of a USB drive.
2. Use Disk Management to Partition a USB drive
Partitioning of USB Drive can be done using Disk Management as well.
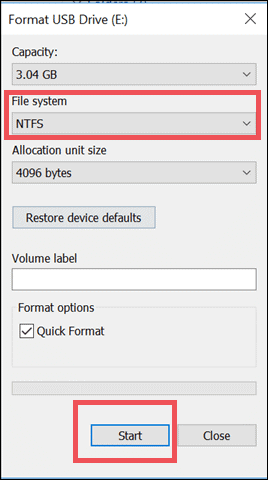
Format your USB drive into NTFS File System.
To do so, right-click on your USB drive and select Format from the context menu.
A window named Format USB Drive appears on the screen. Choose NTFS in File System and click on Start.
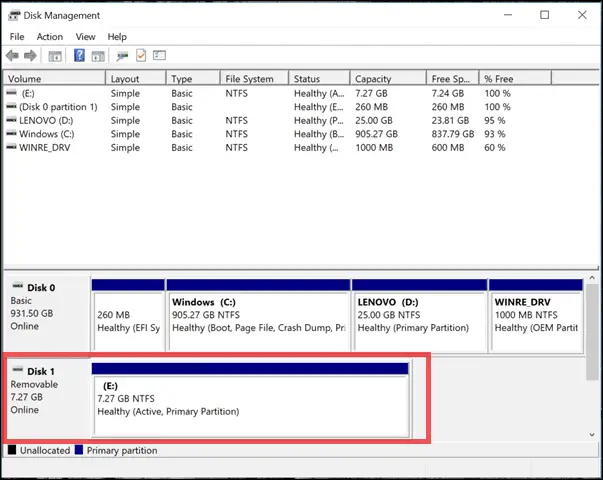
To open Disk Management, press Windows key + X and double-click on Disk Management.
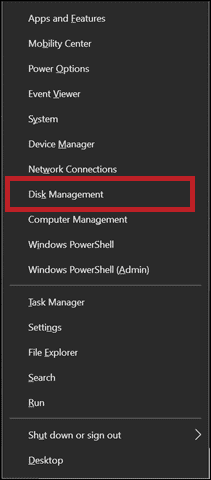
Once the Disk Management opens, the screen shown below appears on your screen.
It shows all the drives on your computer along with the detailed information.
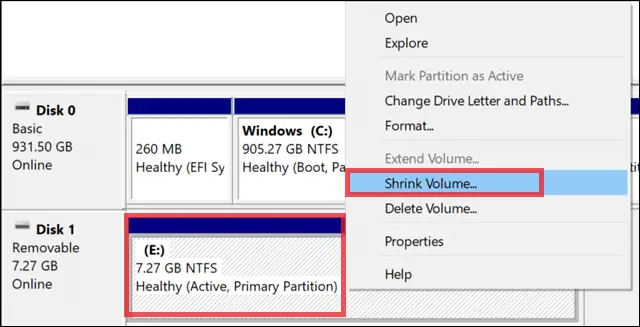
To resize USB drive, right-click on the Primary Partition in the Removable Disk and then select Shrink Volume from the context menu.
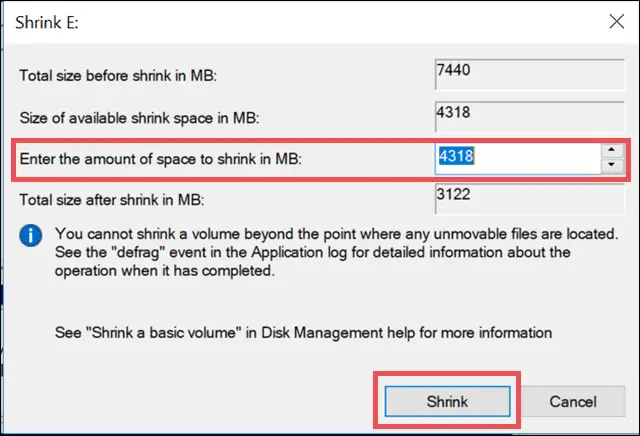
When the next window appears, you need to specify the amount of space to shrink.
For example, if you want to partition 8GB USB drive in two halves, which are 4GB each, then mention 4GB in MB.
Change the value in – Enter the amount of space to shrink in MB as per the size you want to partition.
Click on Shrink.
Now, you can see some unallocated space next to the removable disk.
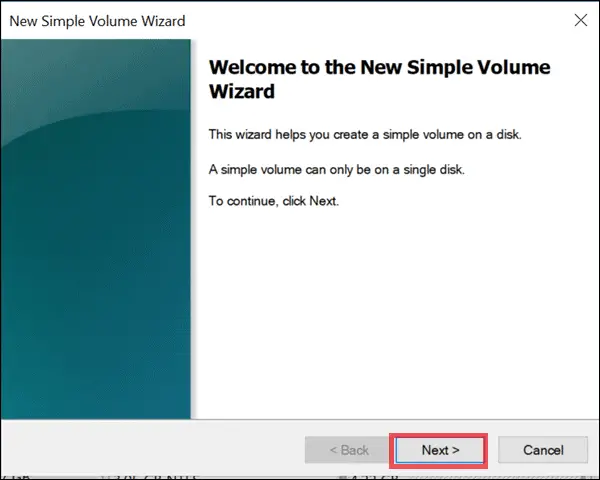
Right-click on it and select New Simple Volume.

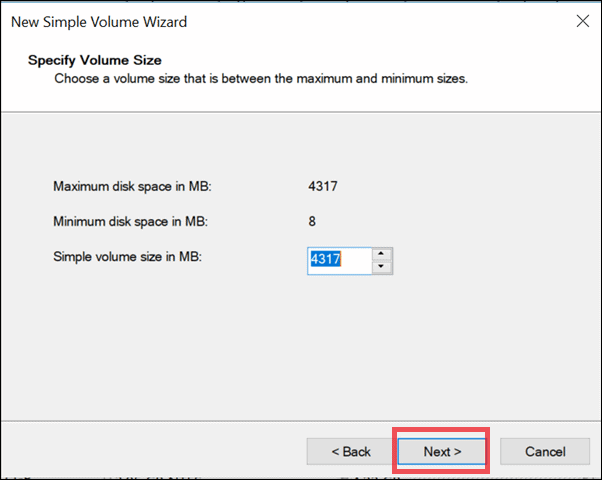
Next, you can see a wizard. Create a simple volume on the disk.
Click on Next.
Keep the default value as it is and click on Next.
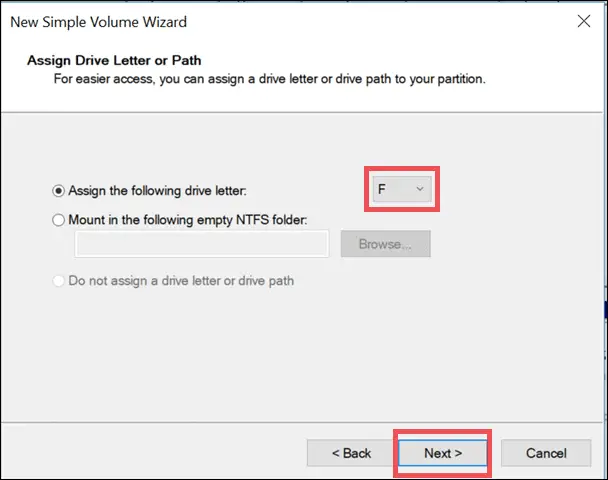
In the next window, you need to assign a letter to the new volume.
Select a unique letter. It should not be assigned to any other drive.
Click on Next.
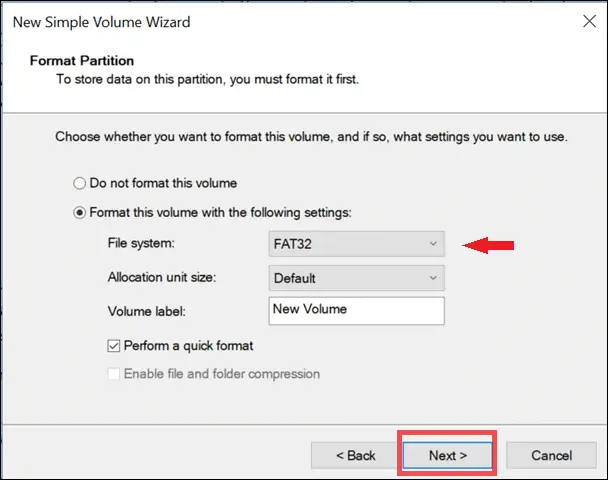
To create a new volume of the FAT32 file system, select FAT32 in the File system and then click on Next.
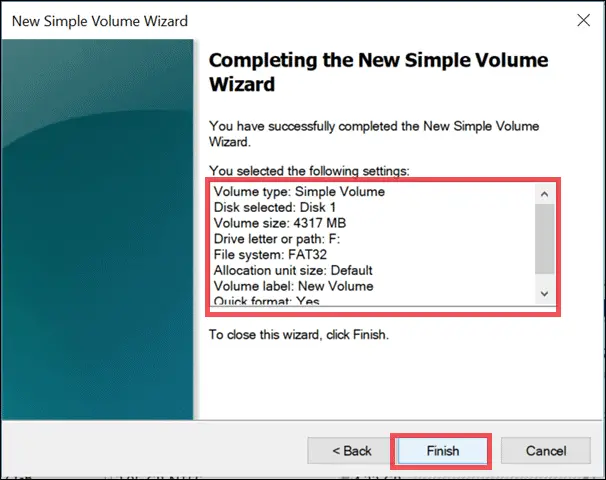
There is a list of settings you selected in the box. If you wish to change any settings, then you can click on Back.
If all the settings are appropriate, click on Finish.
Next, you can see the changes in your Disk Management.
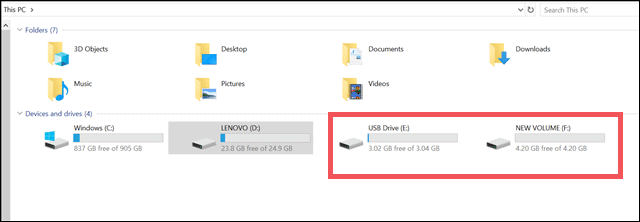
As letter F is allocated in the process, you can also see a new F drive in This PC.
Now you will see a partitioned USB drive.
3. Partition a USB drive Using a USB Partitioning Tool
Third-party tools are also used to partition a USB drive. If you are not comfortable using the command prompt or you feel partitioning USB drives using Disk Management is a lengthy process, then the USB partitioning tool can work best for you.
There are many tools available in the market, but EaseUS partitioning manager has much to offer with the simple user interface.
You can download EaseUs partitioning software from their official website or use the link below.
Download EaseUS Partition Master
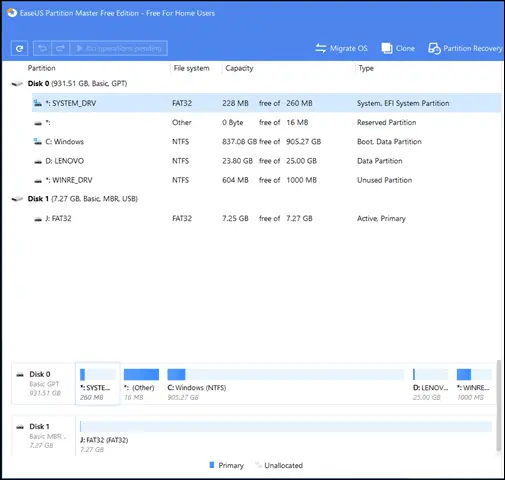
After installing the EaseUS, you need to open it. You can see all the drives, including your removable media.
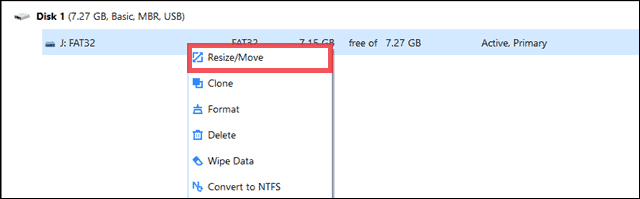
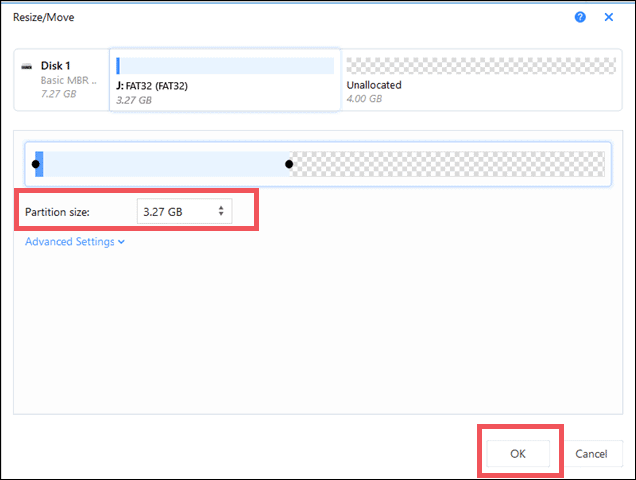
Right-click on your removable disk and select Resize/Move.
Select the Partition size you want and then click OK.
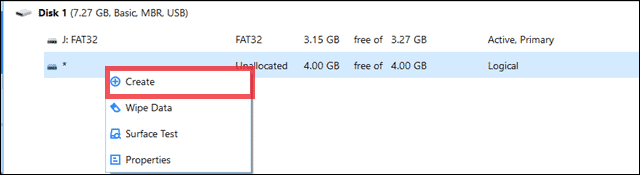
There is a new unallocated space below the USB drive. Right-click on it and select Create to create a new volume.
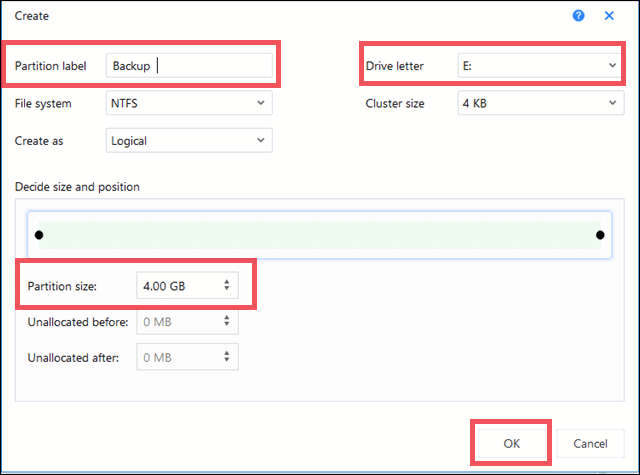
Give the Partition Label, which is the name for the new volume, also assign the unique Drive Letter.
Do not change the Partition size to divide it into two halves. You can later resize it if you wish to partition the new volume.
Click on OK.
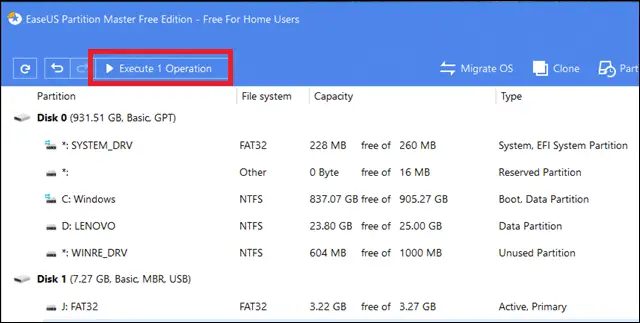
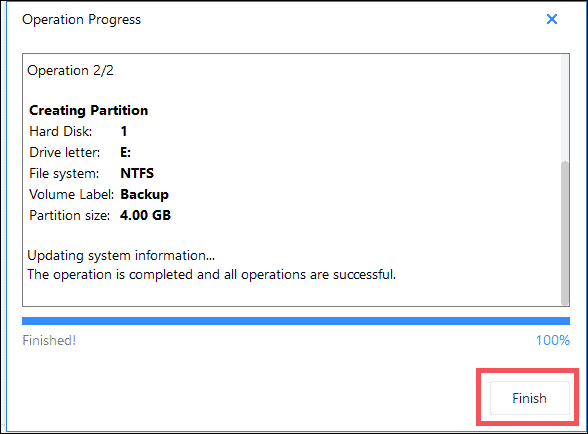
After this, click on Execute Operation to finish the partitioning process. It shows the pending number of operations to execute.
Click on Finish to close the Operation windows.
Note: You should click on Finish only after the operations complete.
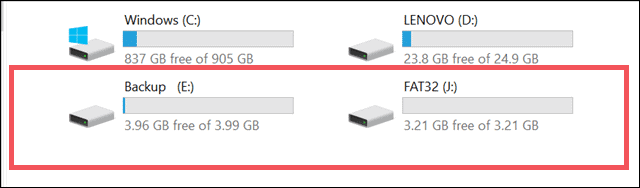
You can now see another volume with the drive letter specified while creating a partition.
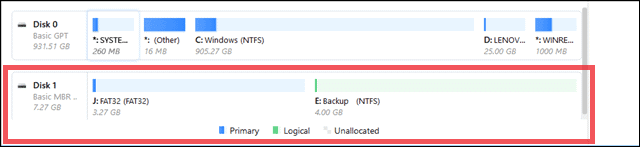
The changes will also reflect in This PC.
In this way, you can use third-party software to partition a USB drive.
But, what if you want to delete the partitioned USB drive that you have created. Well, there is a process for that too.
How to delete the partition from a USB drive?
You can delete or merge partition by using the third-party software as well as the command prompt.
To do it using the command prompt, follow the steps below.
Open the command prompt and type the following commands.
Hit Enter after every command.
diskpart ➜ list disk ➜ select disk * (here * means the number of your removable drive) ➜ list partition ➜ select partition 1 ➜ delete the partition (repeat the selection and deletion process till all the partition deletes) ➜ create partition primary
Exit the command prompt and check This PC, there is no partition in the USB drive.
Conclusion
These steps answer everything you need to know about how to partition a USB drive. Multiple partitions can be created using all the above methods. You need to select which works best for you. If you are comfortable with the command prompt, then using it for partitioning USB drives can be time-consuming but straightforward.
While using Disk management can partition quickly, it has a lengthy procedure. If you do not want to dive into the system settings yourself, then third party software is the best option. However, you need to be careful about the data loss before you partition your USB Drive.
Articles related to USB Drives:
- How to Create USB Recovery Media in Windows 10
- USB Troubleshooting: 5 Common USB Annoyances and Their Solutions
- How to Assign a Permanent Drive Letter to Removable Media in Windows 10
- Create Bootable USB Versions of Windows with WinUSB Maker


