Both Microsoft Word and Google Docs offer options to the users when it comes to adding borders to their documents. Borders represent an organized way of working and add a certain kind of professional feel to a document. So, how to add a border in Google Docs?
While Microsoft Word offers direct options for users to apply a border around their documents, that isn’t the case with Docs. Adding fun borders in Docs can be viewed as a lengthy process, but it is very simple and lucid to understand.
Learn How To Add A Border In Google Docs In No Time!
In Google Docs, you can apply simple, fancy, and cool borders depending on the type of document you are working on. From how to put decorative borders on google docs, to how table properties can help in adding a border, there is so much to explore. For easier accessibility, you can also make a table of contents in Google Docs.
Without further ado, let’s dive into the four different ways on how to add borders in Google Docs.
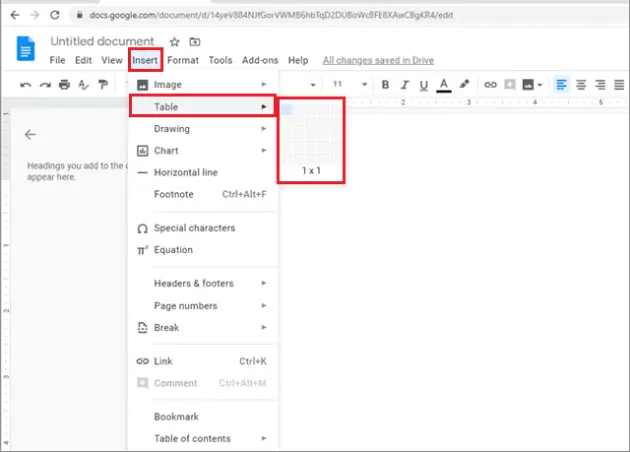
1. Create a 1X1 table to add Google Docs Border
While operating in Microsoft Word, we usually create borders directly with the options given to us in the menu bar. However, Google Docs offers users a variety of methods on how to add a border in Google Docs, one of which is by creating a table.
To start with, open a Google Doc by signing in with your email address from your Google Drive. Navigate and click on the Insert button in the menu bar. Then, click on Table and create a 1×1 table.
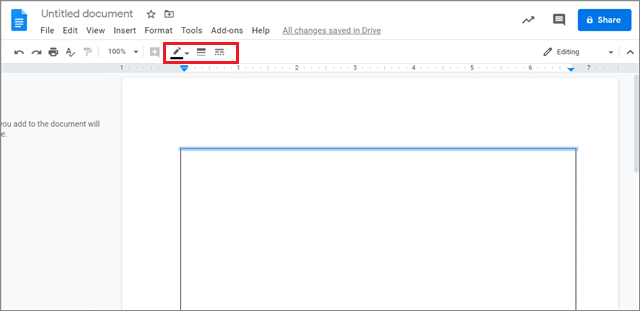
By pressing the Enter key continuously, you can enlarge the table enough so that it looks like a border. Users can also edit the line colors and thickness by using the border options given in the menu bar.
Creating a 1X1 table in a Doc is the easiest way to create a border, given the quick execution of the steps involved in the method. You can also add different headers in Google Docs for better presentation.
2. Create Cool Borders Using the Google Drawing Tool
Google Docs has an integration with Google Drawing, which is a convenient tool if you want to know how to add a border in Google Docs or insert background color, videos or pictures.
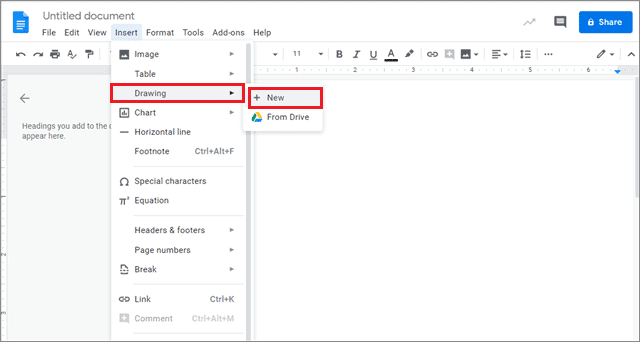
First, open the document of your choice from your Drive. Then, click on the Insert tab and click on the Drawing option.
Next, select New to open the Drawing window.
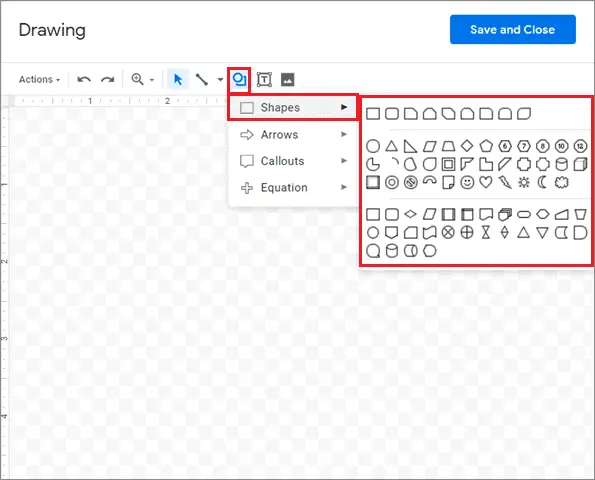
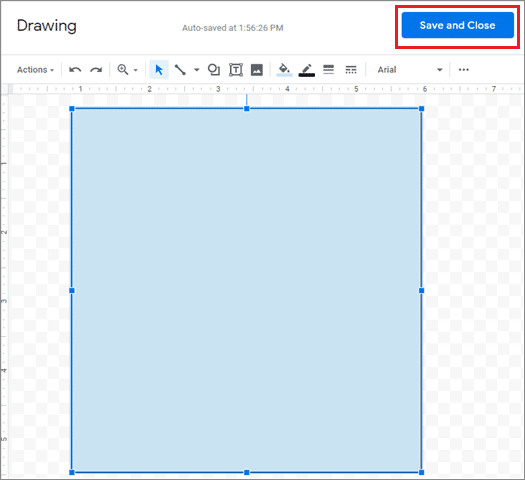
Once the window opens, click on the Shape option in the top menu and then select Shapes. You can select the shape which is similar to the Google Doc. A rectangle is the best shape to choose from since it comes the closest to matching the shape of a document.
Drag the tool on the canvas to create a shape as per your requirements.
Once you have finalized the size of the shape, click on Save and Close on the right-hand side top corner of the Drawing window.
Next, you can see that the entire shape has been inserted on the drawing canvas.
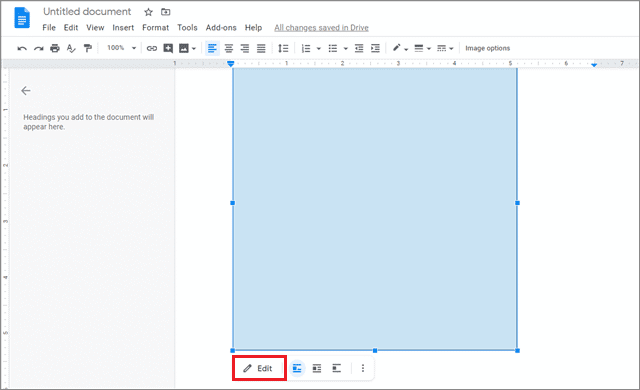
You can edit the size of the shape using the Edit option at the bottom. Using the Drawing tool, you can also create fun and cool borders, given that there are various shapes that the tool offers.
3. How To Add A Border In Google Docs Using An Image
Once you know how to add a border in Google Docs and are bored with the typical black line borders, you can create fancy outlines using this method. With the help of a border picture file, users can create cool borders and enhance the look of their documents.
To begin with, click on the Insert tab and then the Drawing tab. Select the New option to open a Drawing window.

Now, you can paste the image directly if you have it copied on the clipboard. If not, you can click the Images option.

You will be presented with a tab for inserting the image. There are various ways in which users can insert images on the Drawing canvas.
If you don’t have the image saved on your computer, you can try the Search option and source it directly from Google.
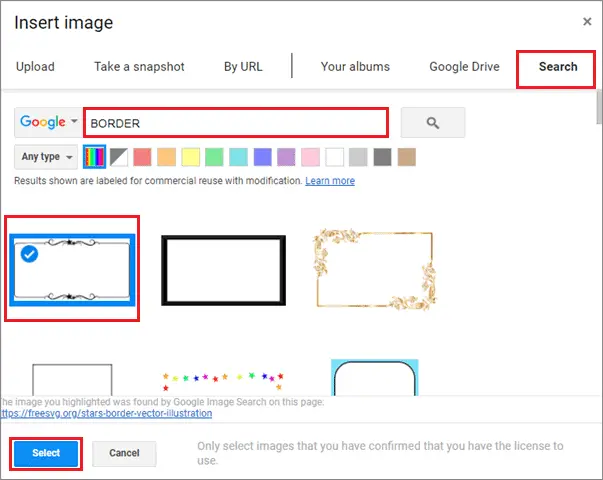
Select the Search option, enter ‘Borders’ in the search bar, and click the search button. You will be presented with various designs of borders.
Choose one and click Select at the bottom of the window.
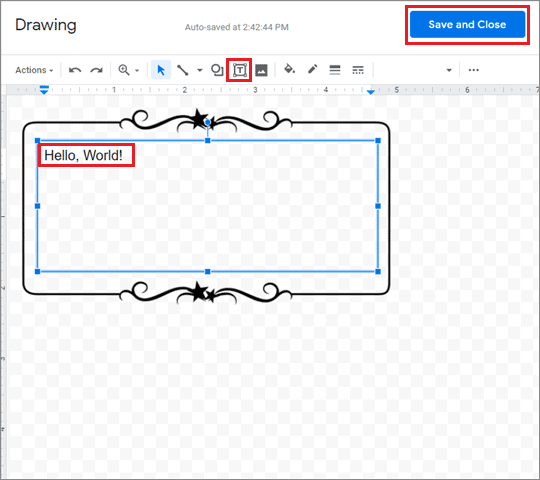
Now, your border image will appear on the Drawing canvas. Inside the outline, create a text frame and enter your text in it. You can also apply a suitable background color to the text box for better enhancement.
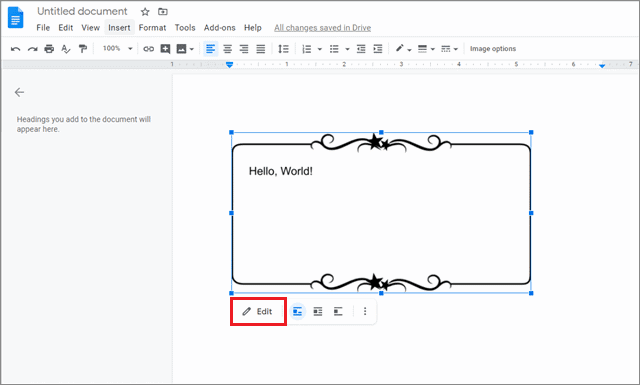
There you go. You will have your content surrounded by the fancy and cool outline of your choice.
4. How To Add A Border To An Image In Google Docs
We have already seen how to add a border in Google Docs using an image, now let us see we can apply borders to an image.
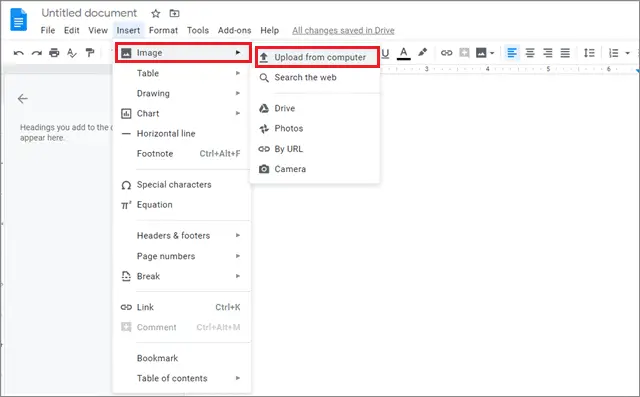
First and foremost, open the document of your choice from your Drive. Then click on the Insert tab and choose Image. You will be presented with a slew of options on how to insert an image. Select an option as per your convenience.
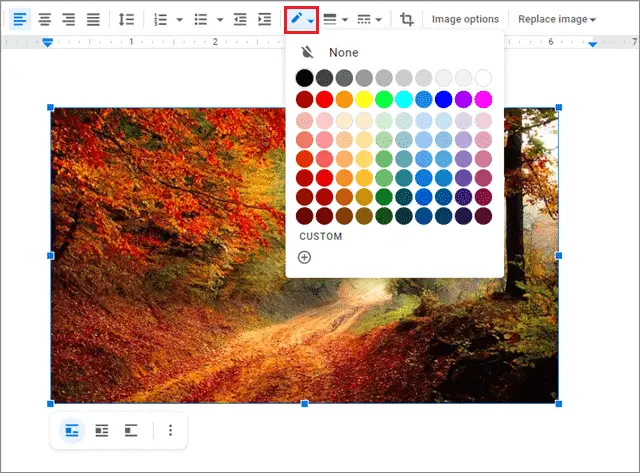
Resize the image according to your requirements. Next, select the image and you will see border tools on the toolbar.
First, select the Border color option and then select the color of your choice for the outline. After selection, you will see that the image has a border in the color of your choice.
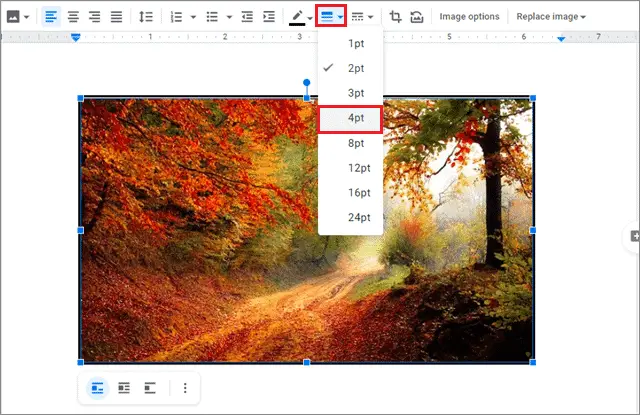
Now, select the second option i.e., the Border weight tool, to increase or decrease the thickness of the contour.
The original thickness is 2pt, but you can change it as per your wish. Here, let’s make it 4pt.
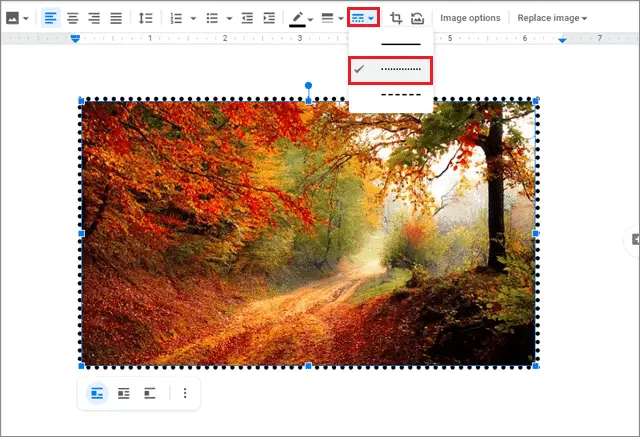
Moving forward, select the Border dash option to choose the type of contour you want. You can either go for a solid outline, a dotted outline, or a broken line outline.
Here, we will select the dotted border.
This is how we can apply different kinds and types of borders to images. Make sure you add borders to your images and documents, depending on whether they are for personal or professional use.
Conclusion
Google Docs and Microsoft Word might be regarded as two sides of the same coin but both tools have their specialties and ways of operation. When it comes to bordering the documents, Word offers simple and direct tools for the same. The question of how to add a border in Google Docs precisely arises at this point.
Google Docs has no tool for bordering, albeit there are ways in which one can outline his or her documents. Users can choose to create borders using the tables, the drawing tool, or any sourced images of borders. Creating an outline using a 1X1 table is the easiest and the fastest way to add a border to a Google Doc.
Using images or the Drawing tool can only be used for personal purposes as users can create fancy borders with those methods. The choice of method depends on the type of document that is being used by the user. For better presentations and added information, you can also check out the Google Docs Tutorials.
(Updated on 11th December 2020)


