If you have used Google Docs for making professional reports and documents, you must have come across the concept of headers and footers. These tools are used to store descriptive information about a document, like an author name, the number of pages, draft revisions, and much more. That’s precisely why users look for how to have different headers in Google Docs.
How To Have Different Headers In Google Docs
Headers and footers help in the proper structuring of the data in the document. You can also add footnotes in Google Docs to make some remarks or add notes for extra information. The entire document appears organized, and having page numbers in Google Docs also enables easier navigation throughout the document.
It is necessary to know the purpose of section breaks and why they are added to a document. Without further ado, let’s have a look at how to add section breaks and then learn how to have different headers in Google Docs.
What is Section Break?
Section breaks are used to divide a Google Doc into appropriate sections. This feature largely comes into use if you are writing a book; Each section acts as a separate page, and you can add headers and footers to all of them.
So, to simplify it, we have to add a section break at the end of a sentence before adding a header or a footer. While formatting a book, section breaks can be added after every chapter so that each chapter has separate headers and footers.
Add Section Breaks
To start with, open the Google Doc from your Google Drive. Go to the page where you have to insert a header and a footer. Then, place the cursor at the end of the last sentence of the preceding page and not the current page.
Now, click on Insert in the menu bar, select Break, and click on Section break (next page).
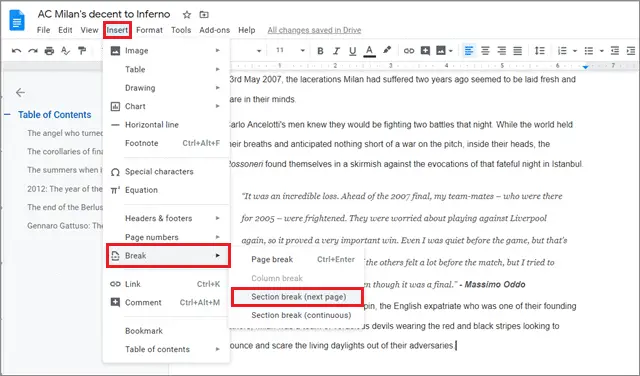
Once you do this, a section break line will be added in the form of a dotted line as shown in the image below.
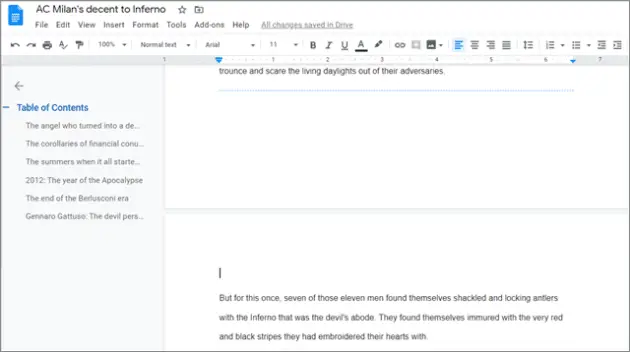
After adding a section, you will automatically move on to the next page. Here onwards, you can start editing the header and footer.
How To View Section Breaks And Delete Them
To view section breaks in a document, navigate to the menu bar, and click on the View tab. In the drop-down menu, select Show section breaks.
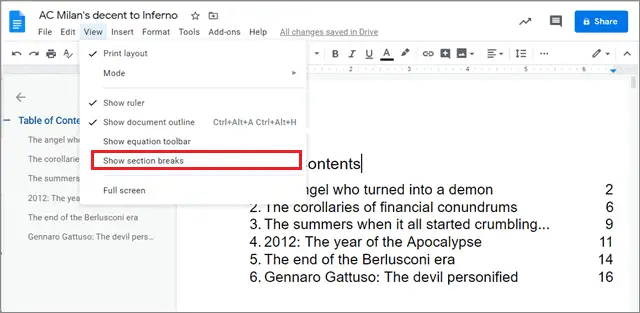
A checkmark will signify the visibility of the section break lines. If the checkmark is absent, click on Show section breaks to see it.
You will see a blue dotted line indicating the break on the page you have selected. To hide them, select the Show section breaks option again and uncheck it.

To delete a section break, click on the last line before it. Then, press the delete button on the keyboard. The section break will be deleted.
Viewing and deleting section breaks is necessary for the context of learning how to have different headers in Google Docs. Users can choose to delete or view the section breaks as per their requirements.
How To Insert Header And Footer
Once you have added the section breaks, it’s time to learn how to have different headers in Google Docs and edit the header and footer of the document.
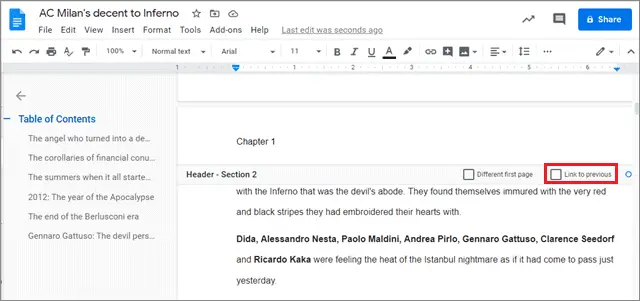
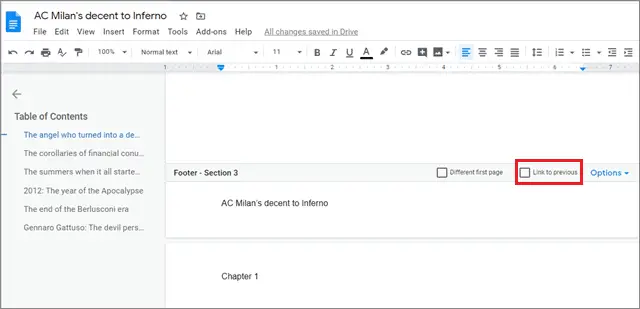
Double-click on the header section of the page you are on, and the header section will appear instantly. Then, uncheck the Link to the previous option.
An alternative way is to go to the Insert tab, choose Headers and Footers, and select Header.

Next, add the content in your header and press Esc to close it.
Now, scroll down to the end of the same page and click on the Footer. Uncheck the Link to the previous option here as well.
Also, make sure you add your content in the footer. Once that is done, press the Esc button to close the footer.
If you check the entire document, the current page has a different header and a footer in contrast to all the pages above it.
However, the pages below the current page have the same header and footer setting because they are a part of the current section.
In the case of a book, each section consists of a separate chapter. You will have to add sections after a bunch of pages, as each chapter requires several pages. The entire process has to be repeated in the same manner, depending on the number of sections that are required.
How To Add Header and Footer Only On The First Page
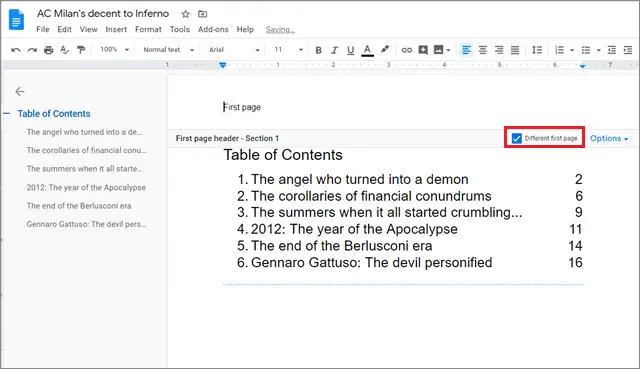
In an official document or report, the first page usually has the table of contents, meaning we cannot have a header or a footer on that page. However, Google Docs ensures you can add a separate header and footer only for the first page.
To avail the option, click on the header section of the Table of Contents page. Check the Different first-page option.
In case you don’t want a header or footer for it, delete the existing text.
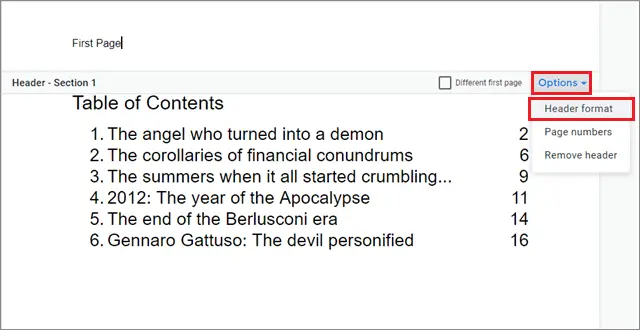
Alternative Way To Add Header And Footer To The First Page
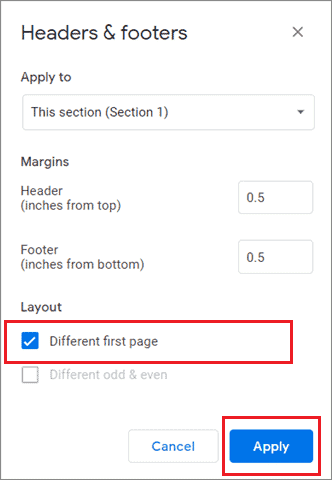
In case you are just starting to write a document, you can set the parameters beforehand. Now, click on Options and select Header format from the drop-down menu.
Next, under the layout section in the dialog box, check the Different first-page box and click on Apply.
Cap:
You will see that the Table of Contents page will have a separate header in comparison to all the other pages in the document.
Add Page Numbers In Headers And Footers
You need not add page numbers manually in Google Docs. The tool offers functionality to make your job easier for that purpose.
To begin with, adding numbers in headers and footers, navigate and click on the Insert bar in the menu tab. Click on the Header and page number option from the drop-down menu and select Page numbers.
Further, select whether you wish to add the page number to the header or the footer.
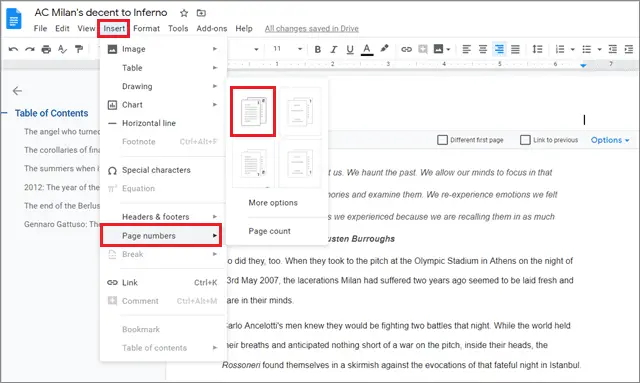
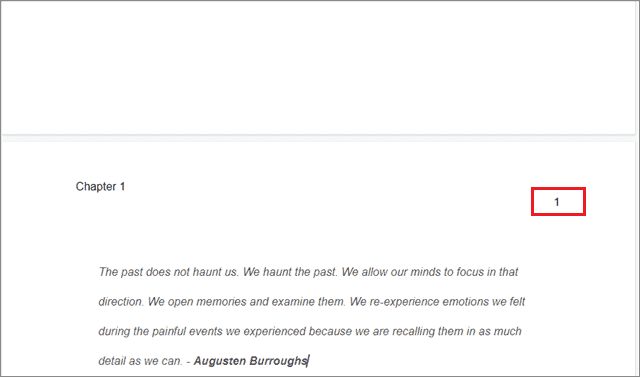
The page number will appear in the header or the footer as per the style of numbering you select.
Numbering pages in a document is one of the crucial reasons for learning how to have different headers in Google Docs.
How to Remove Headers And Footers
Removing headers and footers is as easy as adding them to a document. Right-click on the header you want to delete to select it.
Then, select Remove header from the drop-down menu that appears.
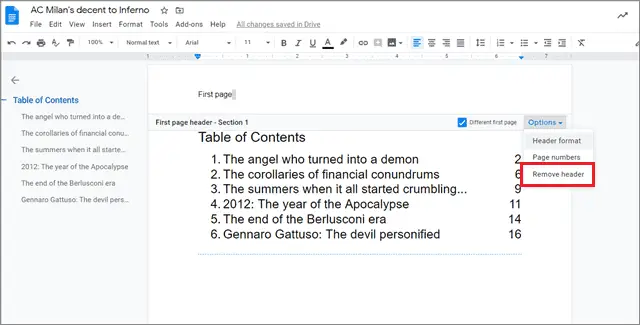
All the headers and footers in the Google Doc will be removed immediately once you exert this command. You can remove the footers following the same process.
You can add or remove headers and footers, depending on the type of document you are creating. If it is for personal use, you can use these options to organize your data. Headers and footers are nothing short of mandatory when it comes to making reports in the corporate world.
Conclusion
Headers and footers are usually used to organize a user’s documents and store descriptive information like date and time, the number of revisions, author name, and more. Inserting a header and a footer in a document might appear confusing if you are a beginner with Google Docs. That’s the reason why many of us find ourselves asking questions on how to have different headers in Google Docs.
Once you get the idea of how to add headers and footers, it’s a cakewalk to organize and add proper structure and formatting to your document. Learning how to create section breaks is a prerequisite for creating headers and footers. Users can also add different headers to each page or headers only on the first page. In the end, it all depends on the type of the document plus the needs and requirements of a user. You can also check various Google Docs Tutorials to know more.
(Updated on 8th Dec 2020)


