Google Docs has become an integral part of our personal and professional lives. Using this tool, we can create various types of documents as per our needs. At times, you need to know multiple aspects of formatting a document, and making columns are one of them. Hence, how to make columns in Google Docs is the question that sprouts in our minds frequently.
Many of us usually turn to MS Word for making professional reports or making e-books. However, few are aware that Google has already added functionalities to create such documents in Docs. Apart from making columns, you can add a border to Google Docs and also insert videos in Google Docs. In all, Google Docs is your one-stop shop for making any kind of document you wish to.
How To Make Columns In Google Docs
Nowadays, you can easily arrange your text or data into columns and create a newsletter or a magazine. Learning how to create a newsletter could be extremely beneficial for digital marketers as they are an integral part of email marketing campaigns.
Likewise, writers in different niches such as travel, fashion, parenting, sports, or lifestyle can start their magazine using Google Docs. If you want to create a newsletter, a magazine, or any statistical report, you can also add an outline to Google Docs.
Without further ado, let’s get to know the basics of adding columns to a document.
1. How To Create Columns In Google Docs
Creating columns in Google Docs can be done with just a few clicks. You can sort data into columns at the beginning of creating the document or even after you have written it.
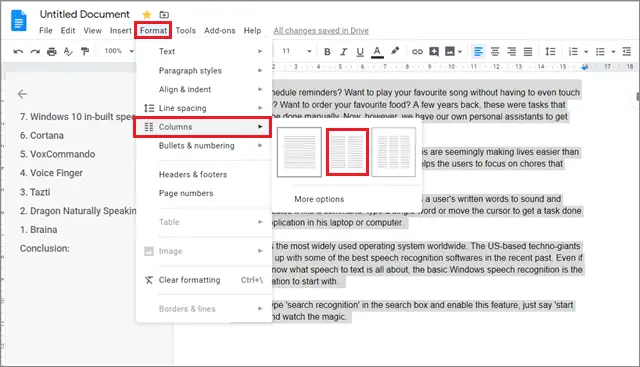
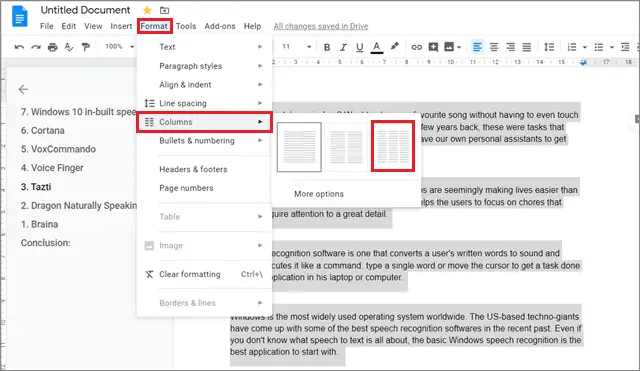
To begin with, open the document from your Google Drive and select the text you want to sort into columns.
Click on the Format tab in the menu bar and select the number of columns you want to have in your Google Doc.
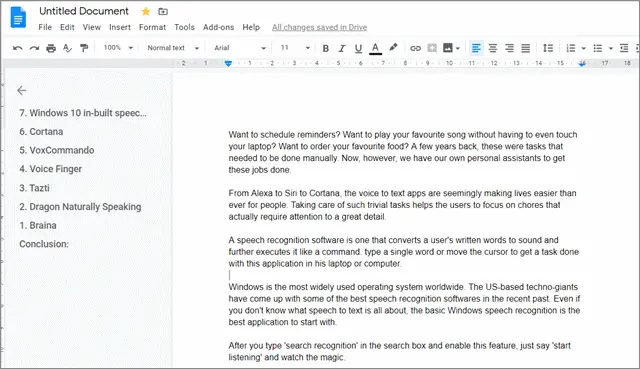
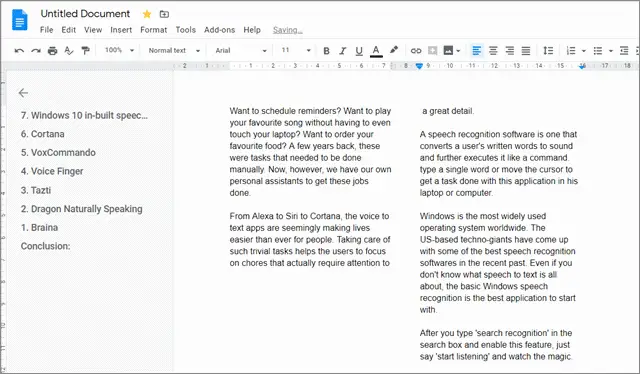
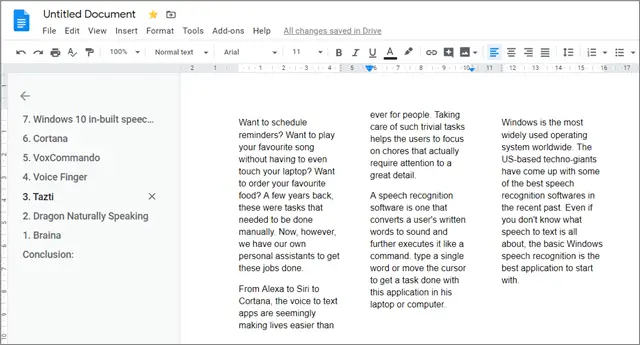
This is how the text will get sorted once you carry out the instructions mentioned above.

If you do this in an empty document, you won’t be able to see how the text will look like once you start writing. However, the ruler at the top of the page starts showing columns, which indicates that the column settings have been applied. Users learning how to make columns in Google Docs for the first time must know that you can make only three columns; creating a fourth is not possible.
2. How To Switch Back To One Column In Google Docs
If you have a change of mind in terms of the columns you have created in your Google Doc, you can always go back to the original setting of the document.
Navigate to the menu bar and click on the Format tab. Now, select Columns and click on the first option, i.e., one column.
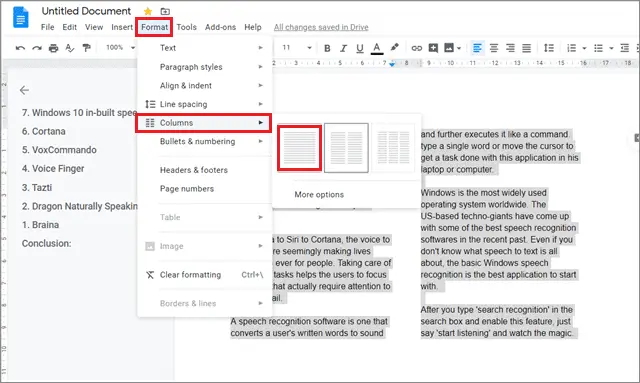
Your document will immediately be reverted to the original setting.
That’s how simple it is to create Google Docs columns and revert from it. You can also select the Undo option in Google Docs until you get your text in the original format.
3. How To Type In Different Columns In Google Docs
You can press the enter key until you move to column two, but that’s like using the space bar rather than the tab key. If you add or subtract text in a column later, your spacing could change. Hence, when you are learning how to make columns in Google Docs, it is also necessary to learn how to type in different columns.
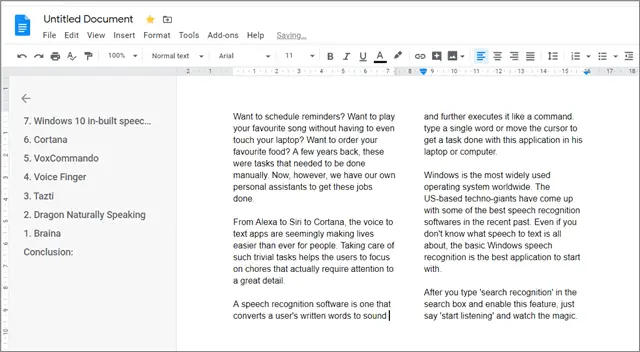
Keep your cursor at the end of the text. Navigate to the menu bar, click on the Insert tab, and choose the Column break option.
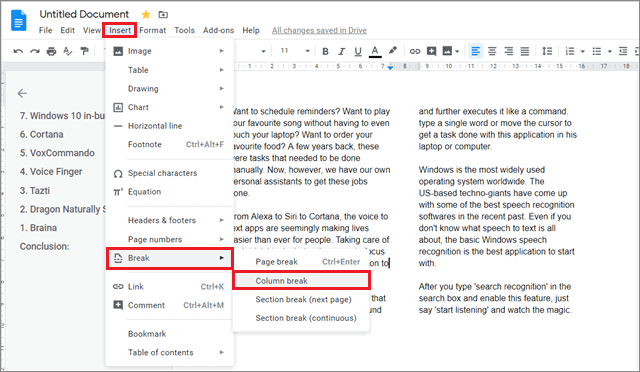
Your columns will be separated, and you will be able to make changes to one of them without accidentally changing the line spacing of the other.
In this manner, you can make changes in different columns without disturbing their line spacing. This option should be used when you have to make changes in between columns.
4. Add Vertical Lines In Columns Between Google Docs
To organize your magazine, report, or newsletter, you can add lines to show the separation of columns. Organization of content is a vital aspect to take care of when you are learning how to make columns in Google Docs. Adding vertical lines in between columns gives the document a neat and professional appearance.
To start with, click on the Format tab and select Columns. From the drop-down menu that appears, click on More options.

A dialog box of various options will appear on the screen. Now, check the Line between columns option and click on Apply.
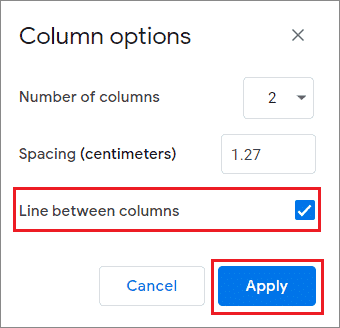
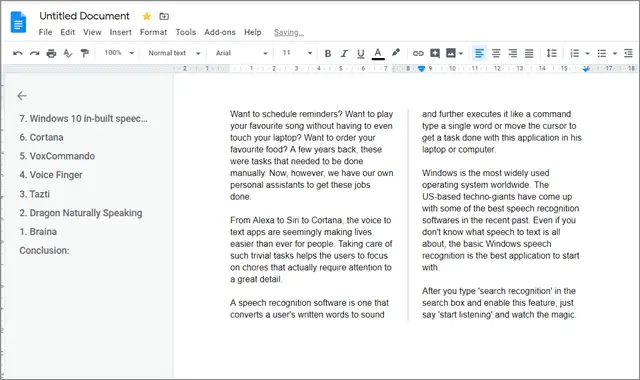
The lines will immediately appear in the document, showing the separation between the columns in Google Docs.
Adding vertical lines is a matter of choice more than compulsion. Irrespective of the fact that it helps in displaying proper organization in a Google Doc, users can choose to go with this option if they feel the need to do so.
5. How To Make Multiple-sized Columns In The Same Document
When we make Google Docs columns using the standard process, they are created evenly. Users can opt to go against the uniformity of the size of these columns and make them uneven using the process mentioned below.
Initially, when you sort a text in even-sized columns, they will appear like this.
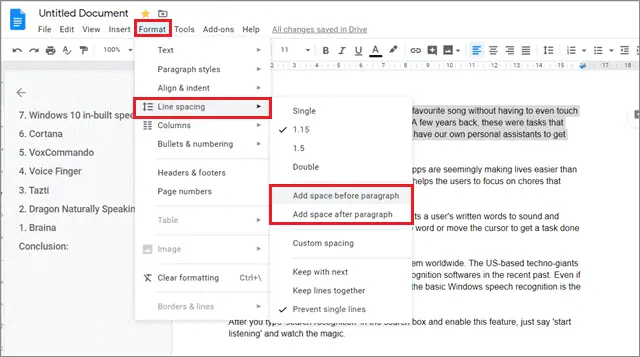
To change this type of formatting, first, revert the text in a single column. Now, select each paragraph you want to add to a column and click on the Format tab. Further, select Line spacing and add spacing both before and after the paragraph. Repeat this process for every paragraph.
Once you have added the line spacings for all paragraphs, go to the Format tab and click on the Columns option. Choose the three columns option.
Your document will then be divided into three columns and each one of them will have an uneven length.
In case if you have two columns on all pages in the document and you want to have a page with uneven columns, you can always go for this process.
6. Is It Possible To Add or Remove Columns In Google Docs in Mobile?
Unfortunately, you can neither add nor remove columns in Google Docs on your smartphone. However, you can edit the text in the columns on your phone. The columns appear one above the other rather than at the side because of the small screen size.
Conclusion
When it comes to creating text columns, many users usually turn to Microsoft Word for creating such documents. But in recent years, Google Docs has enabled that feature too. The problem is, not many users are aware of how to make columns in Google Docs.
Adding Google Docs columns is a very simple process. Learning to create columns is an easy and important skill to master if you want to create newsletters or magazines. Columns also help in organizing a document according to the content. Adding columns in Google Docs is not mandatory for every type of document; the choice to add columns depends entirely on the user’s needs and requirements. You can also check the various Google Docs Tutorials and learn to create professional presentations and data management.
(Updated on 11th December 2020)


