One of the first things to notice after upgrading to Windows 11 is the changed position of the Start menu on the taskbar. As far as Windows users remember, the Start menu was always in the bottom-left corner of the computer screen. So, if your muscle memory is moving the mouse cursor to the left, you need to know how to move Start menu in Windows 11.
The change in the Start menu is one of the Windows 11 features the users are not fond of. You can not only move the Start menu to the left but also the top of your screen. Let’s see how to do so.
How to Move Start Menu in Windows 11
1. Open the Settings window and go to Personalization ➜ Taskbar.
2. Expand Taskbar behaviours.
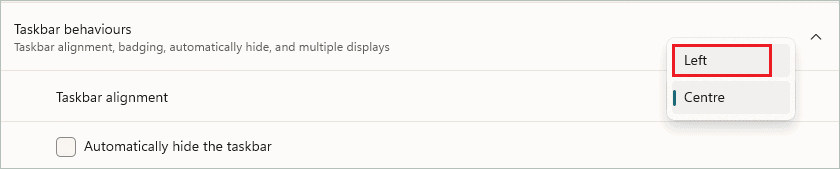
3. Select the location as Center or Left from the drop-down menu next to Taskbar alignment.
Note: These are the quick steps for how to move Start menu in Windows 11. Let’s look at each of these steps in detail with images.
How to Move Start Menu in Windows 11 to Left
Microsoft has made it easy to move the Start menu to the left of your screen. You can make a change in the Windows Settings app and reposition the Start menu on the taskbar.
If you wish to refer to detailed steps to align the Windows 11 taskbar icons to the left corner, you can refer to the steps below.
Step 1: Press Windows key + I to open the “Settings” app and go to the “Personalization” settings.

Step 2: In the Personalization section, click on “Taskbar.”
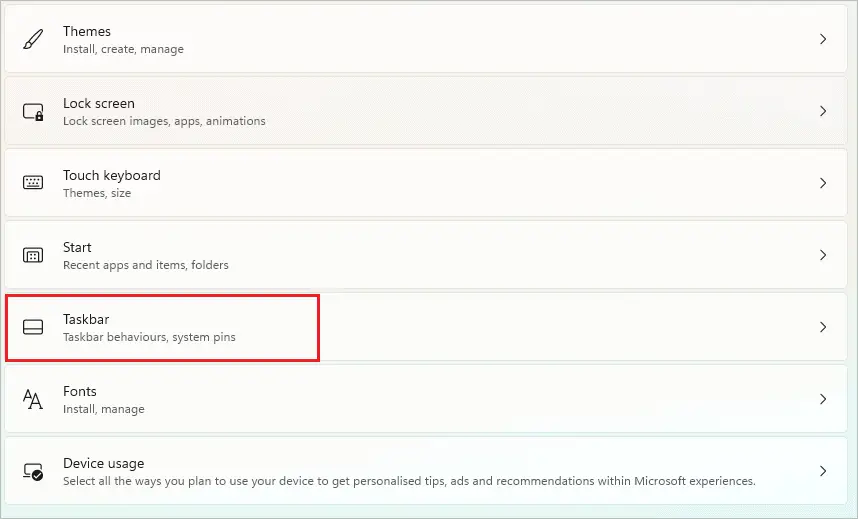
Step 3: Next, expand “Taskbar behaviours” to find alignment settings.

Step 4: Select “Left” from the dropdown menu next to “Taskbar alignment.”
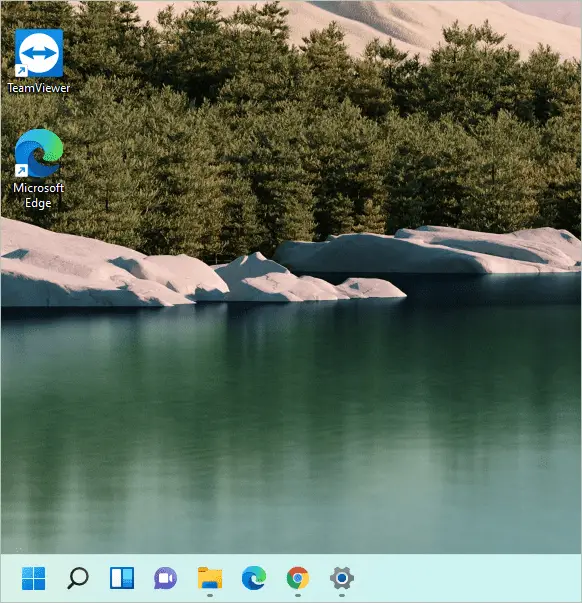
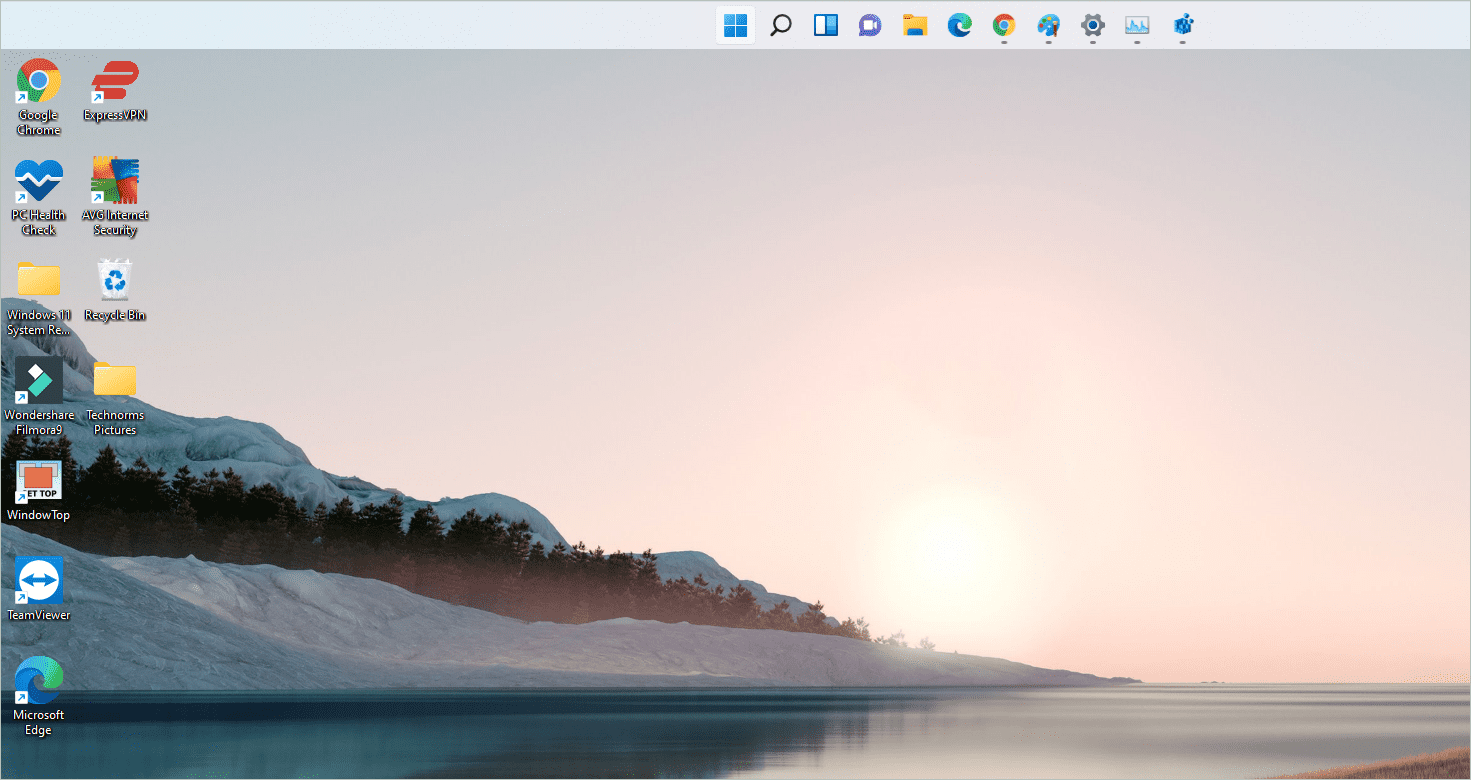
The taskbar, along with the Start menu, will be moved to the left of your screen.
You now know how to move Start menu in Windows 11 to the left. Unfortunately, Microsoft does not provide options to move the Start menu to the top of the screen. However, you can refer to the section below to know how to move the Start menu to the top.
How to Move Windows 11 Start Menu to the Top?
You need to tweak the Windows Registry Editor to move the Start menu to Top. However, before making any changes to the registry, you can either backup the Registry Editor or your entire computer. So that if something goes wrong, you have the backup to restore from.
However, if the instructions are correctly followed, the chances of anything going wrong are less.
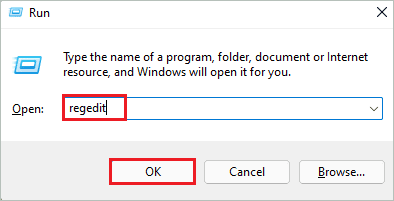
Step 1: Press Windows key + R to open the “Run” window and type “regedit” there. Click “OK” or press the “Enter” key to open the “Registry Editor.”
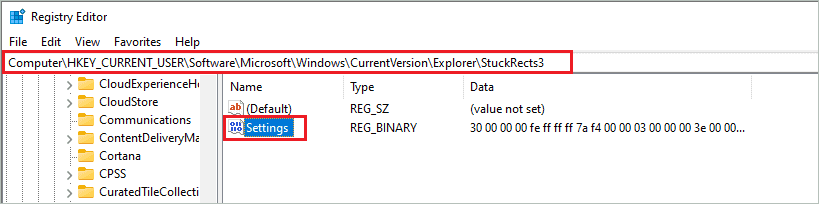
Step 2: In the Registry Editor window, go to the below-mentioned path.
Computer\HKEY_CURRENT_USER\Software\Microsoft\Windows\CurrentVersion\Explorer\StuckRects3Step 3: In the StuckRect3, double-click on the “Settings” value.
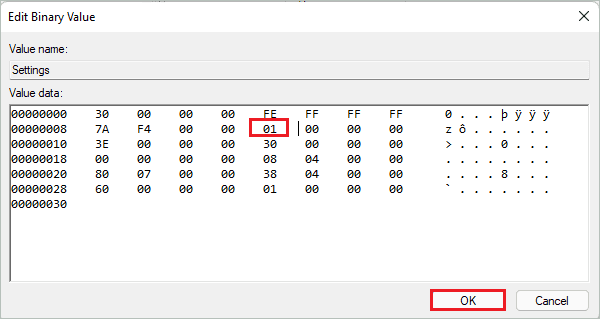
Step 4: When the “Edit Binary Value” dialog box appears, you must modify the fifth value in the second row. The “03” needs to be replaced with “01” to move the Start menu to the top.
Place the cursor to the right of 03 and press the “Backspace” key once. You can then type “01” and click on “OK” to save the changes. Make sure you only change the mentioned value, as making unwanted changes can cause different issues on your Windows 11 PC.
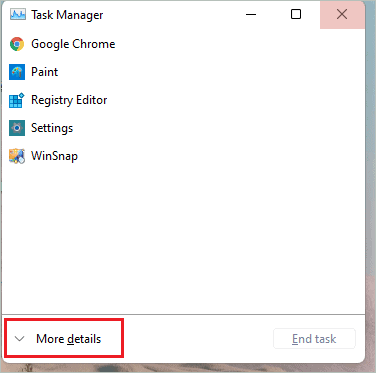
Step 5: Close the Registry Editor and open “Task Manager” by pressing Ctrl + Shift + Esc keys simultaneously.
Step 6: If you see the Task Manager window as shown in the screenshot below, click on “More details.” However, you can skip this step if you see processes and other details.
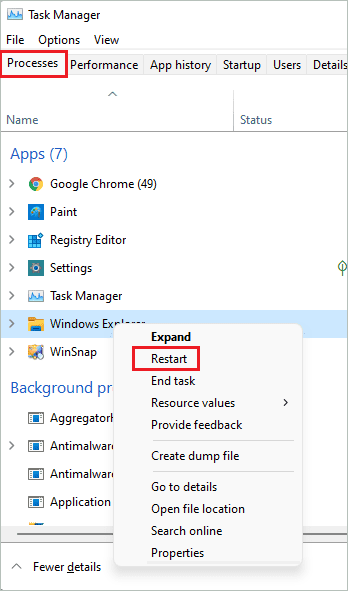
Step 7: Go to the “Processes” tab and right-click on Windows Explorer. Select “Restart” from the context menu.
If you don’t find Windows Explorer, launch File Explorer on your computer by pressing Windows key + E. Then restart it via Task Manager.
Once Windows Explorer is restarted, you will see the Start menu at the top of your Windows 11 screen.
One must refrain from using the downloadable executable files found on the Internet that can modify the Registry Editor for you. Instead, you can easily change the registry yourself to move the Start menu.
To move back the Start menu to the bottom of the screen, revert the above changes.
Conclusion
The Start menu positioned at the center was a setback for many Windows users. However, before you roll back to Windows 10, it is worth trying to reposition the Start menu to the left as it was in older versions of Windows. In addition, if you wish to have the Windows 11 taskbar at the top of your screen, you can do that by making changes to the Registry Editor.
The above article explains how to move Start menu in Windows 11 to the top and left of your computer screen. You can move the Start menu to whatever position you want as per your requirement and need.
FAQs
Can you move the Windows 11 Start menu?
Yes, you can move the Windows 11 Start menu to the left using the Settings app. If you want to move it to the top, you have to tweak the Registry Editor.
How do I move the Start button in Windows 11?
To move the Start button, go to Settings app ➜ Personalization ➜ Taskbar ➜ Taskbar behaviours and select the Left or Center option from the drop-down menu next to Taskbar alignment.
Is it possible to move the Start menu to the top?
Yes, it is possible to move the Start menu to the top of the screen by making changes in the Registry Editor. To shift the Start menu to the top, you need to change the Settings value in the StuckRects3 key of the Registry Editor.


