Key Takeaways:
- Quick Settings can be accessed by clicking on the volume/network/battery icon on the taskbar.
- Sometimes, the Quick Settings does not open or simply freezes.
- You can perform an SFC scan and change Local Group Policy Editor to fix the issues with Quick Settings.
- The Feedback Hub app can help you report this issue to Microsoft.
Windows 11 has Quick Settings to manage frequently used settings conveniently. Microsoft replaced Action Center with the Quick Settings area in Windows 11. You can click on the volume, network, or battery symbol on the taskbar to access the Quick Settings area. However, many users complain about Windows 11 Quick Settings not working or not opening when attempting to do so.
With the Quick Settings panel, you don’t need to open the Windows 11 Settings app to connect to the Internet, pair a Bluetooth device, activate Airplane mode, control sound, manage Focus assist, and other minor settings.
However, with Quick Settings not working as expected, it can get annoying to configure these settings. You can perform some fixes to resolve these common issues with Quick Settings on your Windows 11 PC.
How To Fix Windows 11 Quick Settings Not Working?
The Quick Settings menu can stop working because of corrupted system files or buggy updates. You can perform the below fixes in chronological order to resolve it permanently on Windows 11 PC.
1. Restart your Computer
Sometimes, the temporary glitches can prevent the Quick Settings from working as expected. You can perform a system restart to fix temporary issues on your computer.
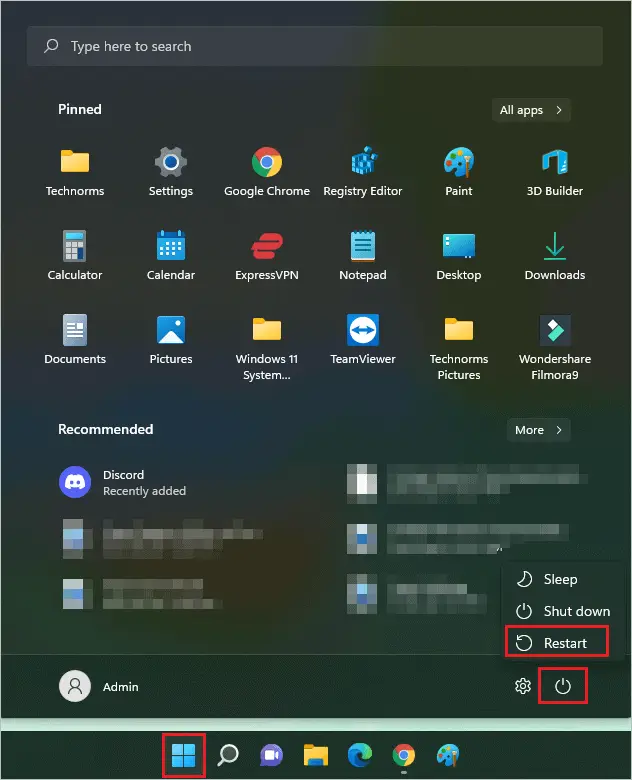
Press the Windows key from your keyboard or click on the ”Start button” on the taskbar to open the Start menu.
Then, click on the “Power icon” and select “Restart” to reboot your computer.
After the PC restarts, check if you can launch and use the Quick Settings panel on your Windows PC.
2. Perform SFC and DISM Scan
One of the reasons to experience Windows 11 Quick Settings not working is corrupted critical system files. To repair the corrupted system files, you can run SFC (System File Checker), and DISM (Deployment Image Servicing and Management) scans. These Windows utilities can be used from Command Prompt terminal.
Open the Start menu and search for “Command Prompt” in the search bar. Next, click on “Run as administrator” to launch Command Prompt with admin privileges.

In the CMD window, type the below command and press “Enter” to execute it to repair corrupt files.
sfc /scannow
The SFC command execution may take time to execute, do not close the Command Prompt window in between. Once the SFC command is executed, you can perform the DISM scan to fix corrupted files.
To use the DISM utility, execute the below command in the Command Prompt.
DISM /Online /Cleanup-Image /RestoreHealth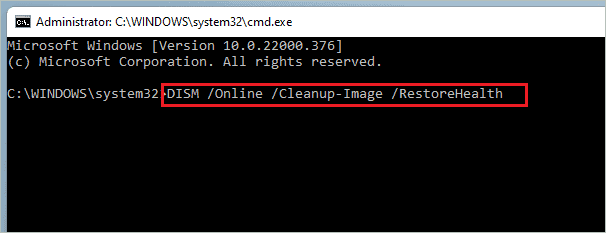
Once both the commands are executed, reboot your PC and check if the issue is resolved or not.
3. Update Windows Operating System
It could probably be a buggy update if you started experiencing issues with Quick Settings after updating your PC. However, you can check if there are any new updates to fix the old issues on your computer.
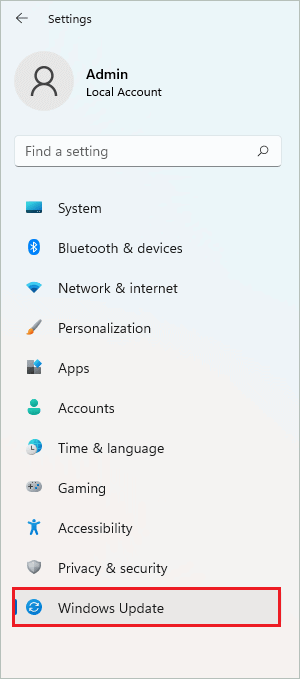
Press the Windows key + I keyboard shortcut to launch the Settings app and go to “Windows Update” from the left panel.
Now, click on the “Check for updates” button.

If there are any new updates, the Windows operating system will download and install them. Once the updates are installed, check if Windows 11 Quick Settings is not working issue is resolved or not.
4. Perform A System Restore
A recently created restore point can help you fix the issues with the Quick Settings menu. You can revert your PC to the recent restore point. Performing a system restore will not delete your personal files and data. However, the installed apps and settings that were changed after the restore point was created will be removed.
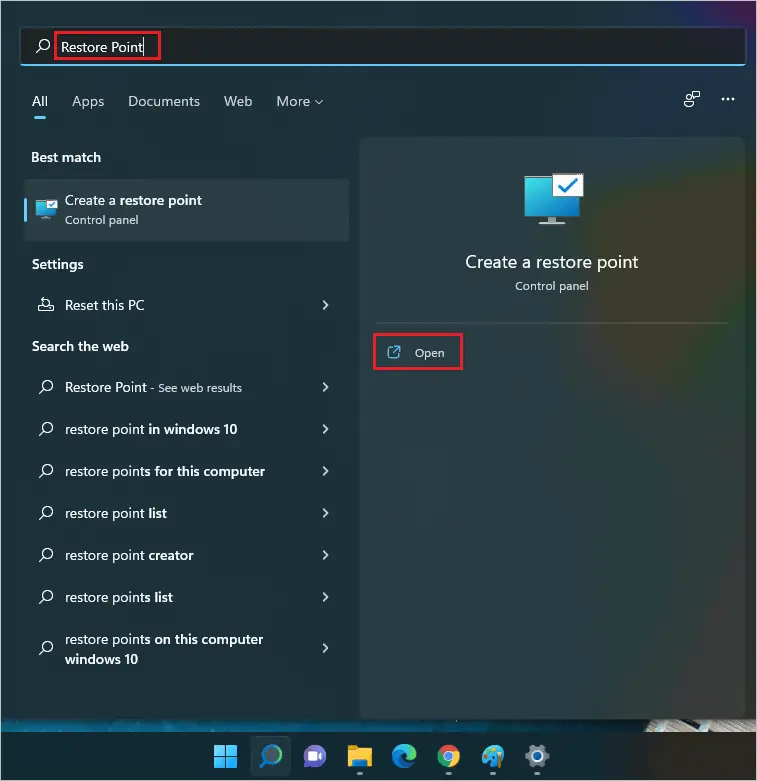
Search for “Restore Point” in the search box and open “Create a restore point” from the search results.
When the “System Properties” dialog box opens, make sure you are in the “System Protection” tab and then click on “System Restore.”
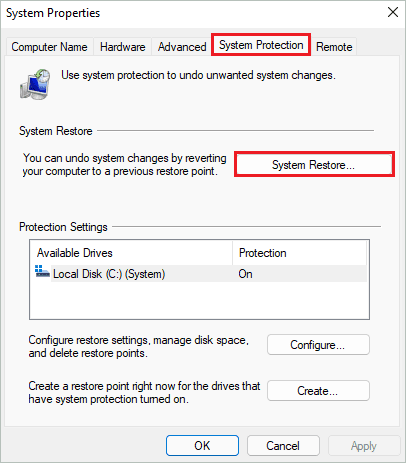
In the System Restore window, click on “Next” to proceed.

Now, select the most recent restore point in the next window and click on “Next.”
Lastly, click on the “Finish button” to start the restoration process.
If you don’t have any restore points, you can skip this solution and check other fixes from the list. However, if you successfully restore your PC to a restore point, try launching Quick Setting and check if it works as expected.
5. Perform A Clean Boot
Some third-party apps and services can mess up with the Quick Settings panel. You can perform a clean boot to find the culprit.
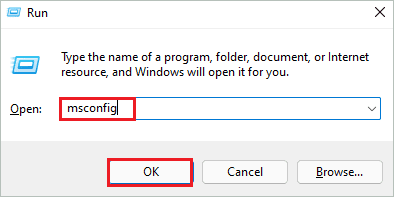
Step 1: Press Windows key + R to open the Run window and type “msconfig” there. Click “OK” or press “Enter” to open “System Configuration.”
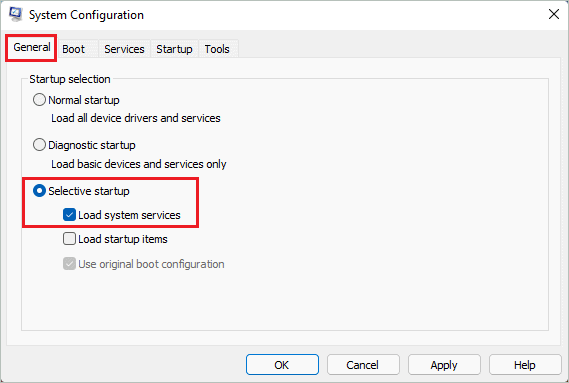
Step 2: Once the System Configuration window launches, go to the “General” tab and select “Selective startup.”
Step 3: Only select “Load system services” below Selective startup.
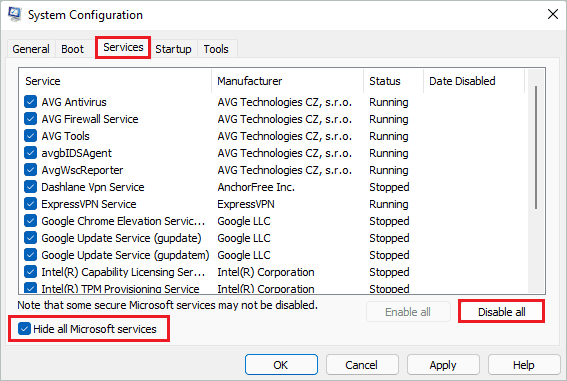
Step 4: Go to the “Services” tab and check the checkbox next to “Hide all Microsoft services” in the bottom left corner.
Step 5: Click on the “Disable all” button to disable third-party services.
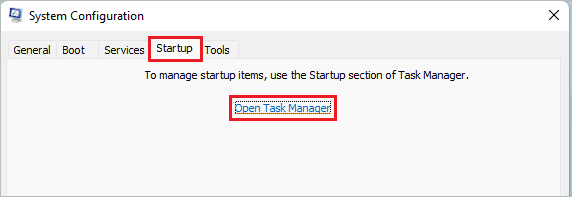
Step 6: Navigate to the “Startup” tab and click on the “Open Task Manager” link.
Step 7: Once the Task Manager opens, click on “Apply” and “OK” in the System Configuration window to save the changes you made.
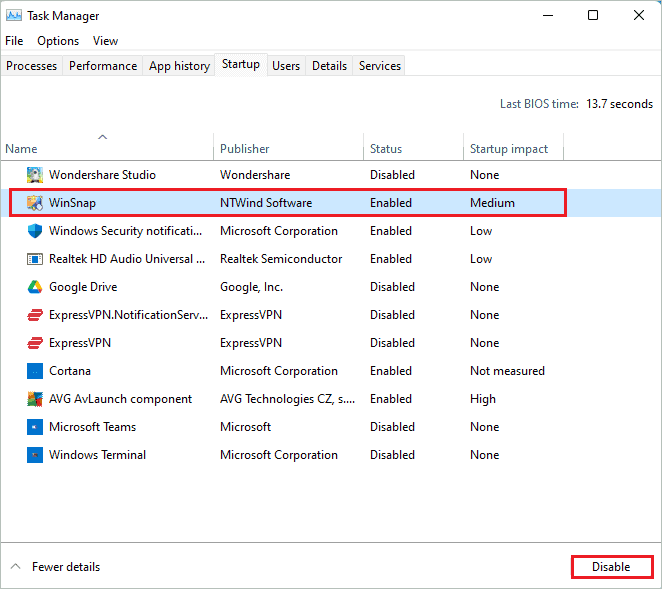
Step 8: Although the startup items are disabled from loading, it is safer to disable unwanted startup apps.
Select the startup programs that are not required and have a “None” Startup impact. Then, click on the “Disable” button to prevent it from launching at startup.
Now, close the Task Manager and reboot your computer. If Quick Settings works without issues in a clean boot state, it is a third-party app messing up. You can enable services and apps one by one to find the culprit. Finding the culprit may take some time, but you can resolve the Windows 11 Quick Settings not working permanently using this way.
However, if the issue persists after rebooting the PC for the first time, you can enable all apps and services and move on to the next solution.
6. Modify Local Group Policy Editor
You can change the Action Center policy to Not Configured to fix Windows 11 Quick Settings not working issue. This solution can only be performed by Windows 10 Professional and Enterprise users. If you use the Windows 11 Home version, you can skip this solution and move on to the next one.
Open the Run window by pressing Windows key + R hotkeys and type “gpedit” there. Then, click OK to open Local Group Policy Editor.
In Local Group Policy Editor, go to User Configuration ➜ Administrative Template ➜ Start Menu and Taskbar from the left frame.
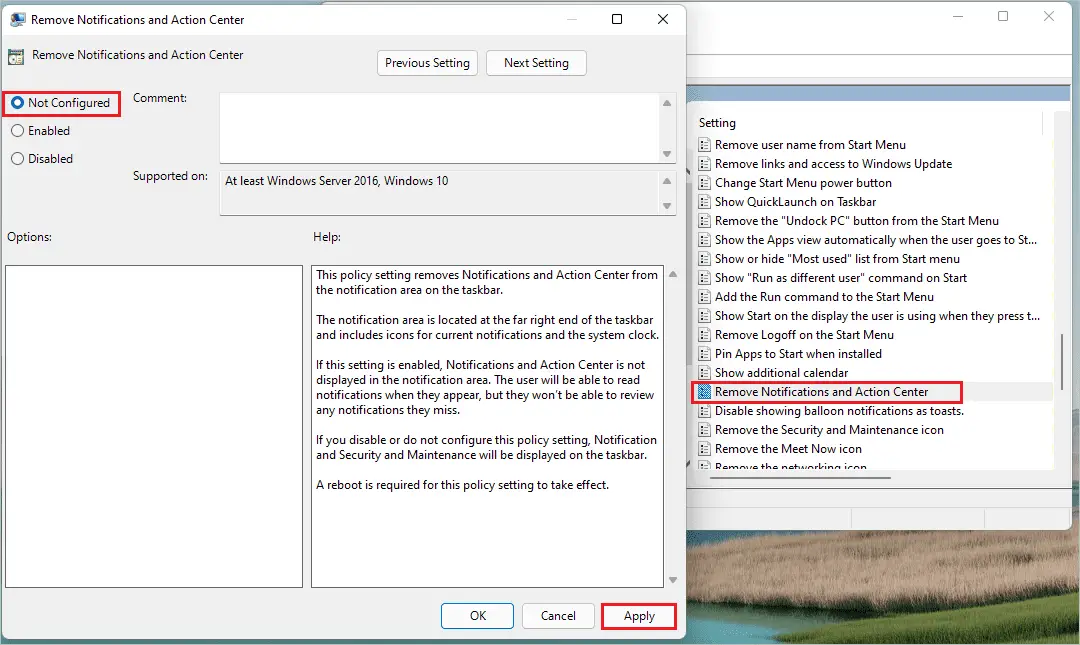
Now, search for “Remove Notifications and Action Center” in the right frame and double-click on it to modify it.
When the Remove Notifications and Action Center window opens, select “Not Configured” and click on “Apply” followed by “OK.”
Once done, reboot your computer and check if the Quick Settings window is opening or not.
7. Create A New User Account
Sometimes, the user account can have issues, so you need to migrate to a new local user account on your Windows 11 PC. This can be because of a corrupt user profile. The below steps are for creating a local user account.
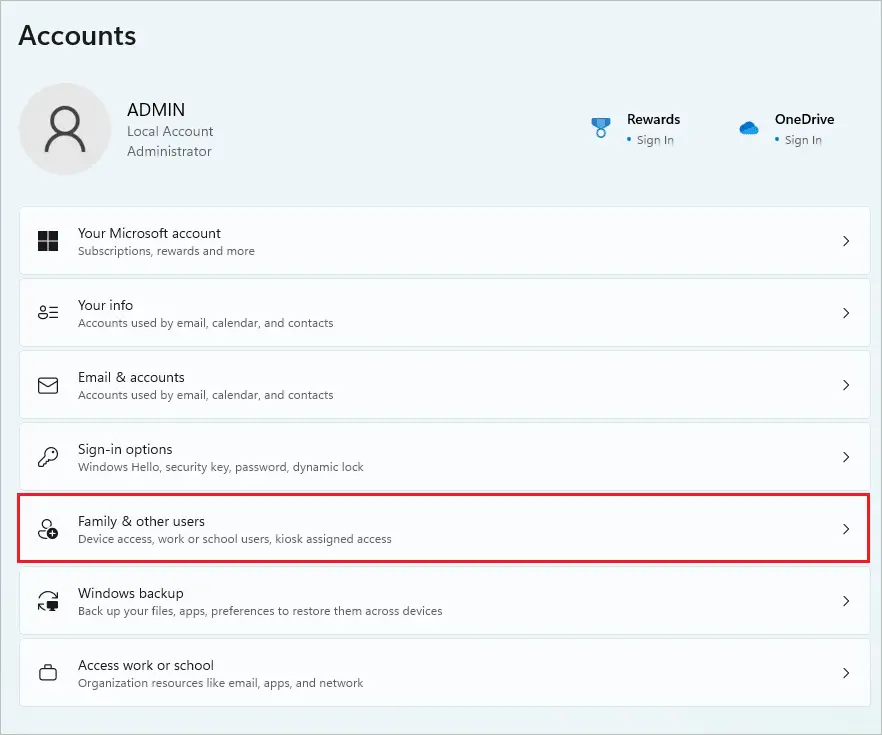
Step 1: Open the Settings app and go to the “Accounts” section from the left sidebar.
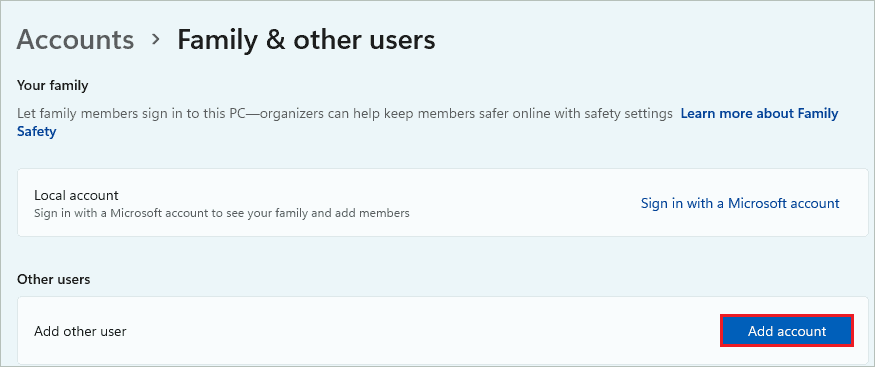
Step 2: Click on “Family & other users” in the Accounts settings.
Step 3: Click on “Add account” next to “Add other user.”
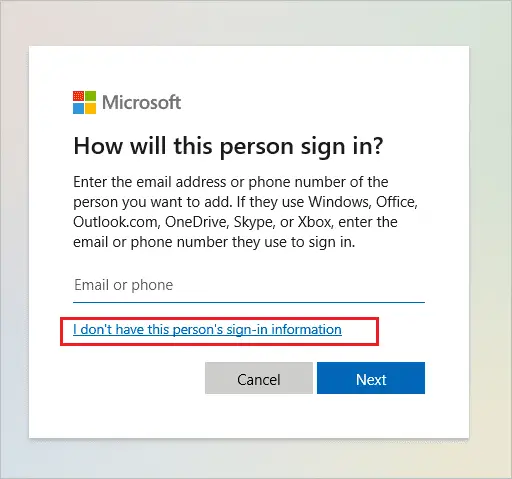
Step 4: Click on the “I don’t have this person’s sign-in information” link.
Step 5: On the next screen, click on “Add a user without a Microsoft account.”
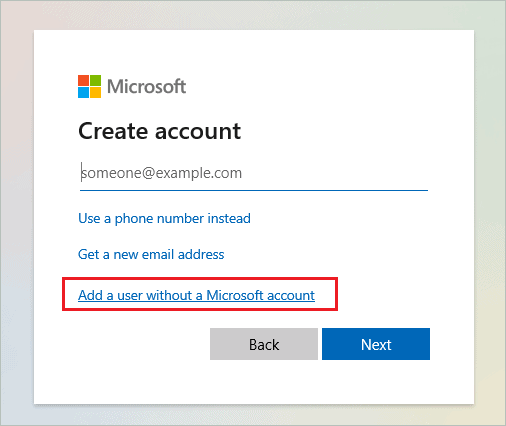
Step 6: Now, add the details and click on “Next” to proceed.

You can then follow the screen instructions to complete the process. Ensure you select the account type as administrator to copy all the data from the old account to the new one.
Once the account is created, sign in and go to C:\Users\Old_Account from File Explorer. You can select all the data and copy it to the newly created account.
8. Reinstall UWP Apps
If the UWP app is not registered correctly, you can reinstall and re-register via the PowerShell terminal. As unregistered Windows apps can cause Windows 11 Quick Settings not working issue.
Press the search icon on your Windows 11 taskbar and search for “PowerShell.” Then, click on “Run as administrator” for Windows PowerShell from the search result.
Once the PowerShell window opens, type in the below command and press the “Enter key” to execute it.
Get-AppXPackage | Foreach {Add-AppxPackage -DisableDevelopmentMode -Register"$($_.InstallLocation)AppXManifest.xml"}Once done, close the PowerShell terminal and reboot your computer.
9. Reset Your PC
You can reset your PC to fix Windows 11 Quick Settings not working issue. The reset can reinstall Windows without deleting your personal files. However, the third-party apps will be removed, and settings will return to default settings. Follow the steps given below to reset your Windows 11 computer.
Step 1: Go to Settings app ➜ System ➜ Recovery.
Step 2: Click on the “Reset PC” button next to the Reset this PC option.

Caption: Click on Reset PC
Step 3: On the ‘Reset this PC’ window, click on the “Keep my files” option. If you don’t have much data on your computer, you can also select “Remove everything.”

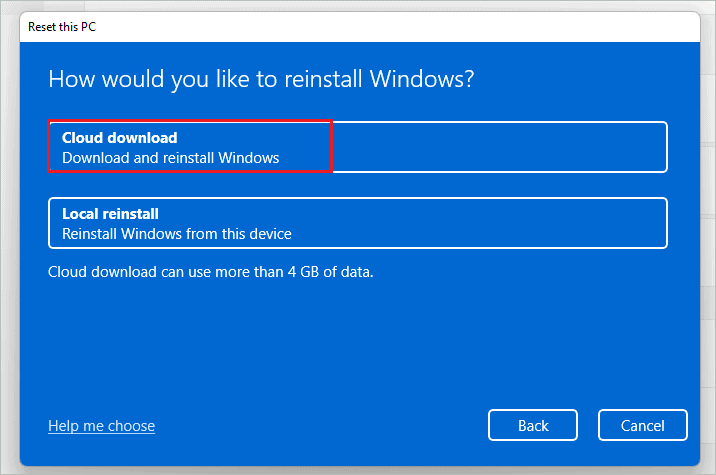
Step 4: You can select Cloud download or Local reinstall on the next window.
Cloud download will download Windows 11 and then reinstall it.
Local reinstall will reinstall Windows 11 from your device.
You can select the option based on your feasibility.
You can then follow the wizard based on your requirement to reinstall Windows 11. After resetting your PC, you may need to install the apps again and make the required changes in the Settings app.
10. Report the Issue Via Feedback Hub App
If the issue persists on your Windows 11 computer, you can report it via the Feedback Hub app. This can help you take the issue to Microsoft.
Search for “Feedback Hub” in the Start menu and open the same from the search results.
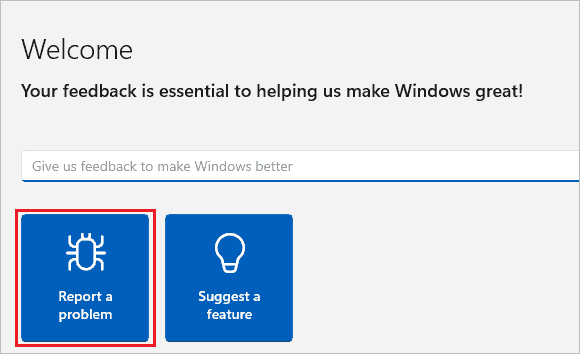
In the Feedback Hub app, click on “Report a problem.”
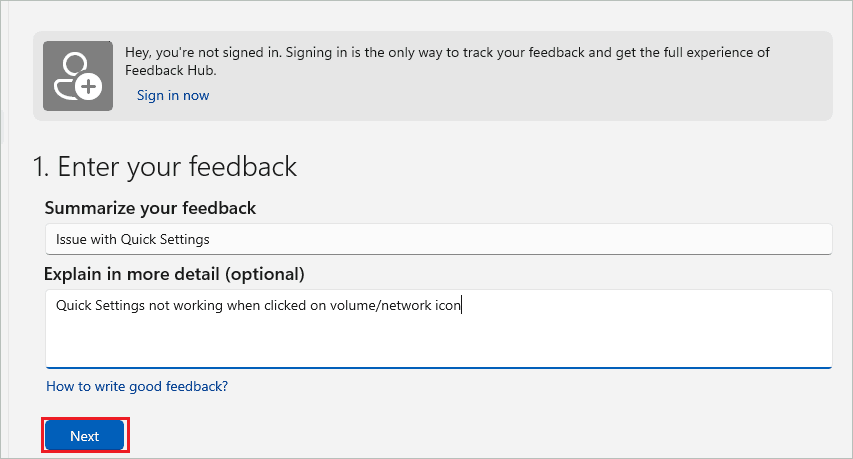
Add in the details of the issue you are experiencing with Quick Settings and click on “Next” to proceed.
You can then add all the required details as per the problem you are facing. Once the problem is submitted, you can wait till Microsoft resolves it. Until then, you can make changes to the settings using the Windows Settings app.
Final Thoughts On Windows 11 Quick Settings Not Working
The Quick Settings menu brings convenience to the Windows 11 operating system. You can manage a few settings quickly via Quick Settings. However, if Windows 11 Quick Settings is not working, it can annoy you while using the PC. Therefore, you may need to access the Settings app for all major and minor configurations.
A corrupt system file, user profile, or third-party apps/services can cause the Quick Settings not to function as expected. The above guide can help you fix the Windows 11 Quick Settings not working issue. You may need to perform a few solutions until you find the one that works for you. However, this also depends on the root cause of the problem.
FAQs
How do I reset the Settings app in Windows 11?
You can right-click on the Settings app from the Start menu and click on More ➜ App settings. Then click on the Reset button to reset the Settings app in Windows 11.
Where is the Quick Settings in Windows 11?
Click on the volume, battery, or network icon on the taskbar to open the Quick Settings in Windows 11.
What causes Windows 11 Quick Settings not to work?
There are many reasons that can cause issues with the Quick Settings menu. Some of them are corrupted system files and user profiles, outdated or buggy Windows updates, third-party apps or services, unregistered UWP apps, and unknown Microsoft issues.
How to fix Windows 11 Quick settings not working issue?
You can restart the computer, perform SFC and DISM scans, update your PC, perform a system restore and clean boot, make changes to Group Policy Editor, create a new user profile, and reset your PC to fix Windows 11 Quick settings not working issue.


