Key Takeaways
- The username and password needed to access a resource on a network are collectively called network credentials
- For security reasons, password-protected sharing is enabled by default
- Sometimes, a user is denied permission to access a resource even after giving the network credentials, which can be resolved using several methods
A security system in any infrastructure is inevitable to ensure proper working and prevent unauthorized access. The network credentials in Windows 10 serve the same purpose. But sometimes, a local network user is denied access to shared resources on some other PC in the Windows-based network. Despite the excellent features in Windows, the Enter network credentials message often pops up, not giving the network share permission.
The login screen asks for a valid username and password you are totally unaware of. Or, the network share credentials you entered proved wrong even though you were sure they were correct. This post addresses the network credential issues in Windows 10 with some brilliant options. On the other hand, if you are facing the computer not showing up on network issues, you can fix that too.
What Are Network Credentials In Windows 10?
A valid username and password that let you access a resource on another network device are collectively known as network credentials in Windows 10. What if blank passwords are all you need to gain entry into another network machine? This dangerous scenario can pave the way to unauthorized access to crucial data causing unimaginable harm. This is the reason why password-protected sharing is enabled by default.
Entering the proper Windows network login credentials saved on a local host enables easy sharing of resources across desktops. If a network user wants to share something with you, they will give you the proper network share login details and set the resource permissions. This straightforward way ensures that resources are always safe in a secure network environment. This is also true of a hidden network in Windows 10.
8 Solutions To Fix Enter Network Credentials In Windows 10 Error
Users have reported that even after entering the proper credentials, they repeatedly get the Enter network credentials in Windows 10 error message. So, this is not a problem with an incorrect username or password option; it could be a malfunction of Windows or something. We have devised adequate solutions to the Enter Network Credentials error message. Try these options and see which one works for you.
1. Assign The Ip Address Properly
Static IP addresses are what work with network credentials in Windows 10. Many devices in the local network are allocated automatic IP addresses that might lead to network credentials error when the network server is changed. For the devices to properly communicate with each other in the network, IP addresses have to be set to static.
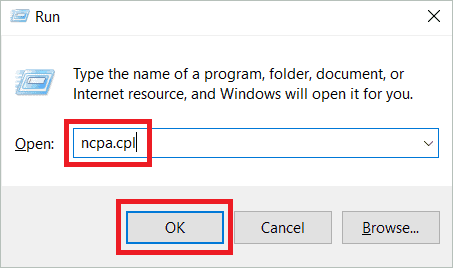
Open the Run application window by pressing the Windows key + R.
Type “ncpa.cpl” in the dialog box and click OK. This opens the Network connections.
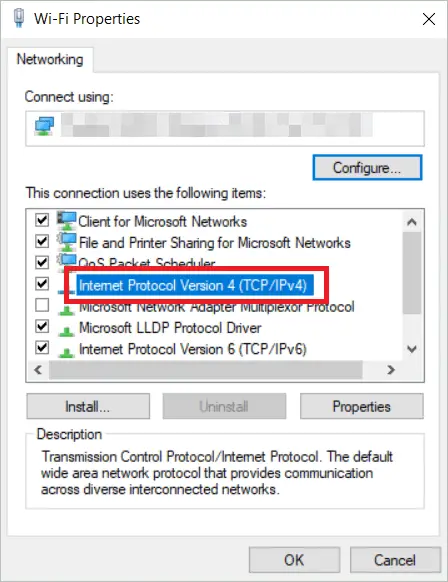
In the right-click menu of the network connection you currently use, select Properties.

Double-click the “Internet Protocol Version 4 (TCP/IPv4)” to open Properties.
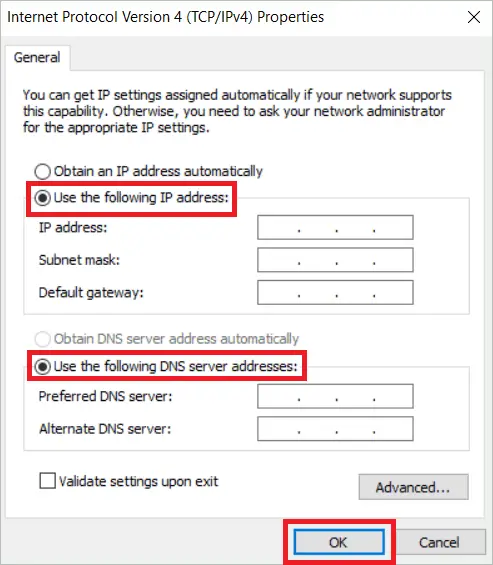
Under the General tab in the Properties window, select the radio button “Use the following IP address” and give the appropriate values in each box. Similarly, enter the Preferred DNS server and Alternate DNS server address values. Click OK. Now, you have set a static IP address to prevent network credentials prompt from appearing.
2. Use A Username And Password Instead Of A Pin
All versions of Windows 10 allow you to log in using different authentication methods, including a PIN code. However, experts suggest that this sign-in option is not a strong security measure compared to an actual username and password. So, stop using a PIN code for login if Windows security is not letting you log in to other computers in the network.
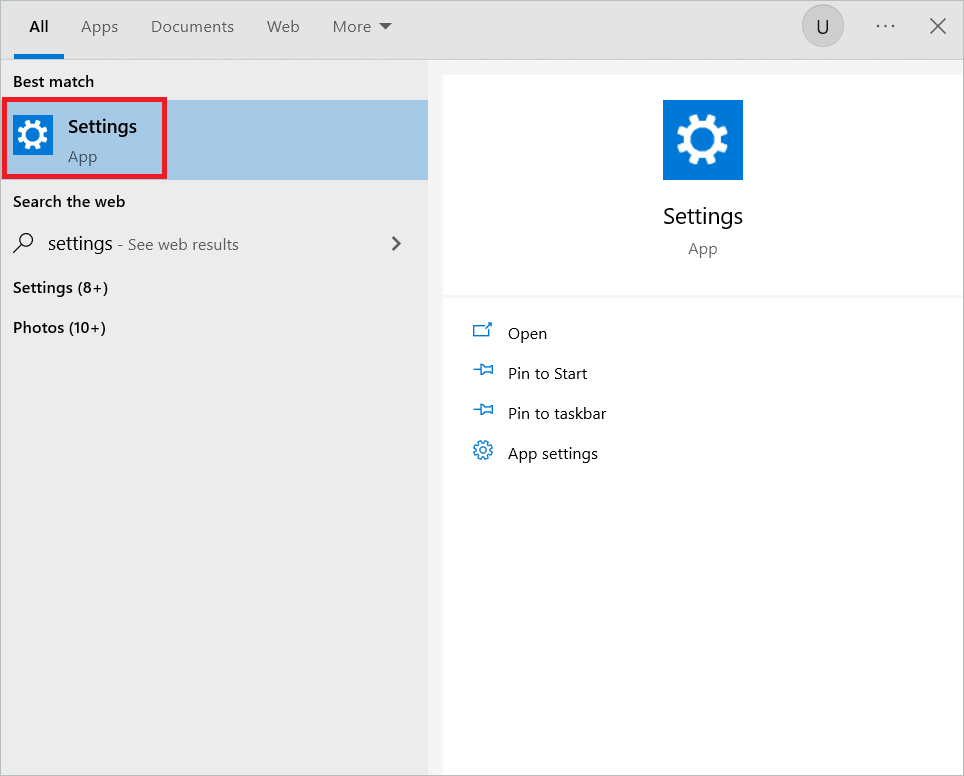
Type “Settings” in the search box and open Settings.
In the Settings window, select Accounts.
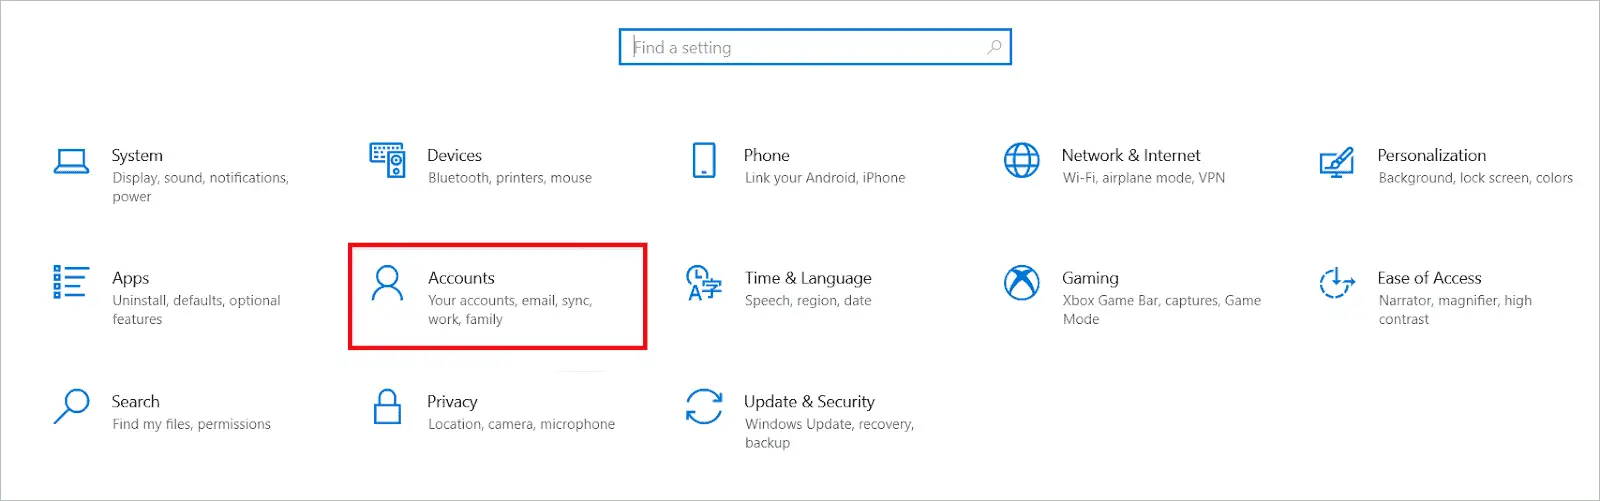
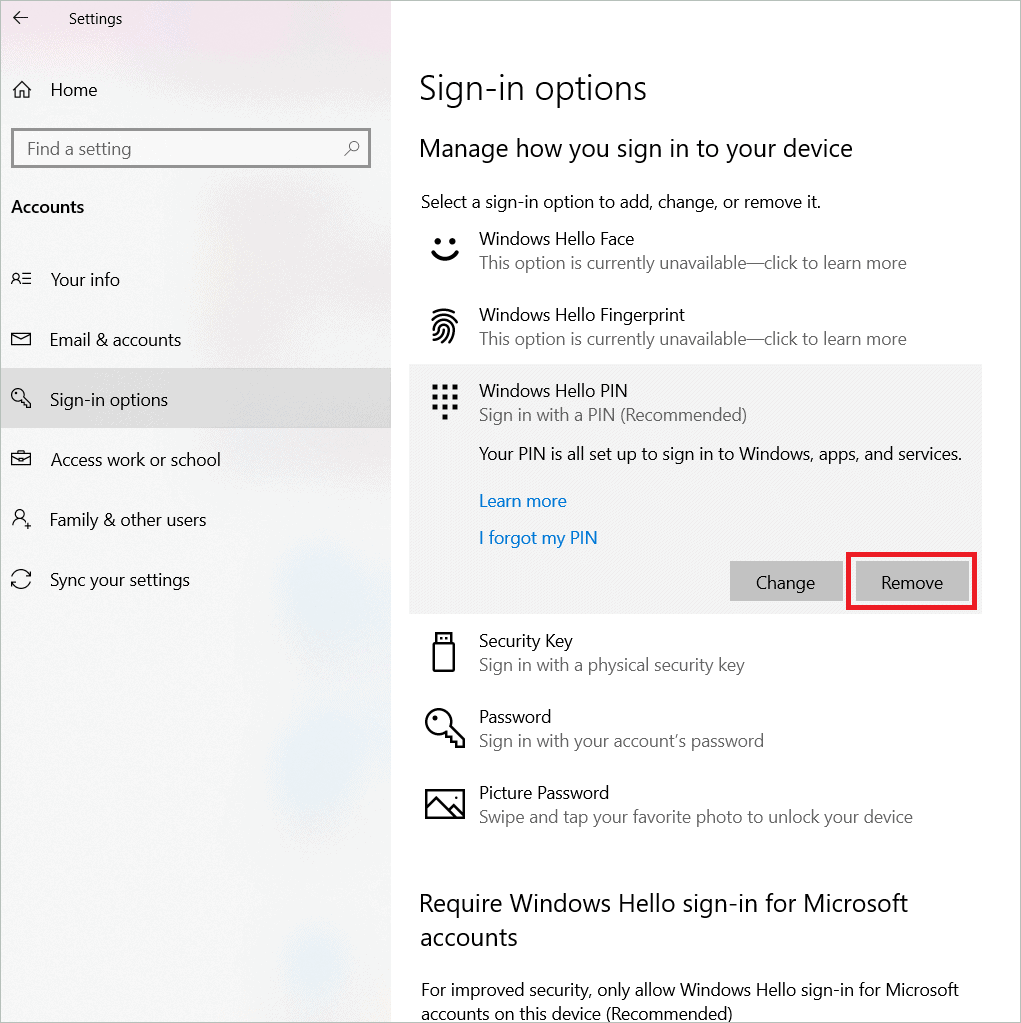
In the left pane of the Accounts window, select Sign-in options. Then, choose Windows Hello PIN on the right side and click “Remove” to no longer use it as a login method.
3. Turn Off Password Protected Sharing
Protecting your network folders and files using a password is a best practice you must follow when working in a network. When you have not set a password, anyone who has network access can reach your public folders and shared files. When a password is in place, there will be no unwanted access. But deciding not to use a password can help solve the issue of Enter network credentials in Windows 10.
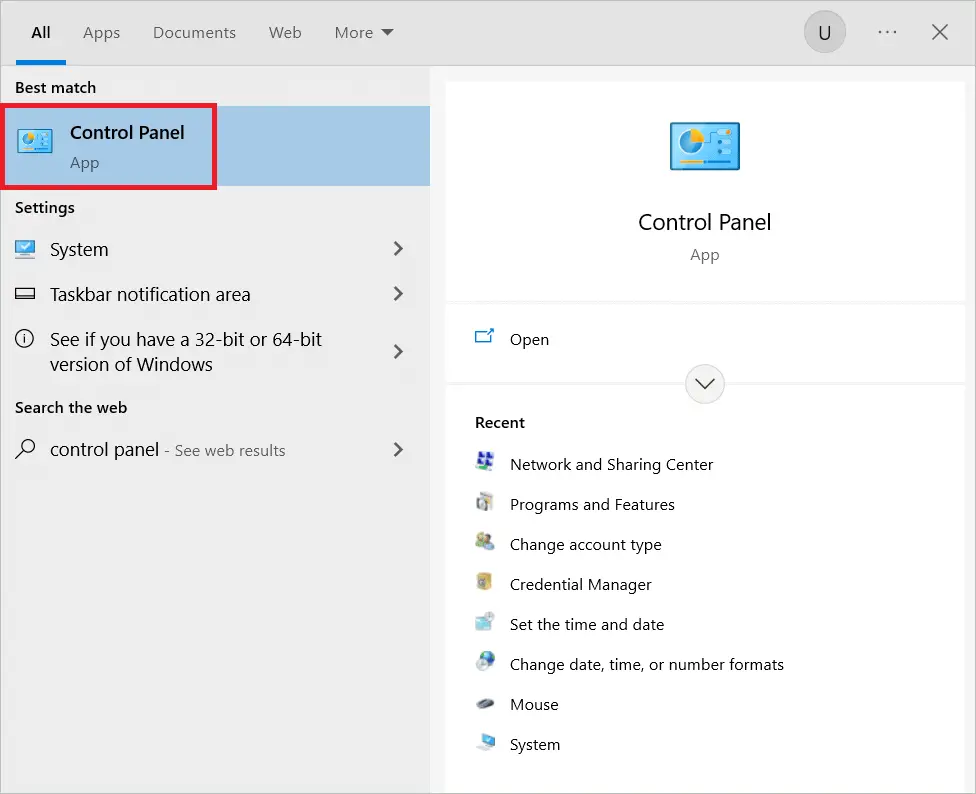
Type “Control panel” in the search box and open the Control Panel window.
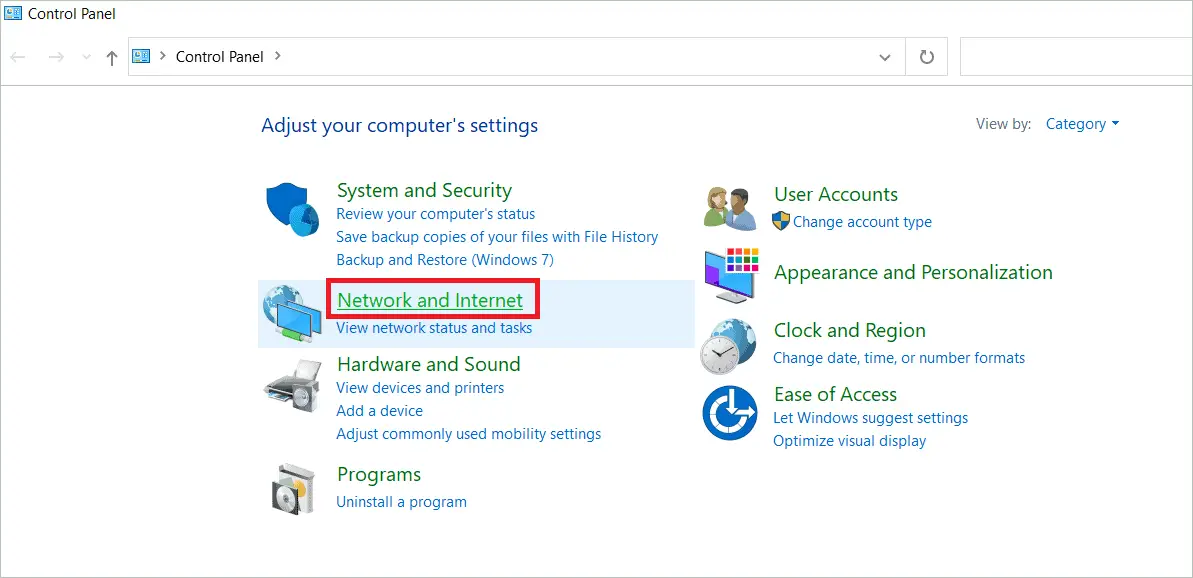
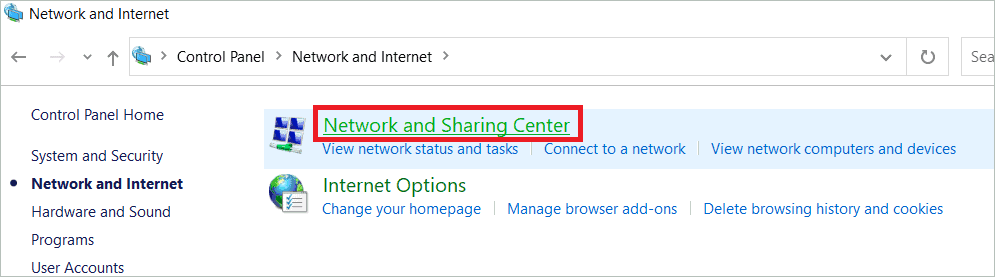
Select “Network and Internet” from the list of options.
Now, click “Network and Sharing Center”.
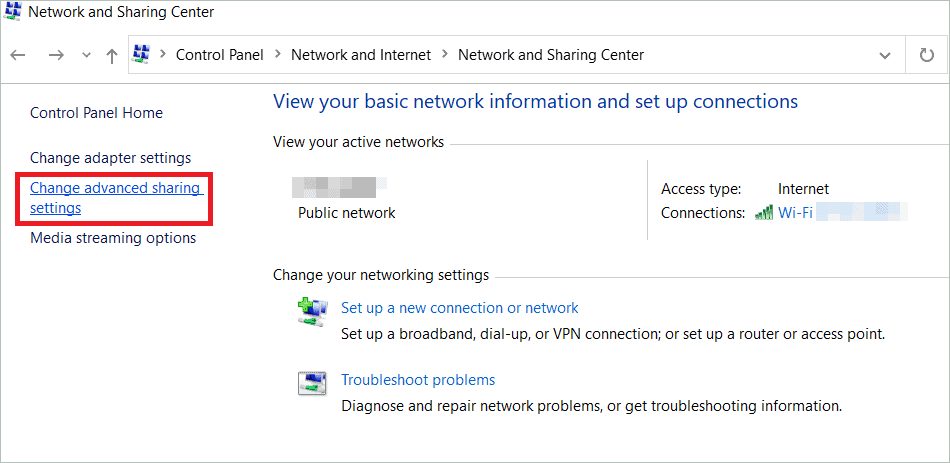
Click “Change Advanced Sharing Settings” seen on the left side.
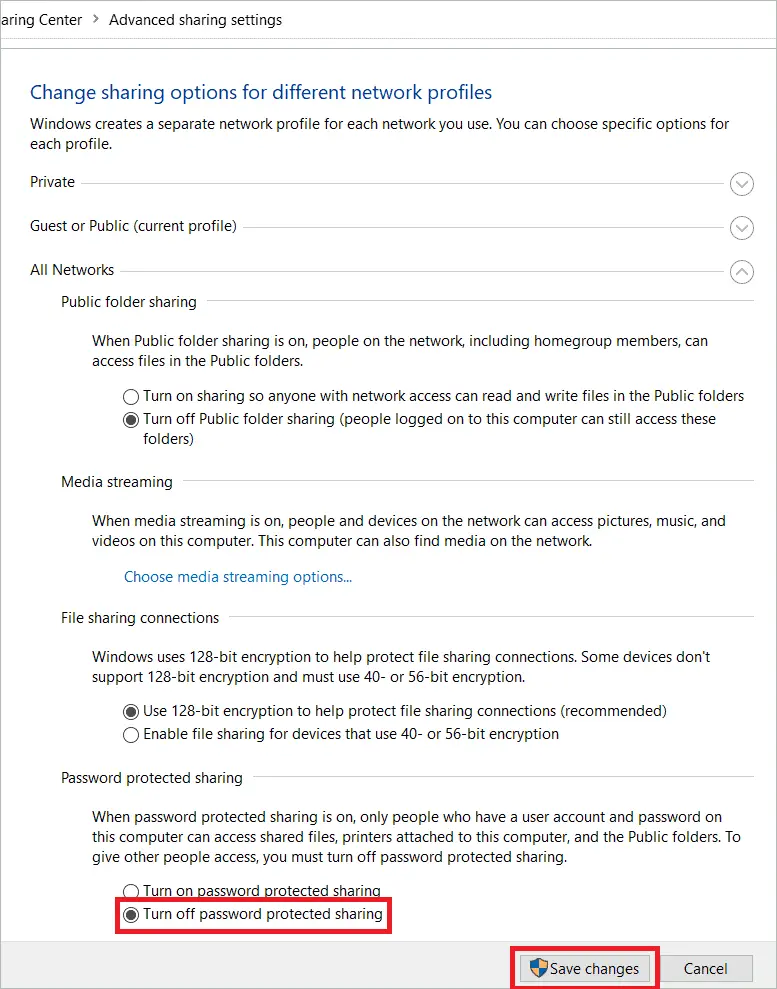
In the next window, tap on the arrow to open All Networks. Under Password protected sharing, select the radio button to “turn off password protected sharing.” Click Save changes.
4. Add Network Credentials To Credentials Manager
Windows has a special place called Credential Manager, which saves the network share login details like addresses, usernames, and passwords. If the credentials you are trying to use to connect to the shared network location are not stored in the Credential Manager, you could end up with an error message. Making them cached network credentials in the Credential Manager is the best solution to resolve this issue.
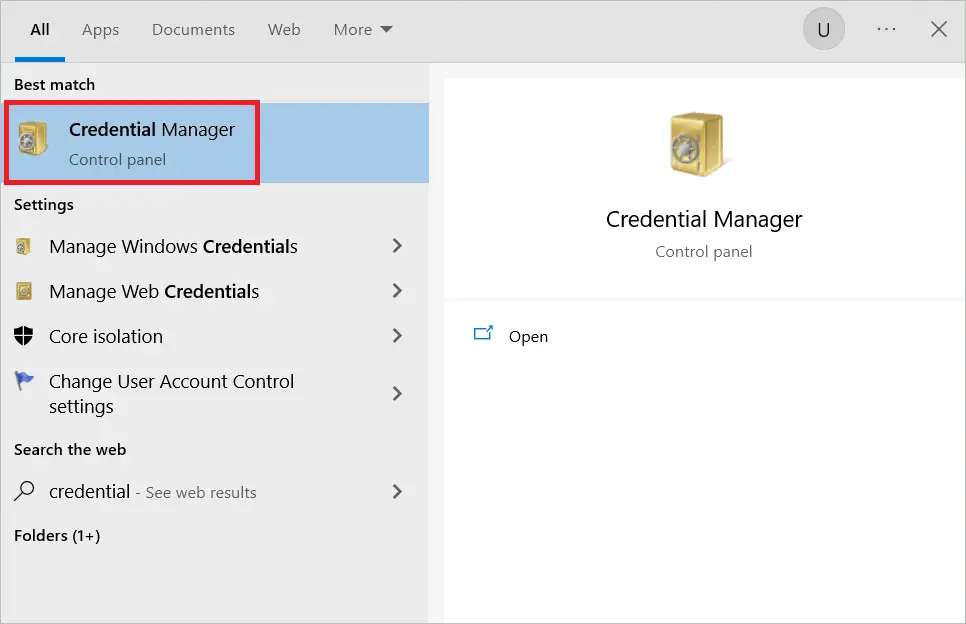
Type “Credential Manager” in the search box and open Credential Manager.
Click Windows Credentials > Add a Windows Credential.
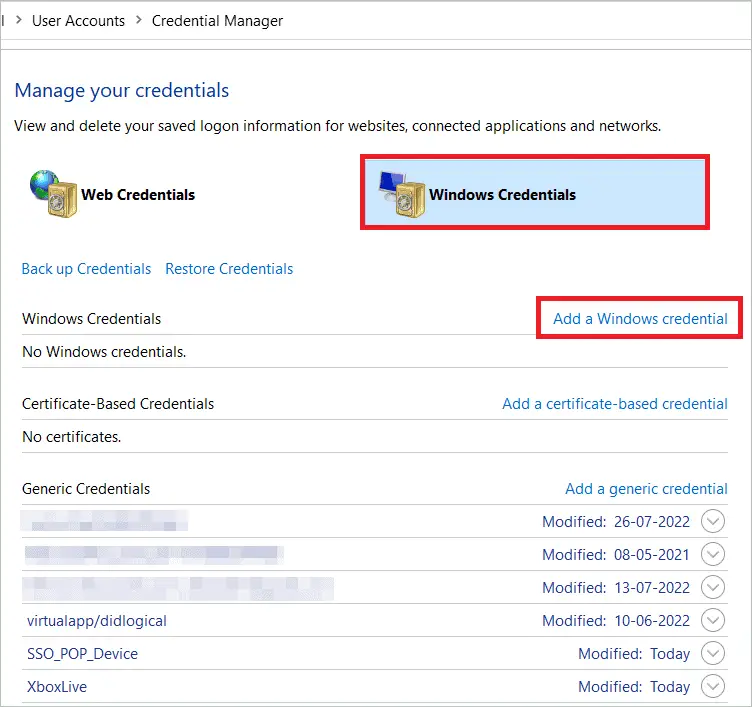
Here, fill in the network address and network credentials input fields, and click OK.
5. Use Microsoft Account Credentials
If you have a Microsoft account used to sign in to Windows 10, use the same username and password of this account to gain entry into devices in the local network. Use this method instead of using the login credentials of your local account. If you are lucky, this might work, as with a few other users who could solve the network credentials in Windows 10 issue. However, if you are concerned about the security of your device, consider using a Virtual Private Network program that provides satisfactory protection.
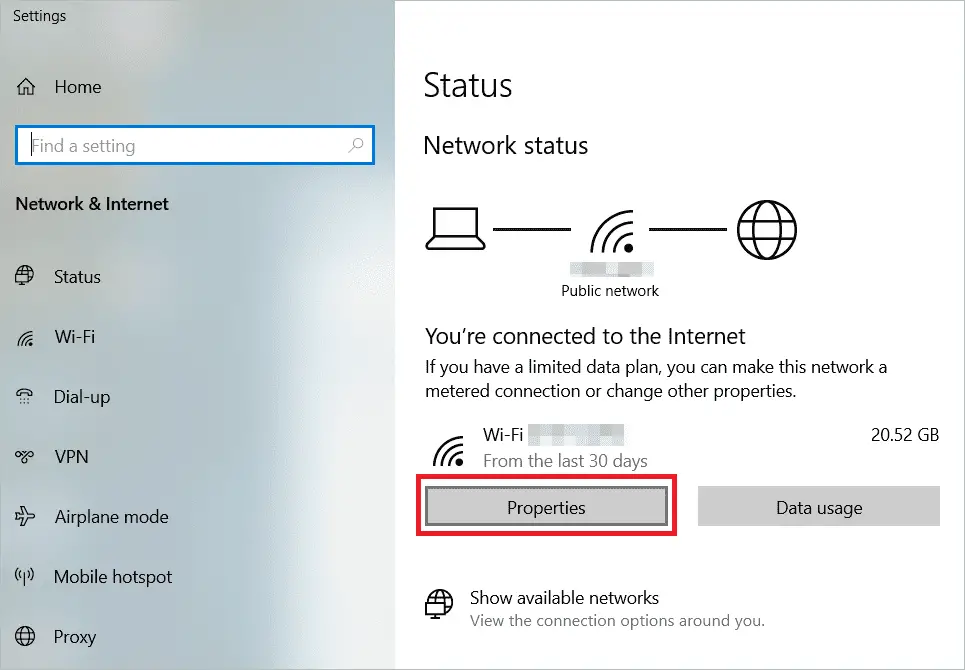
6. Set Your Connection To Private
It is common knowledge that public networks on Windows are not as secure as private networks. Anybody can access networks that are public, and this includes malicious users as well. Therefore, if your device is connected to a local network, it is a good idea to change the network location to private to resolve the issues with network credentials.
Find the network icon in the taskbar and right-click on it to open Network & Internet Settings.
In the Network & Internet Settings window, click “Properties” seen under Status.
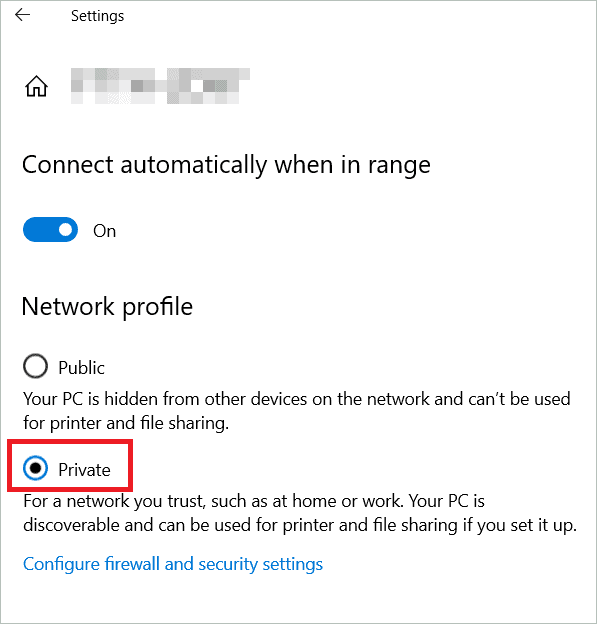
In the Properties window, select the “Private” radio button to set the connection to private.
7. Change Advanced Sharing Settings
Some Windows 10 versions can only use this method of tweaking the advanced settings. But it is worth trying this option if the earlier methods failed to work. The idea is to let Windows manage the HomeGroup so you will not be asked to enter network credentials in Windows 10 when accessing a network computer. For this, you have to navigate to “Advanced Sharing Setting > HomeGroup Connections” on your network profile. Let’s see how.
Type “Control panel” in the search bar and open the Control Panel window.
Go to Control Panel > Network and Internet
Now, click “Network and Sharing Center.”
Click “Change Advanced Sharing Settings,” seen on the left side, to adjust the advanced sharing options.
Select the radio button “Allow Windows to manage homegroup connections (recommended)” seen under HomeGroup connections. Then, click “Save changes.”
8. Change Your Security Policies
When you are logged in as an Administrator in a domain environment, you can change the security policies of your computer to solve the enter network credentials access error. Remember that this option applies only to the Pro and Enterprise versions of Windows and not the Home version.
Open the Run application window by pressing the Windows key + R.
Type “secpol.msc” in Run and click OK to open the Local Security Policy console.
Click Local Policies > Security Options in the left pane.
On the right side, you will see “Accounts: Limit local account use of blank passwords to console logon only”. Double-click on the option to open the Properties window.
Select the radio button “Disabled” on the Properties page.
Click “Apply” and then “OK” in the confirmation window. Restart your system.
Final Thoughts
When your computer is connected to a local network, you will need to access network resources very often. This is especially true if you are using a network at your workplace. Therefore, while security is essential, it would be inappropriate if you get the Enter network credentials in Windows 10 message frequently.
The feature that asks for credentials is enabled so that no unauthorized person accesses resources without proper permissions. But this must not be at the cost of the precious time of legitimate users. Try the effective solutions explained above to discover why you are getting the network sharing issue and what can be done to resolve them.


