Key Takeaways
- To whitelist an email means instructing Gmail to direct emails from a specific sender to an inbox.
- Whitelisting email addresses ensures that no critical emails get filtered.
- Several methods can inform the email client that a sender or group is legitimate.
Any person with an email account who receives quite a few emails daily must be familiar with the concept of spam. Gmail uses artificial intelligence and spam filters to keep away unwanted messages that come ceaselessly. In the process, if you lose essential emails, then you should know how to whitelist an email in Gmail. Most of the biggest email providers like Apple Mail, Windows Live Mail, AOL Mail, and MSN Mail allow whitelisting emails, but here we look only into Gmail.
Whitelisting an email contact informs the email client that an email address is legitimate and the messages from it should always be delivered to the email recipient’s inbox. There are several ways you can do this, but some will only increase the probability of receiving the emails in the inbox. This guide will help you choose the correct method to ensure your emails always fall into the right folder. When you sign into Gmail with different user accounts, the steps must be repeated for each account. But before that, let us understand the meaning of whitelisting an email.
What does it mean to Whitelist an Email?
Whitelisting an email is when you instruct Gmail that a particular sender email address or group is legitimate and always wants to see their messages in the inbox. When you take this step, the email client will not apply the filter algorithms to the emails from that sender. Instead, they will be directed to the inbox without any other action from Gmail.
Once you have made it clear to Gmail, it will follow the sender’s instructions for all future emails. When you whitelist an email, remember to correctly give the email address or domain name, so the unwanted emails do not end up in your inbox. Read further if you want to know how to whitelist an email in Gmail.
How To Whitelist An Email In Gmail
Adding your favorite email address to the Google contacts indicates to the email client that the sender in question is someone important. Henceforth, the emails from the sender will arrive in the inbox, not the spam folder. Of course, the spam filter in Gmail is so strong that you cannot expect this to happen every time. But there are more chances that the email from addresses in your Gmail Contacts list will not be considered spam.
So, let us see how to whitelist an email in Gmail by adding a sender email address to the contact list. Remember to add the contacts if you have set up Gmail for business.
Add Contact in Desktop Browser
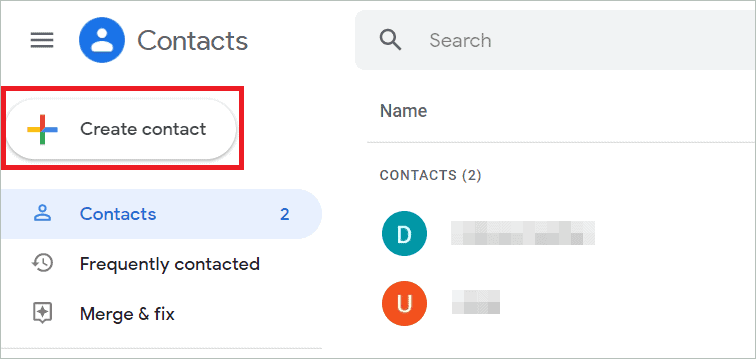
Go to the contacts link, contacts.google.com, on your desktop browser and click “Create contact” at the top of the left menu.
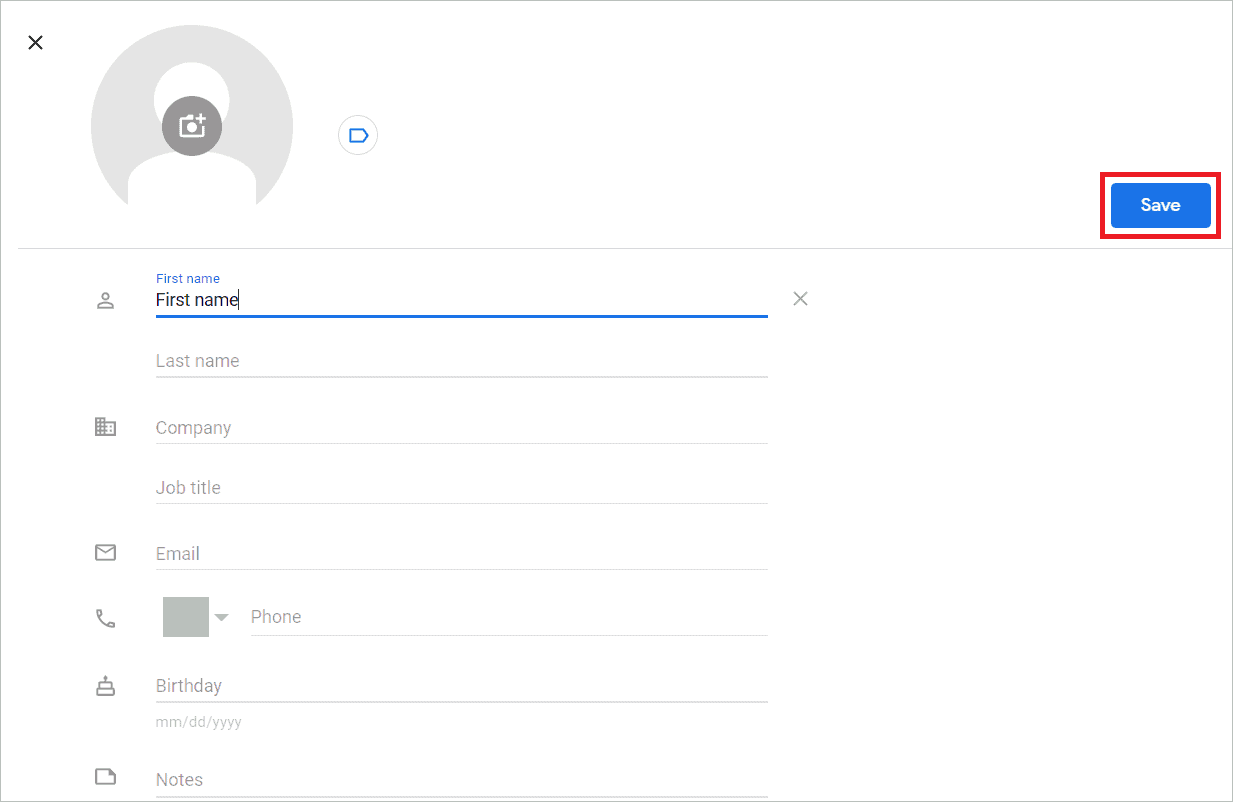
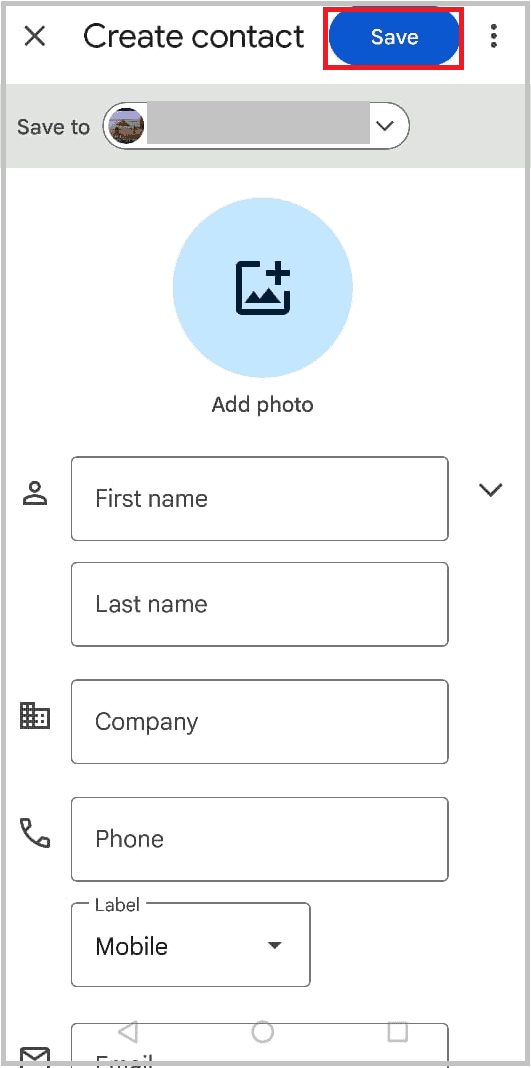
Enter the details of the contact and click “Save.”
Now, you will receive all the emails from this contact.
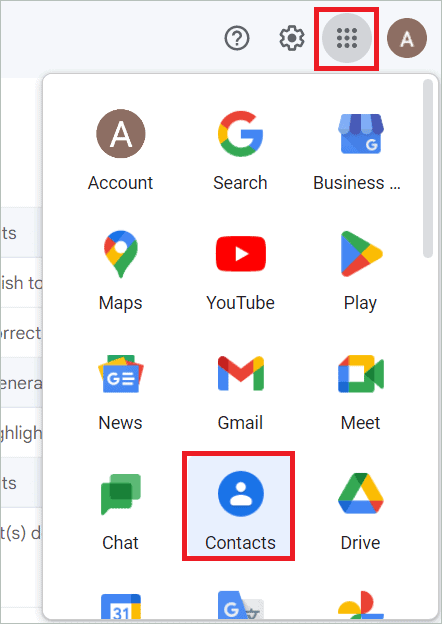
Alternatively, click the nine-dotted menu on the upper-right corner of the page to open the Google apps list. Next, select Contacts to go to the contacts page.
From here on, repeat the above steps to add a contact.
Add Contact in Android Phone
You must install the Contacts app to add a contact to your Android phone. After installing the app, follow the given steps, so you will receive legitimate messages from the added contact.
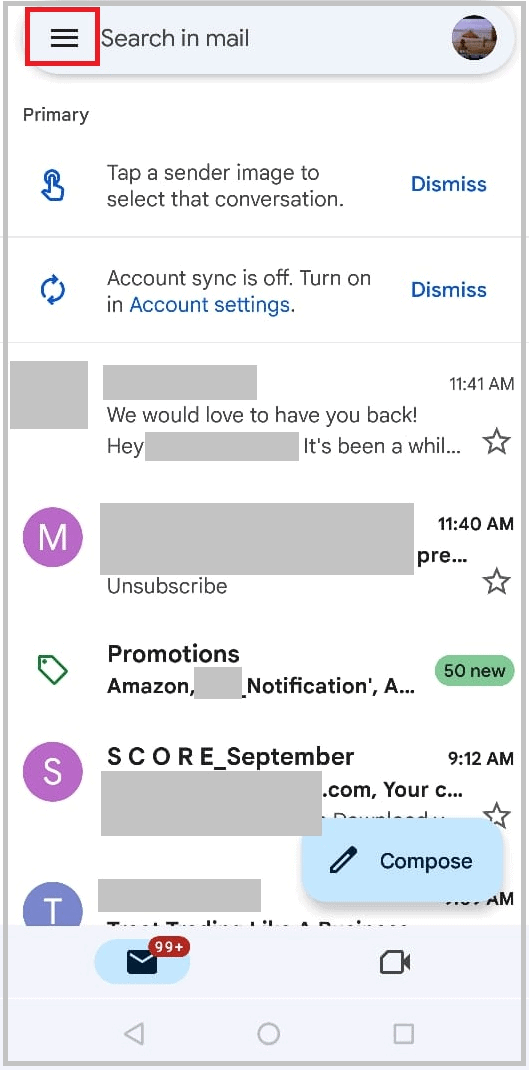
Open the Gmail app on your Android phone. Tap on the three horizontal lines in the top-left corner.
Scroll down and tap on “Contacts.”
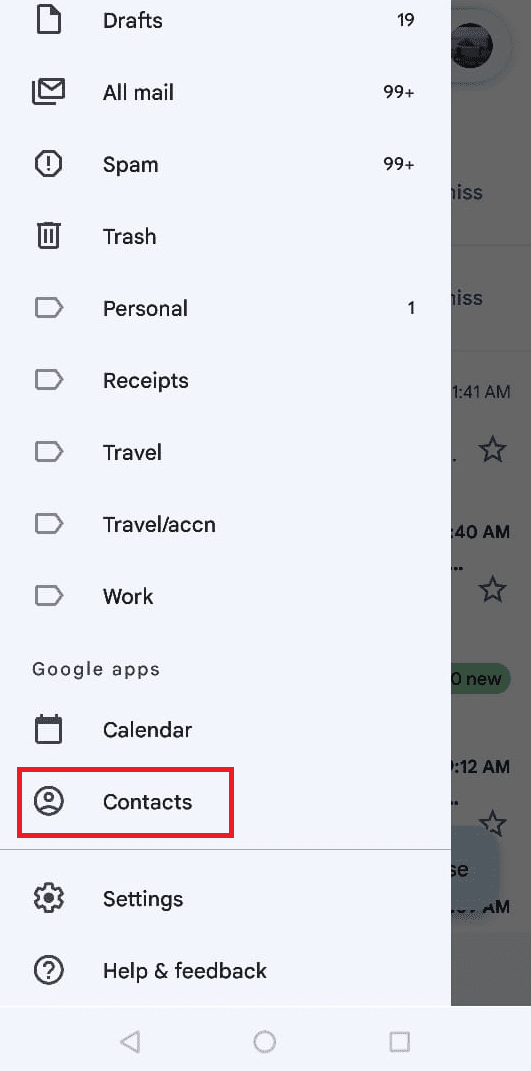
Tap on the ‘+’ sign on the bottom right, which is the add contact button.
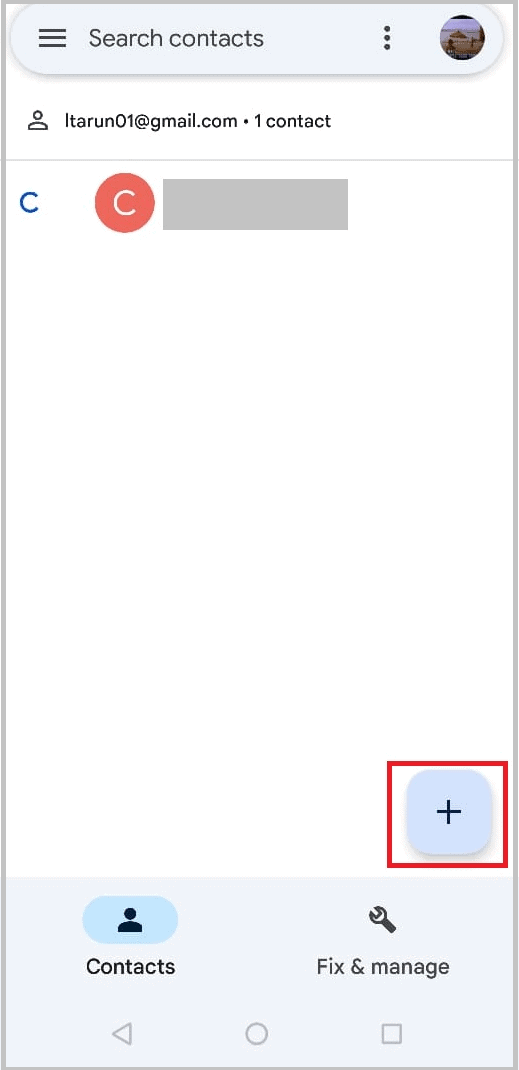
Now, fill in the contact info of the email marketer or the sender whose email message you want to receive. Tap on the “Save” button; the contact is now saved.
Create a Filter
An email filter is a powerful feature that separates legitimate emails from countless spam emails. Managing your emails becomes very easy once a filter is in place. For the question of how to whitelist an email in Gmail, the best solution would be to create a filter. You will create a filter that looks for a particular sender and never sends an email from that sender to the promotional inbox or spam folder. Given below are the step-by-step instructions to create a filter.
Log in to your Gmail account in any browser.
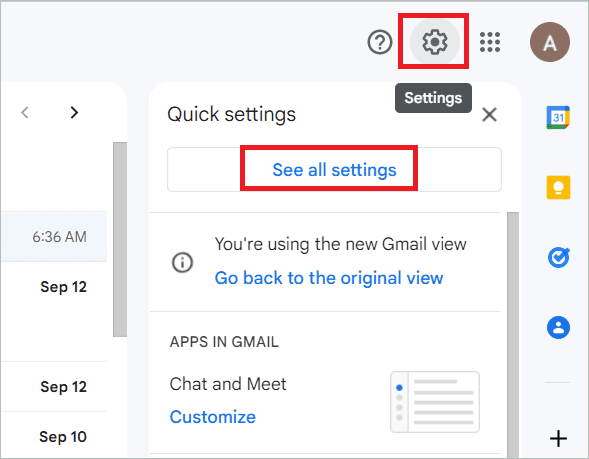
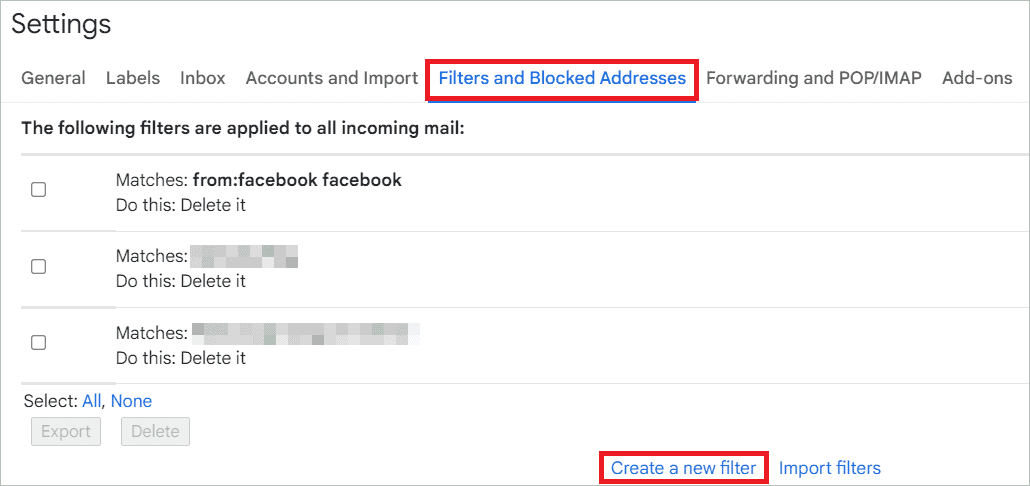
Click the gear icon (the Settings button)in the top-right corner to open Settings. Click “See all settings.”
Select the “Filters and Blocked Addresses” tab and click “Create a new filter.”
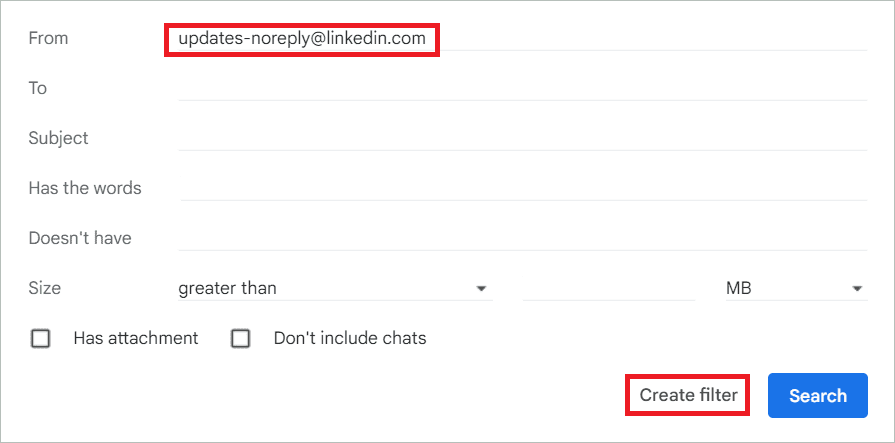
In the From field, enter the exact email or a sender list whose emails should not be subjected to email blacklisting. After specifying the filtering rule, click “Create filter” in the pop-up window.
In the filter settings window, check “Never send it to Spam” and click “Create filter.”
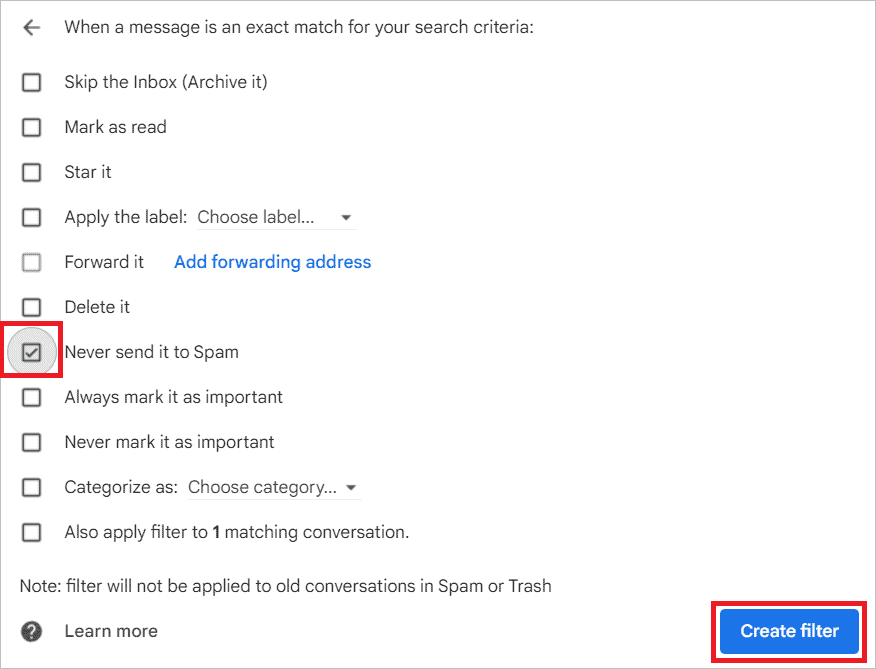
Now, the email address is whitelisted, so you will never miss an email from it.
Whitelist a domain in Gmail
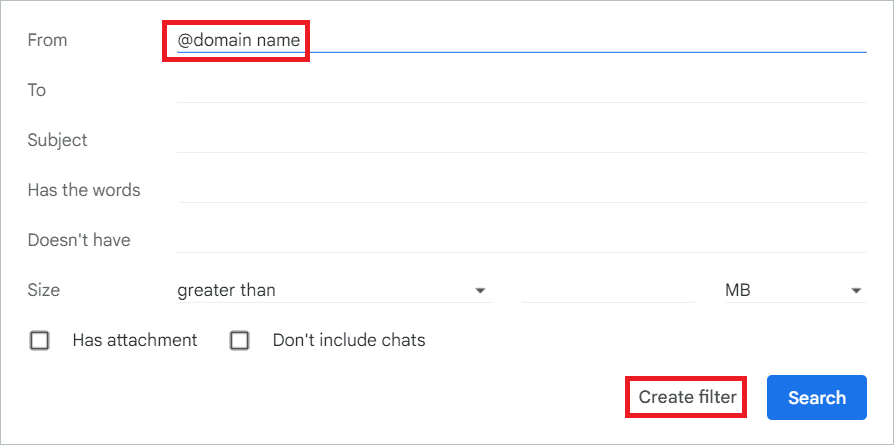
Now that you know how to whitelist an email in Gmail using a filter, here is a similar method to whitelist an entire domain. The technique is helpful if you want to get incoming emails from all the addresses of another business or a vendor. The steps are similar to the ones mentioned above; the only difference is that you enter a domain name in the From field instead of an email address. Also, remember to include the ‘@’ character for domain names, as in the screenshot below.
Report an Email as Not Spam
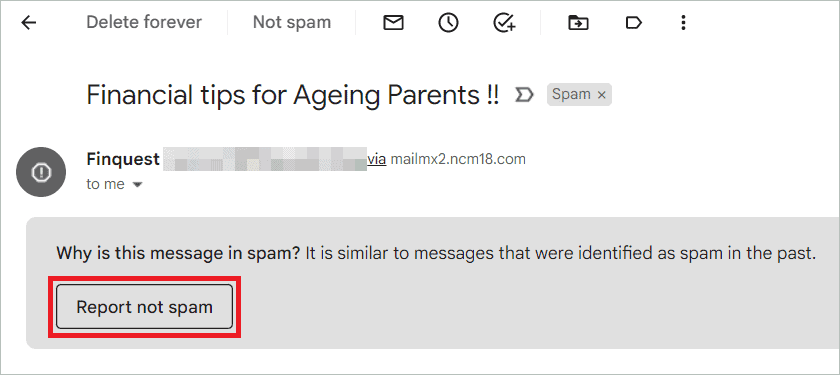
Sometimes, Gmail behaves in unpredicted ways and sends an important email to the bulk folder. In such cases, you can open the email and report it as not spam. When you do this, the email provider is intimated that the email sender is genuine. So the next time you get a similar email, it will be correctly delivered to your inbox. Here is how to whitelist an email in Gmail using Report not spam.
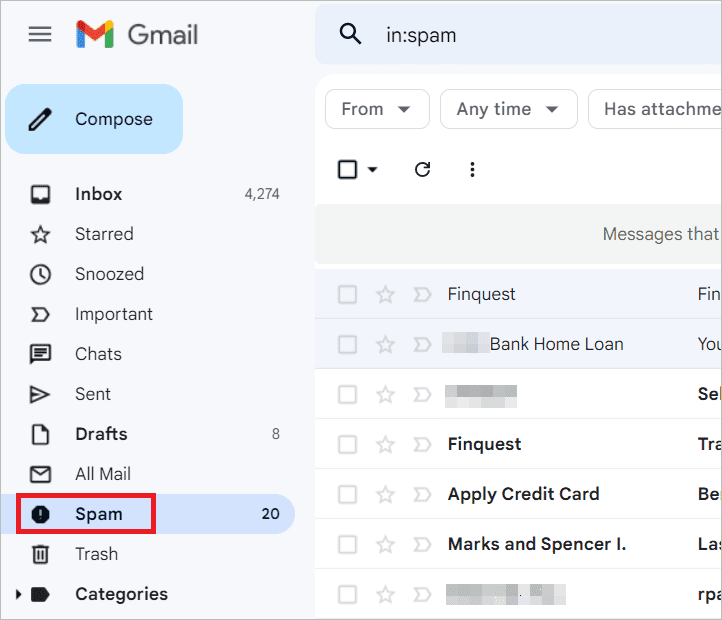
Open Gmail in your browser and select the spam folder from the left pane.
Open the email you want to report as not spam. Then, click the “Report not spam” button to move the email to the inbox.
Drag and Drop to the Primary Tab
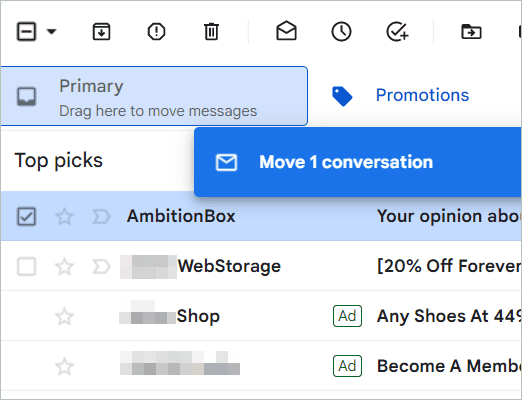
Critical emails can be lost if they are accidentally dropped into the Promotions or Social tab. You can move it to the Primary inbox with a very simple process. Once you do this, you can get all future emails from that particular sender in the Primary tab. Read on to find out how to whitelist an email in Gmail by dragging and dropping it.
Open Gmail in your web browser and look for the email you want to move. Here, we are moving an email from the Promotional to the Primary tab.
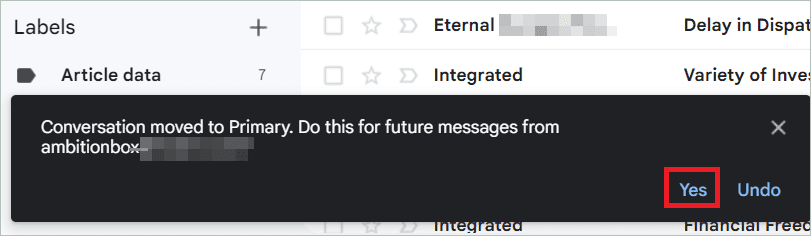
Once you drag and drop the email, you will be asked if you want to do the same for future messages from the sender. Click “Yes.”
Make an Approved Sender List for a Business Account
If you own a business account, you will have many additional features that are not present in a regular Gmail account with only a few basic features. Administrators can configure some advanced settings for Gmail, like creating advanced filters and directing messages to a specific address. Let’s check out the steps for how to whitelist an email in Gmail.
Log in to Gmail using an administrator account to open the Google Admin console. Next, go to Apps > Google Workspace > Settings for Gmail > Advanced Settings. Create a senders’ email list and click “Save” to save the changes. It will take 24 hours for the changes to reflect in the account. Remember that your senders’ list can include an entire domain and a single email address.
Remove an Email Address From the Blocked Addresses
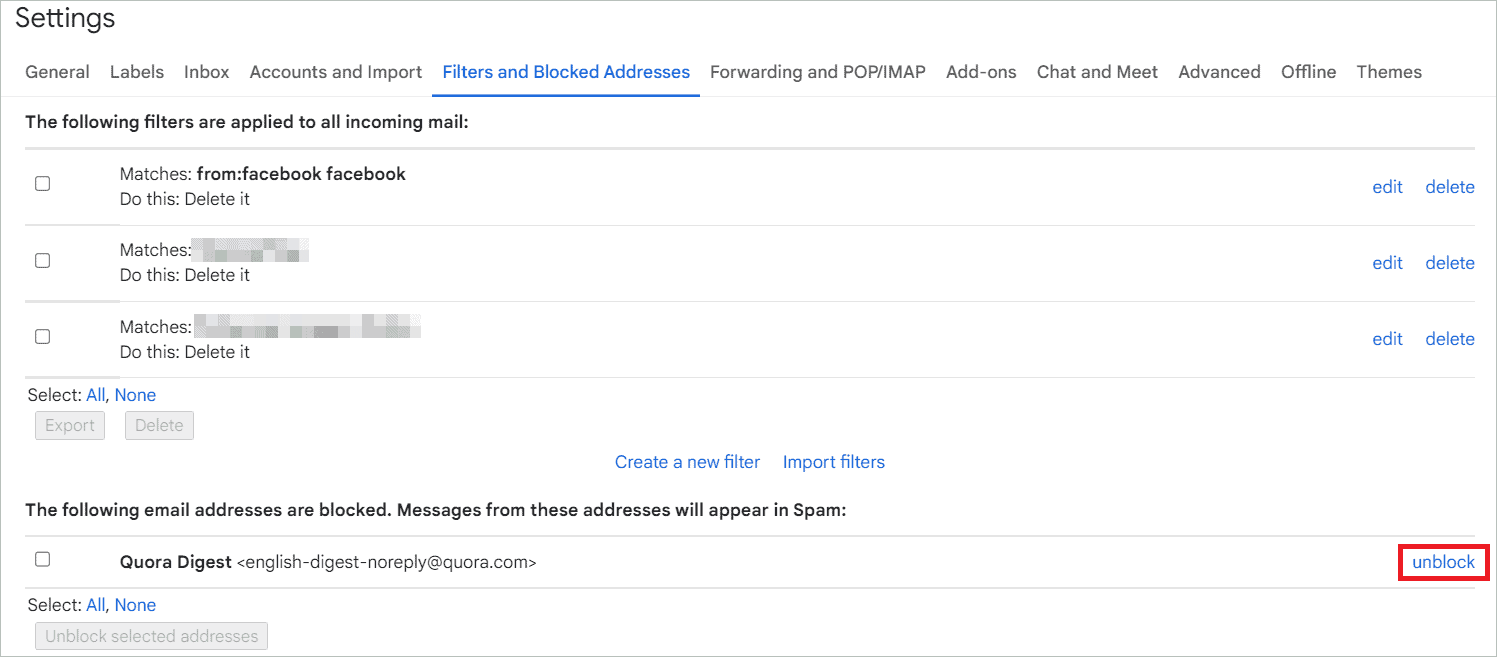
It can happen that you blocked an email address in the past and now want to unblock it. You can block an email address by opening the email, clicking on the three-dotted menu, and selecting Block. The list of blocked addresses is present in the Filters and Blocked Addresses tab. From there, you can unblock it. Here is how to whitelist an email in Gmail by unblocking it.
Open Gmail in your browser and click the cog icon to open Settings. Select “See all settings.”
Select the Filters and Blocked Addresses tab. Here you can see the list of blocked addresses. Find the address you want to unblock and click the “unblock” button.
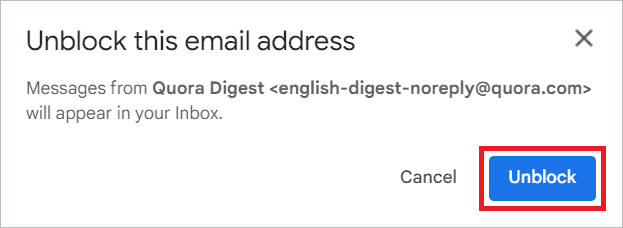
Click “Unblock” on the confirmation screen.
Final Thoughts
Whitelisting an email address can be a powerful way to tell Gmail that you trust a particular sender. It is possible to whitelist safe senders and domains from which emails are delivered. When you adopt a method to whitelist emails, you can avoid the pain of going through each email in the junk folder to check whether it is relevant to you.
Your search for how to whitelist an email in Gmail got us working on a few solutions that will push the necessary messages right into your inbox. You can check which method works best in your case or even try a combination of methods for extra safety.


