Key Takeaways:
- Adjusting microphone settings in Windows 11 is necessary for the best sound input.
- When you add an input device, test the sound volume to see whether you are audible.
- Don’t forget to enable your microphone and set it as the default to ensure there are no audio issues.
Computer peripherals like cameras, microphones, and speakers are of great importance to PC users, whether for entertainment or professional purposes. We are concerned about changing the microphone settings in Windows 11 so that the microphone remains in excellent condition always. Trying out different sound settings for the input device increases the volume and makes it better in quality.
Depending on your specific scenarios, you may want to increase the volume, set a particular microphone as the default device, or enable a device for use. We have answers to all your queries regarding adjusting the microphone settings. Remember that adjusting Windows 11 power settings is vital, thus improving energy efficiency.
How To Change Microphone Settings In Windows 11
Increase The Microphone Volume
The first thing you may want to do with your built-in or external microphone is to boost its volume. Scenarios like work meetings or the usage of some specific apps demand that the microphone volume remains high so your voice is heard. Microphone settings in Windows 11 give you two methods to achieve higher volume levels. In addition, you can use the best equalizer settings in Windows 11 to boost speakers’ volume.
Using Sound Control Panel
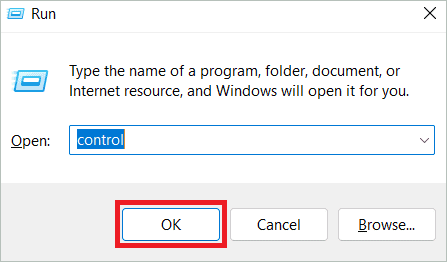
Open the Run command window by pressing the Windows key + R. Type in “control” and open the Control Panel.
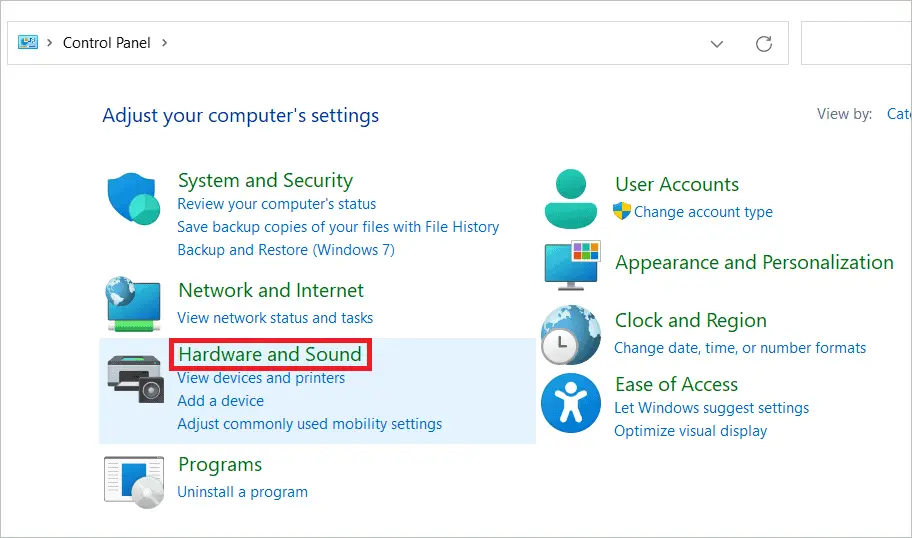
In the Control Panel window, click “Hardware and Sound.”
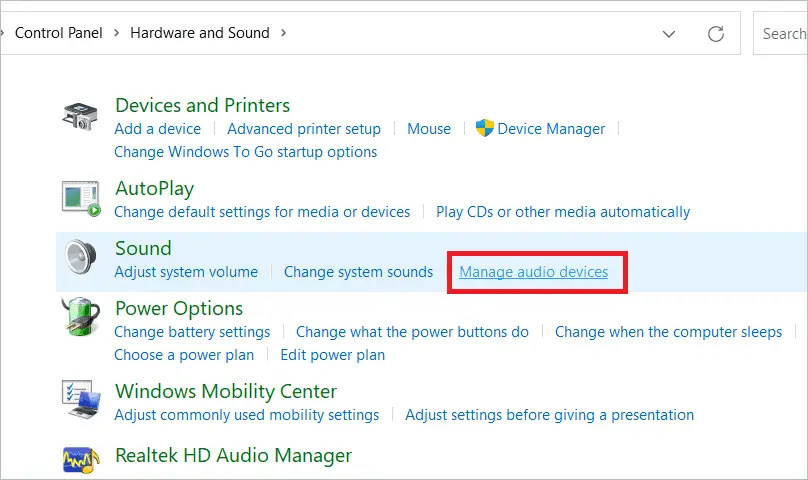
Under Sound, click “Manage audio devices.”
In the Recording tab, select the active input device with a tick and click “Properties.”
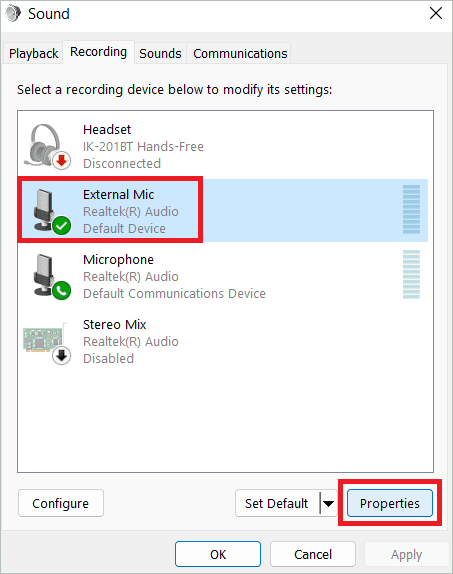
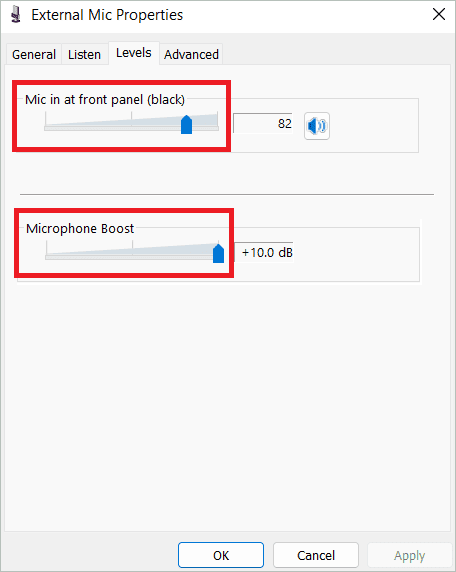
In the Levels tab, adjust the mic volume by moving the slider to the right. If the Microphone Boost option is present, you can also increase it.
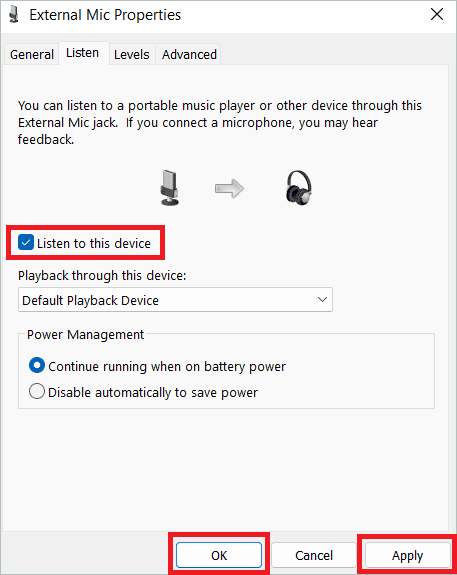
Go to the Listen tab, check “Listen to this device,” click “Apply,” and then “OK.” The system will output a sound for you to check.
Using Settings
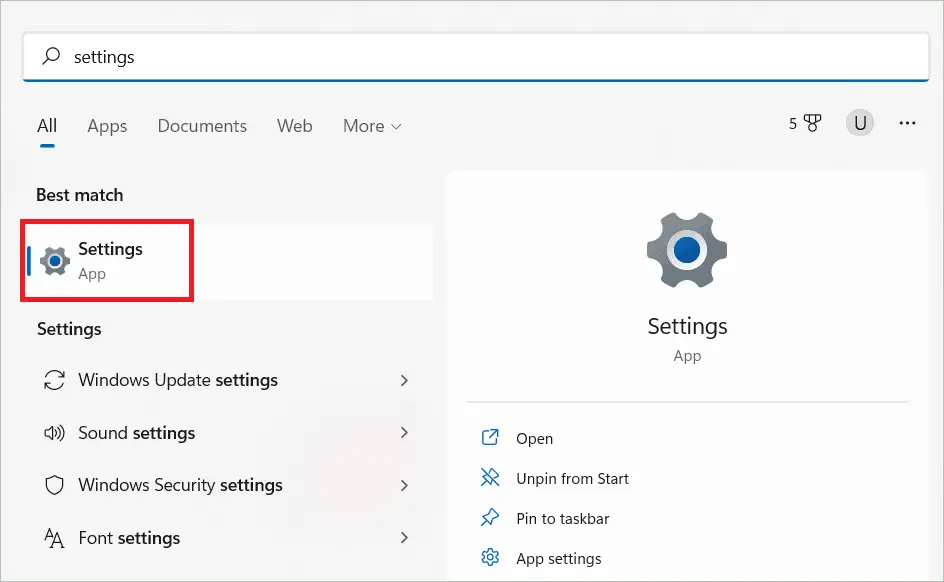
Type “settings” in the search bar and open the Settings app.
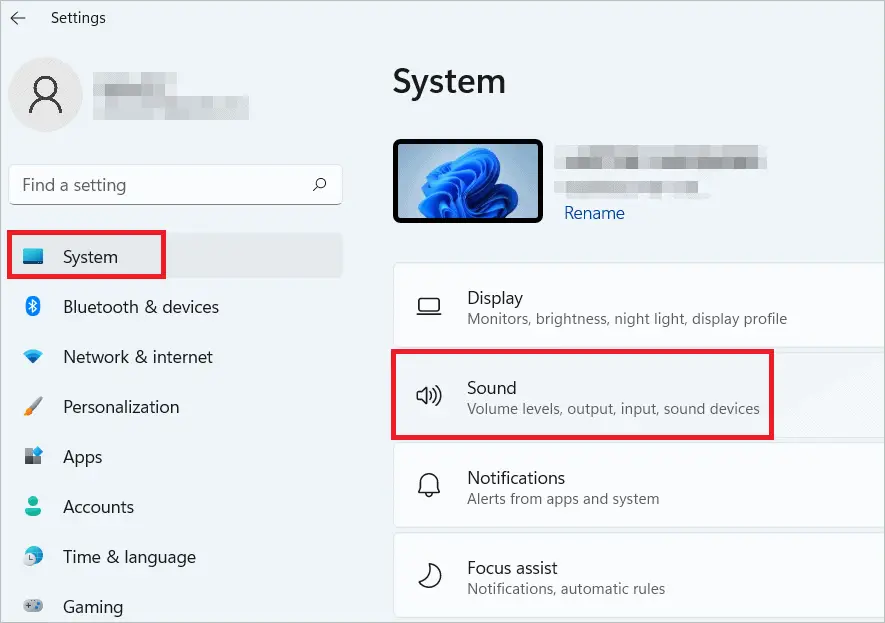
Select “System” in the left pane and “Sound” in the right to open the Sound window.
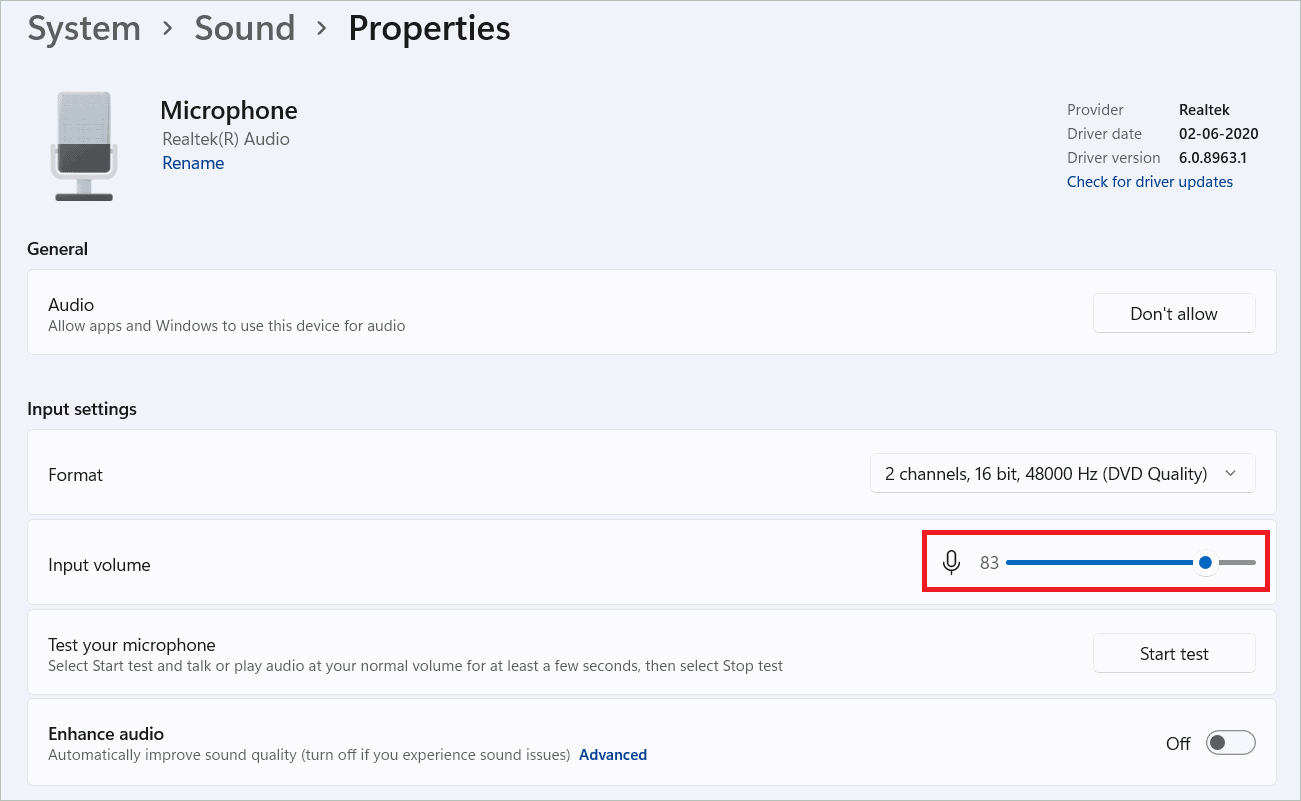
Select “Microphone” under the Input section.
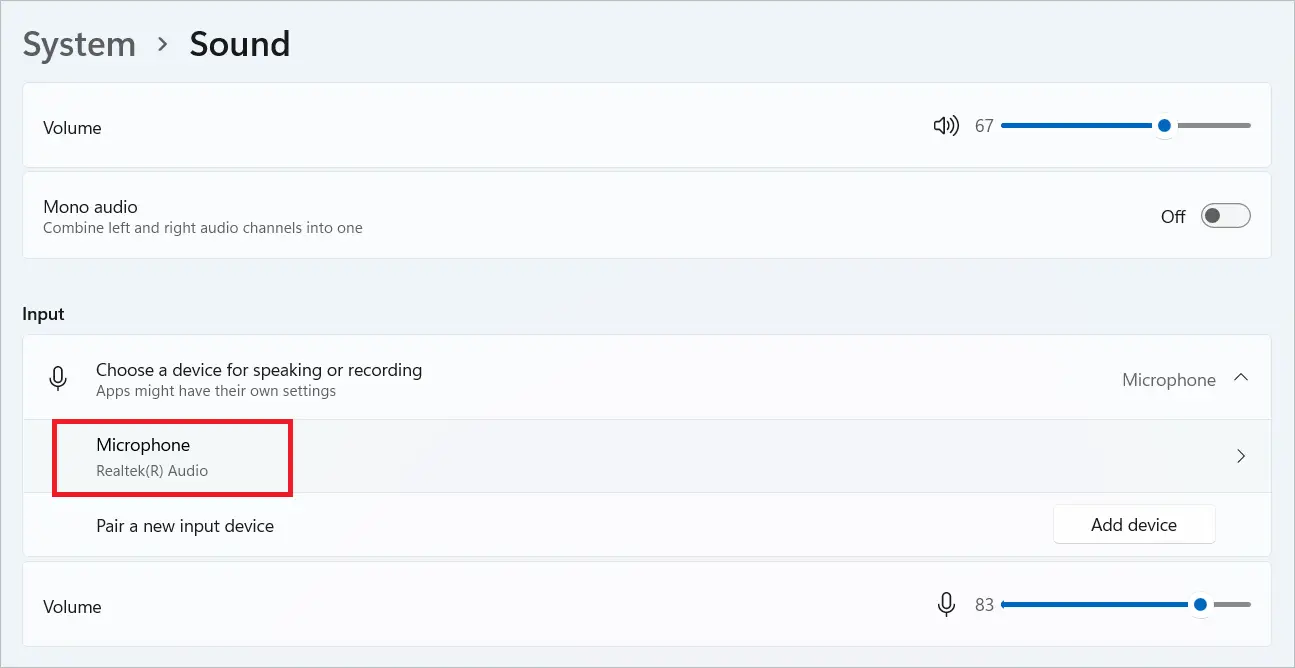
Under the Input settings, use the input volume slider to increase the volume to the desired level.
Add And Test An Input Device
Adding an audio input device using microphone settings in Windows 11 is an important step. The device gets appropriately connected and can only be used as the active microphone by following the proper steps. If you are using Bluetooth devices, pair them correctly. USB ports must be checked if you are connecting audio devices in these ports. Here are the steps to add a device.
Go to Settings > System > Sound.
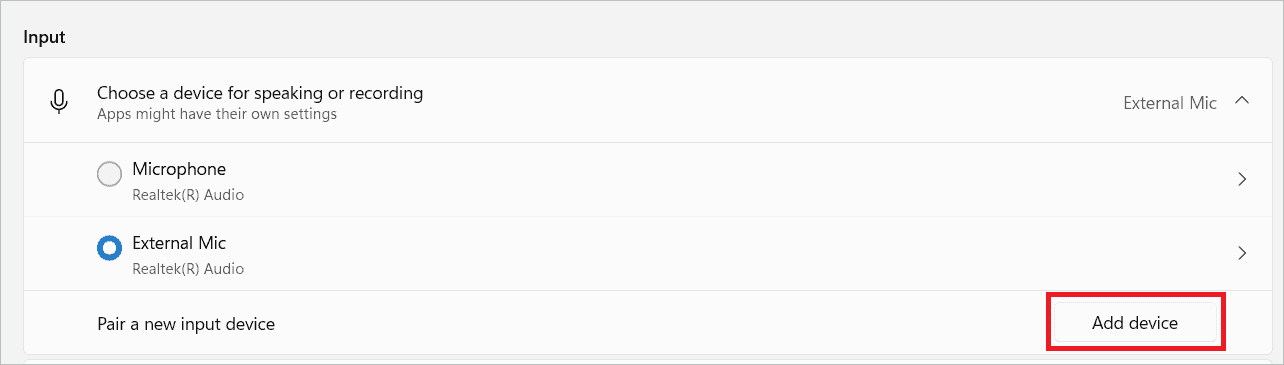
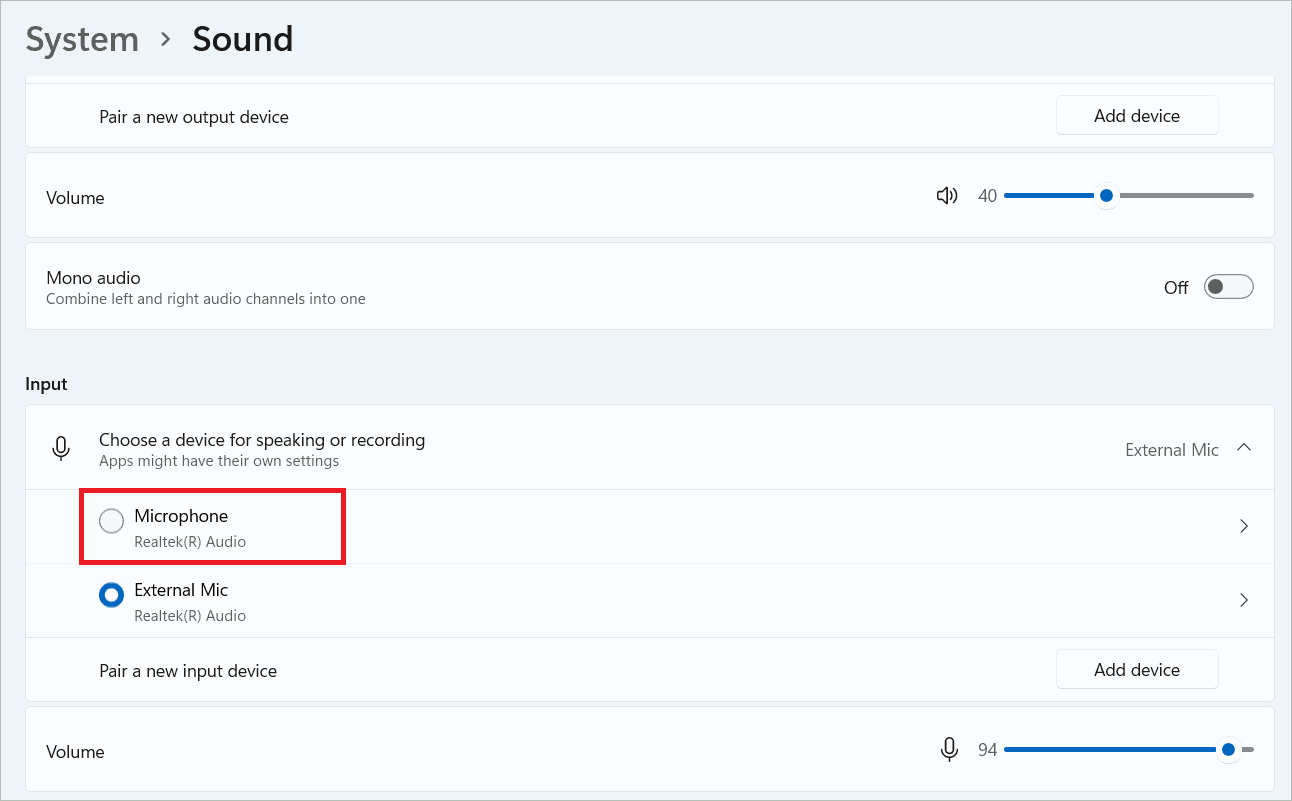
Under the input section, you will see “Choose a device for speaking or recording.” Select a device from the list below as your default input device.
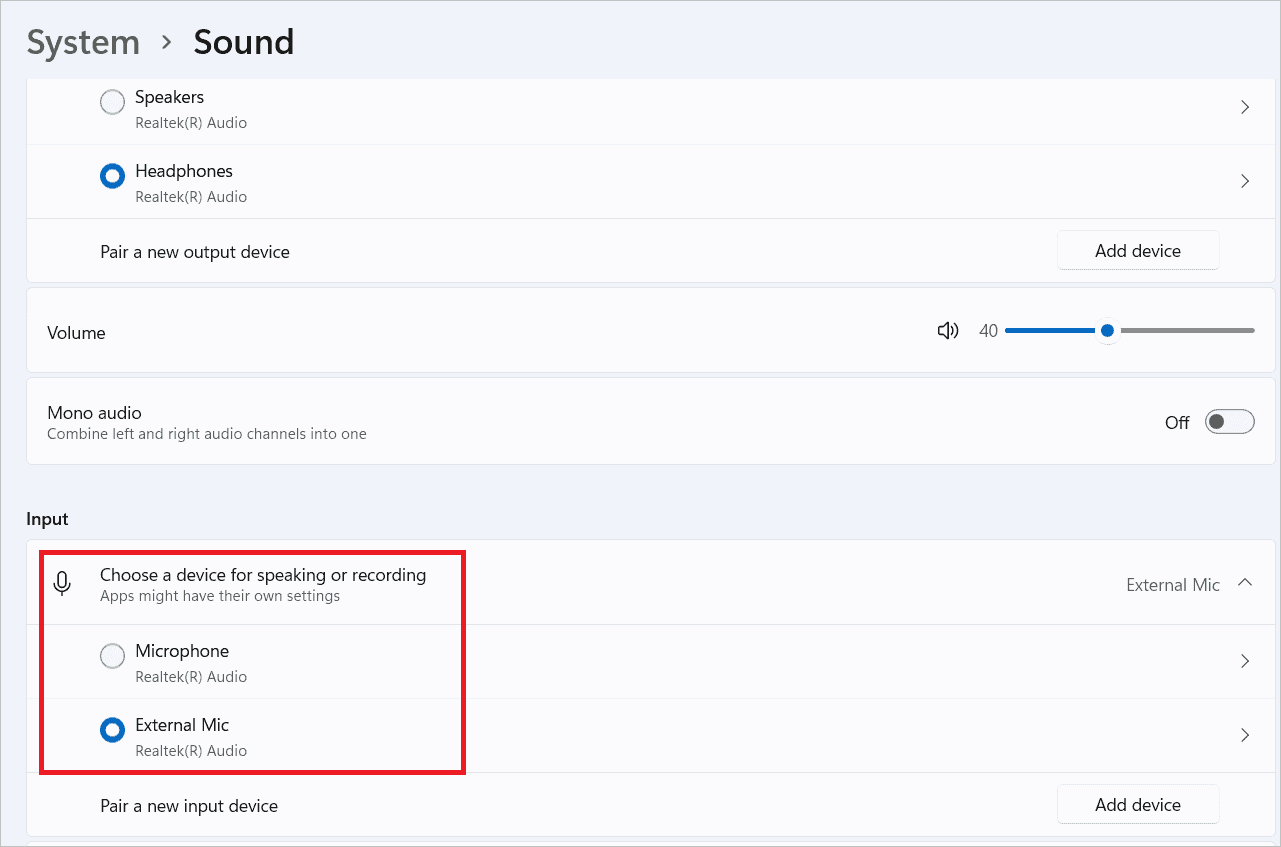
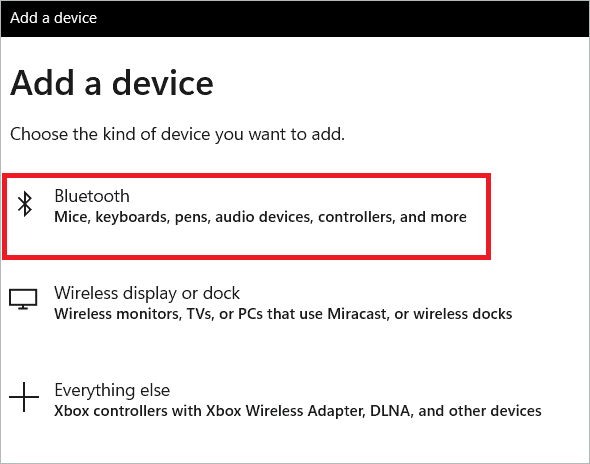
Click the “Add device” button to add a new device.
Select “Bluetooth” in the next window.
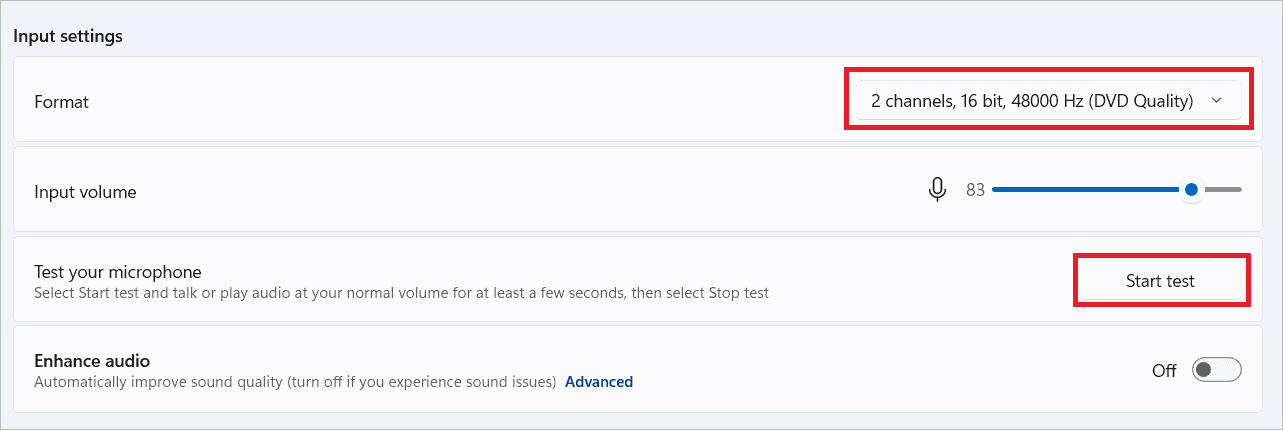
The available devices will be displayed in the next window, where you can select a device. To test your device, click on the device under the Input section to open the device properties.

Check if the audio format is correctly chosen. Then, click “Start test” and speak something into the microphone.
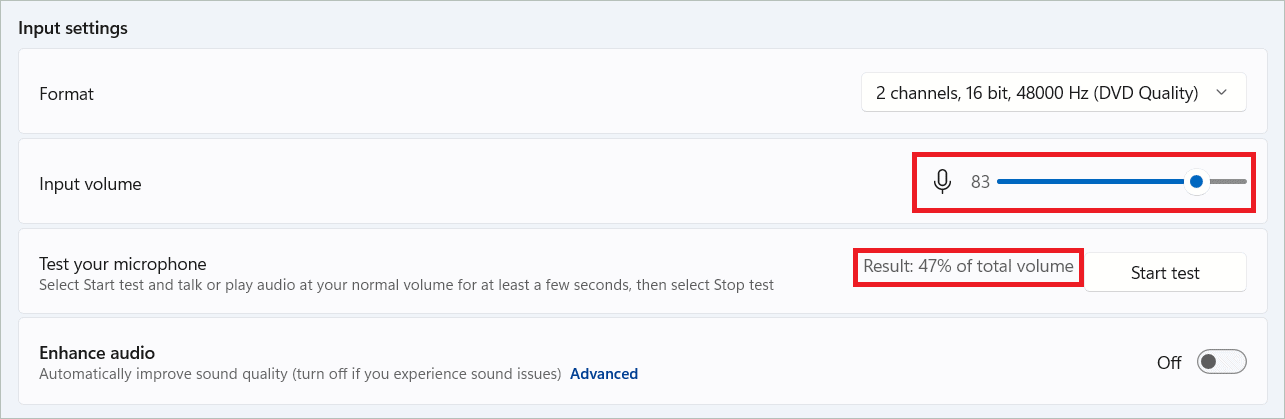
Now click “Stop test.” You will see a percentage value near the button. If it is less than 75%, move the slider to the right to increase the volume.
Set the Default Microphone
You may often connect several input devices via Bluetooth when you are into gameplay, video calls, or video conferences. As a result, the microphone used may not work as desired. However, you can make this device your default microphone using microphone settings in Windows 11.
Let us see the three methods to achieve this:
Using Settings
Go to Settings > System > Sound.
Under the Input section, click on the microphone you want to set as default. This will take you to the settings page.
Near the option “Set as default sound device,” you can choose any option – Use as default for audio or Use as default for communications – from the drop-down menu. If you cannot see the Set as the default sound device option, the device is already used as the default for audio and communication.
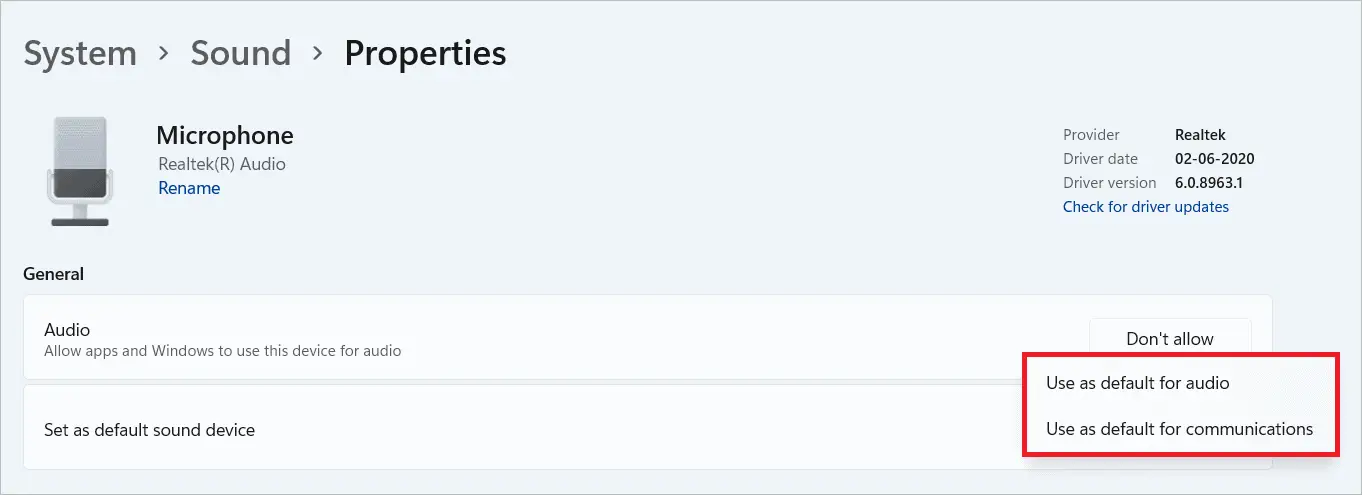
Note: Choosing “Use as default for communications” makes it the default device for audio and video calls using different video conferencing applications. Choosing “Use as default for audio” makes it the default device for all the other apps that use the microphone.
Using Volume Mixer
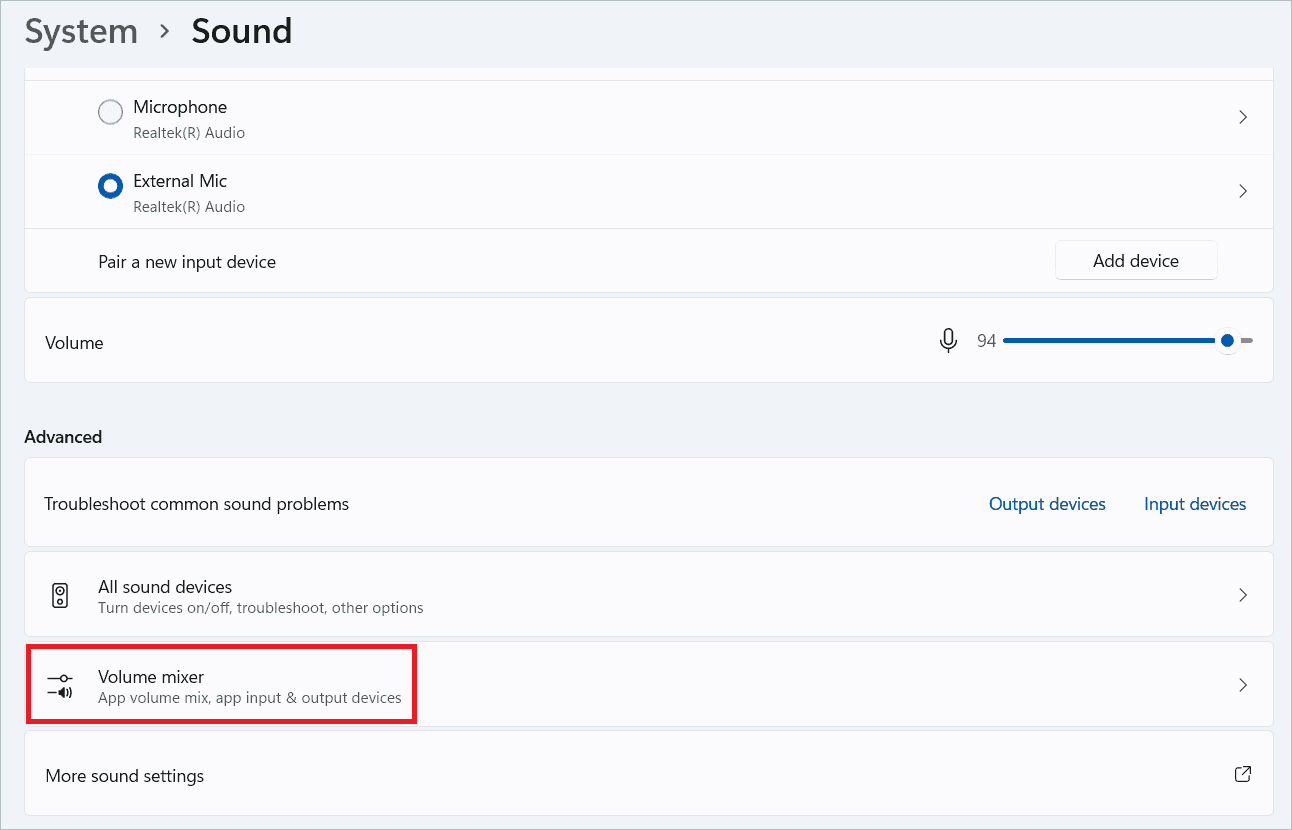
Go to Settings > System > Sound.
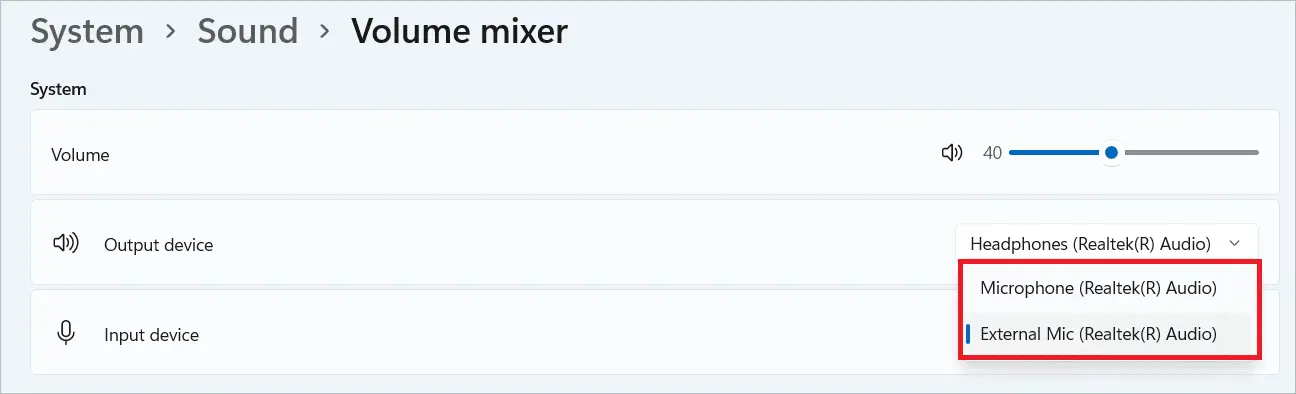
Select “Volume mixer” under the Advanced section. Alternatively, right-click on the sound icon in the bottom right corner of your screen to open the Volume mixer window. Here, you can choose your input and output devices.
Find the Input device field under System and change the device from the list near it. The device you choose becomes the default for audio, not communications.
If you want to change the default audio device used by each app using the microphone settings in Windows 11, find your desired app under the Apps section. Then, click the down arrow near it and select the correct input device from the drop-down list near the Input device option.

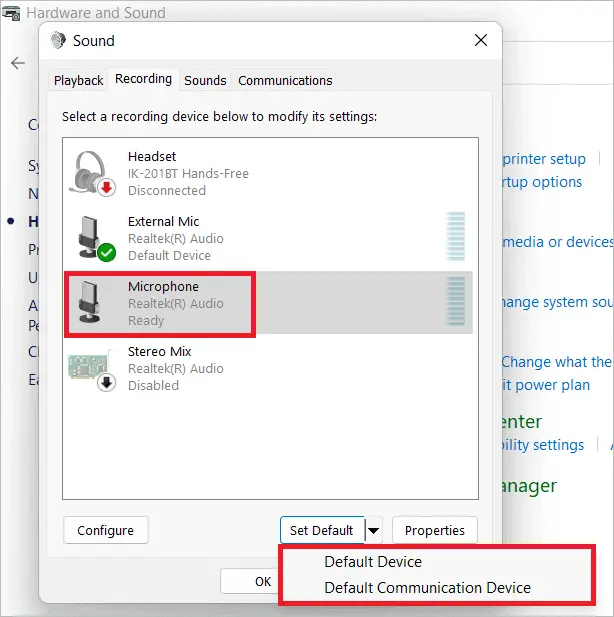
Using Control Panel
Open the Run command window by pressing the Windows key + R. Type in “control” and open the Control Panel.
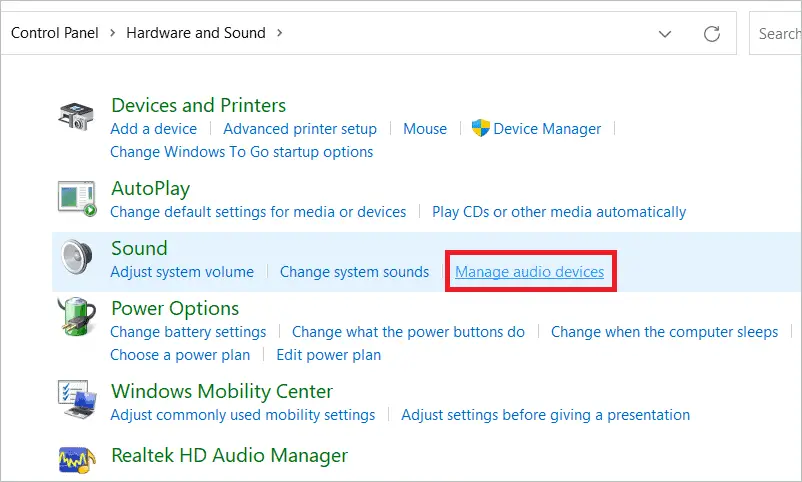
Go to Hardware and Sound > Sound. Under Sound, click “Manage audio devices.”
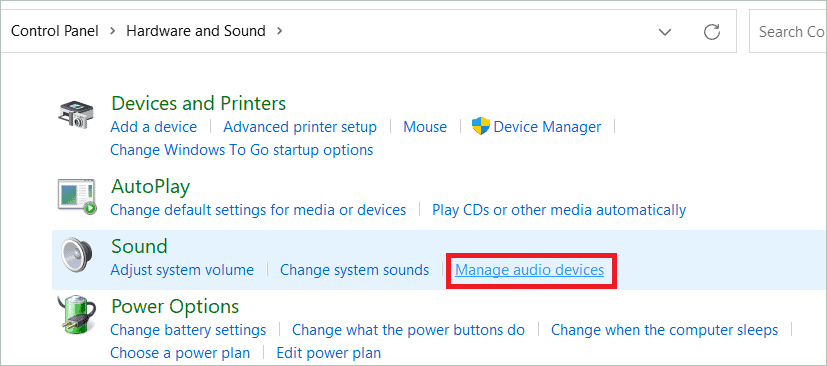
In the Recording tab, select the audio recording device you want to set as default. Click the Set default button to select your desired option. Click “OK” to make it the default recording device.
Enable/Disable Microphone
It is not necessary to keep your microphone enabled all the time. In fact, it is recommended to keep it disabled when not in use owing to security and privacy reasons. Microphone settings in Windows 11 can be adjusted to accomplish this task effortlessly. So, whether you disabled the device unknowingly or you just got a new microphone, you can enable it and then turn it off after use. Let us see the six methods to do this.
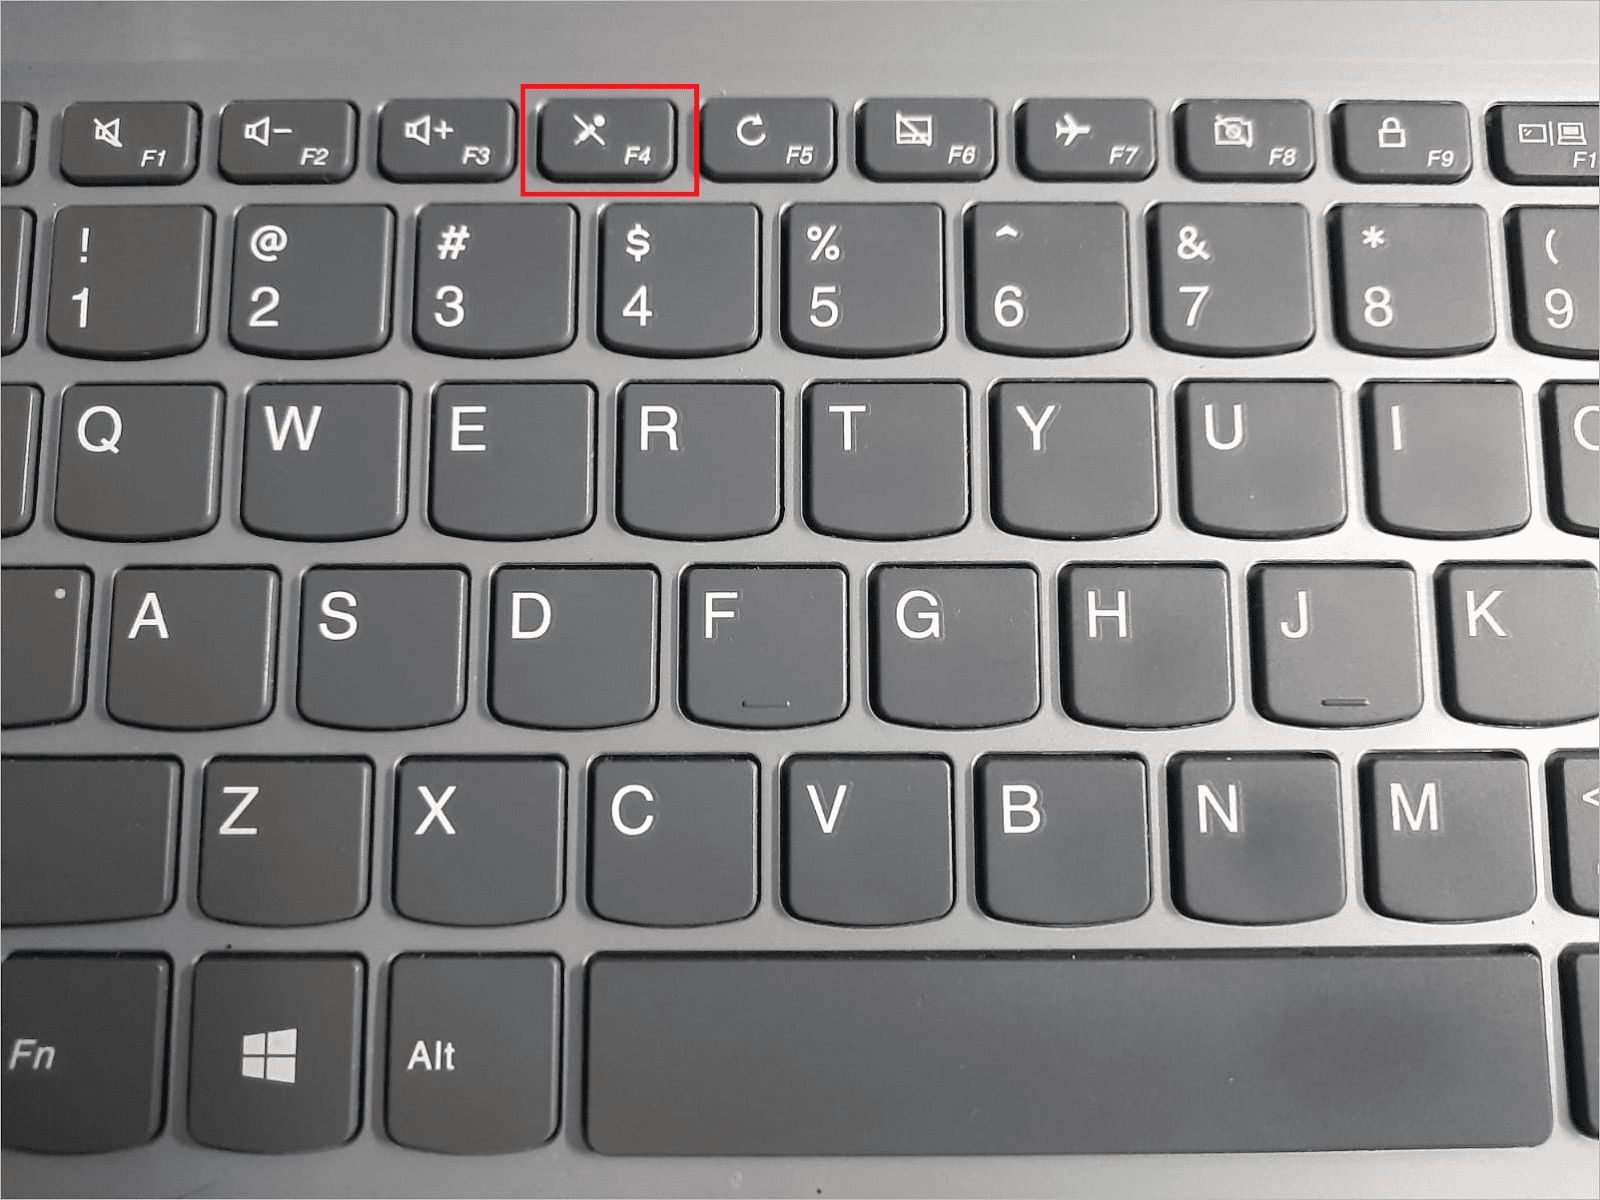
Using Keyboard
Most keyboards have a microphone key that lets you enable/disable the microphone. All you have to do is press it to enable or disable the input device in use.
Using Control Panel
Follow these instructions to enable or disable the microphone using the Control Panel.
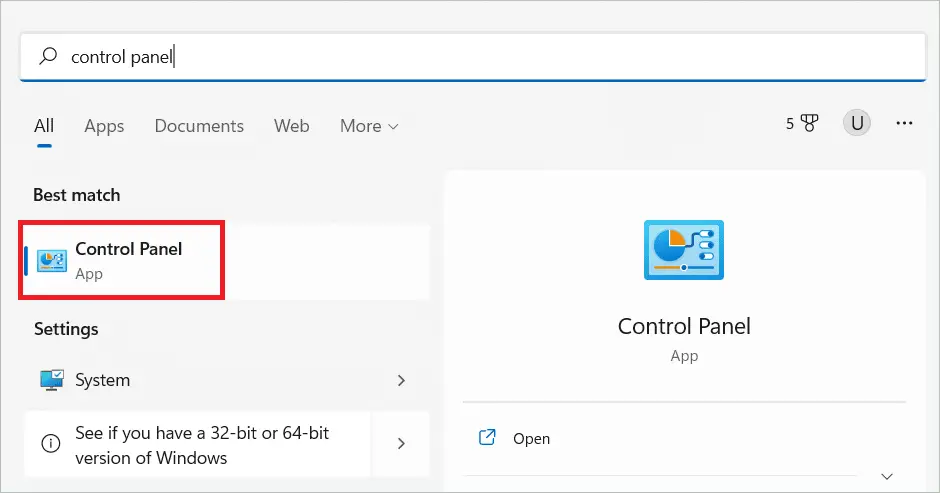
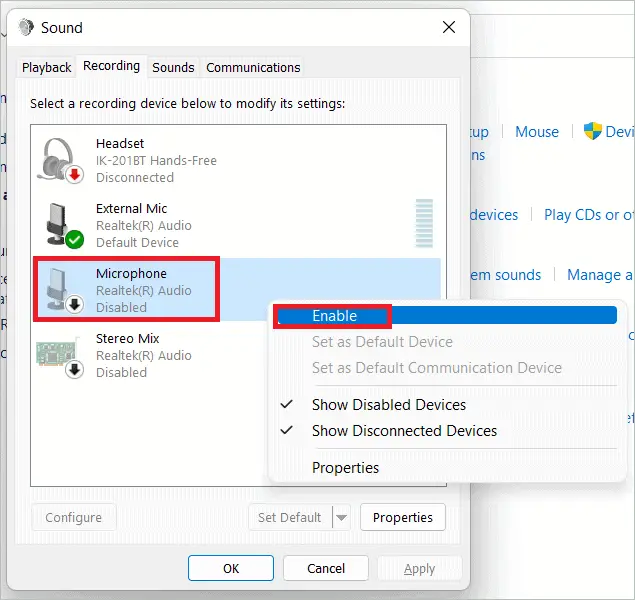
Search for the Control Panel in the search bar and open it when it comes up.
Go to Hardware and Sound > Sound. Under Sound, click “Manage audio devices.”
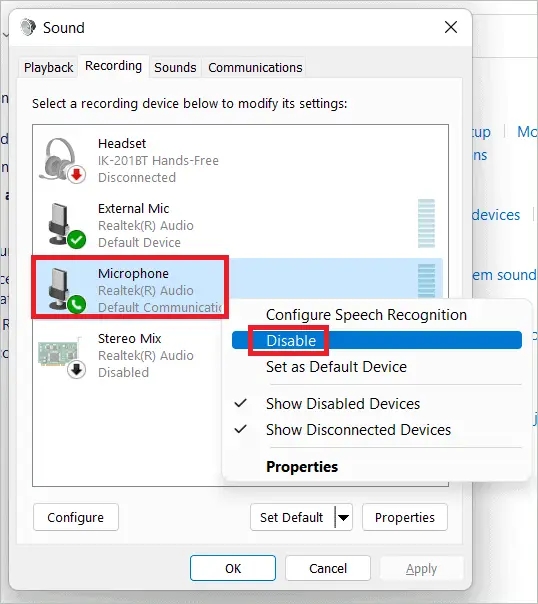
In the pop-up window, select the Recording tab. Now, right-click on the disabled microphone. Select “Enable.”
To disable it after use, right-click on it again and select “Disable.”
Using Settings
Here is how you can enable or disable the microphone using the microphone settings in Windows 11.
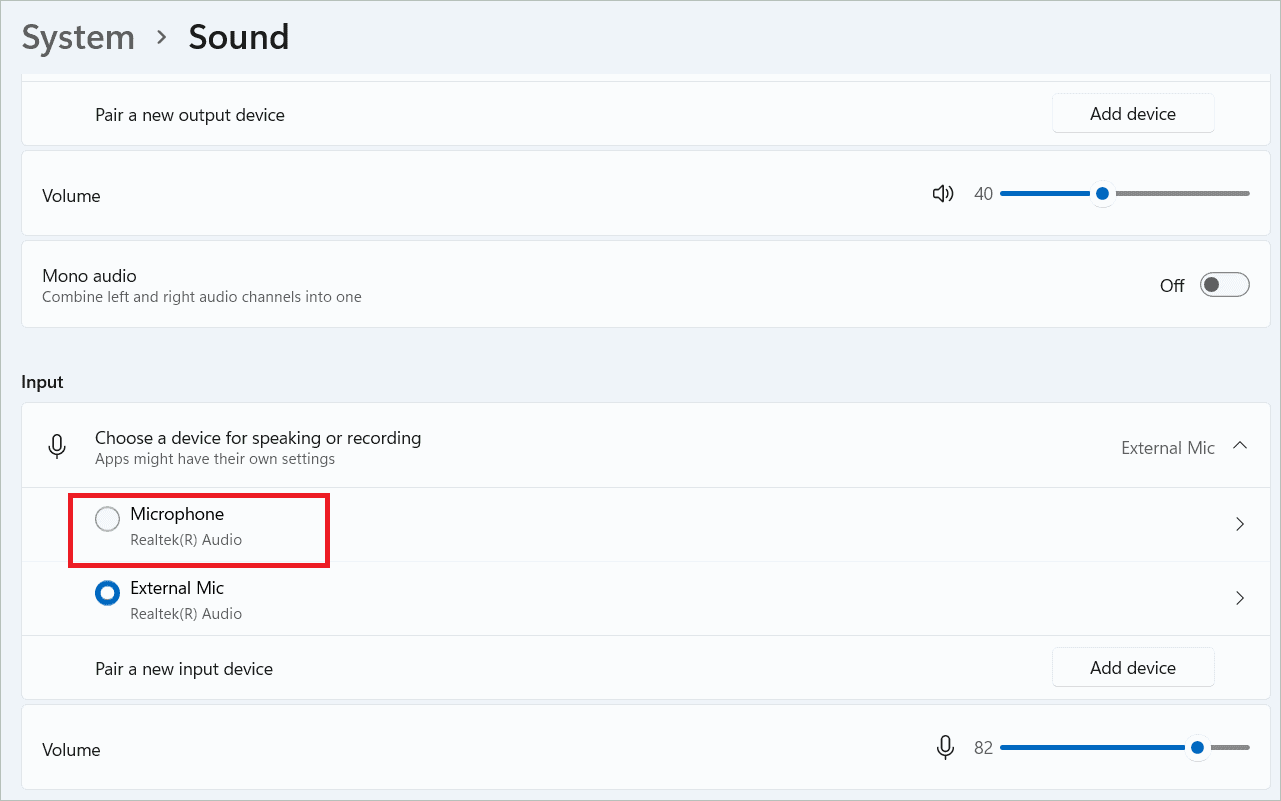
Go to Settings > System > Sound.
Select your microphone from the list in the Input section.
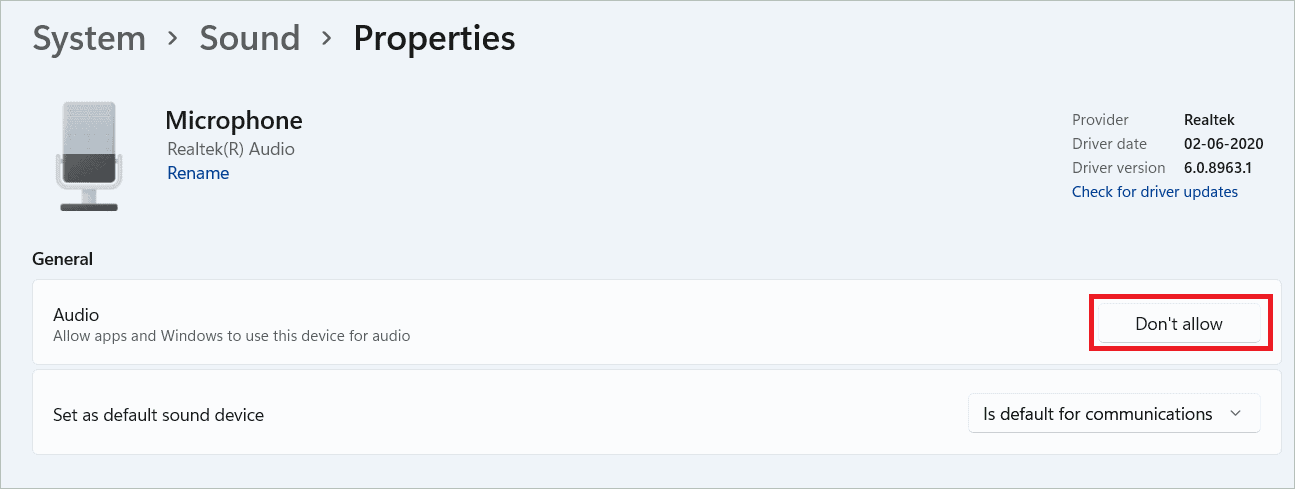
Click on the “Don’t allow” button to disable the microphone. Remember that when you click Don’t allow, you will have to use other options to enable it again.
Using Device Manager
Device Manager lets you manage the hardware in your PC. You can enable or disable the microphone using the Device Manager, as shown below.
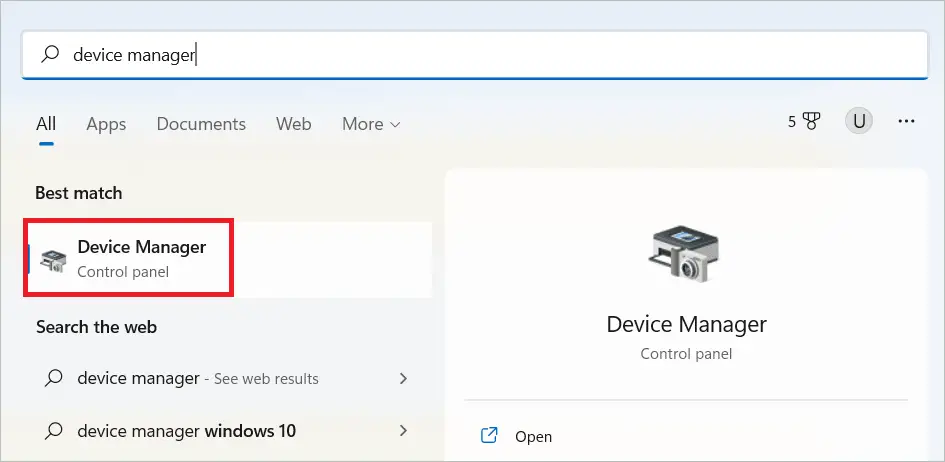
Search for Device Manager in the search bar and open it when it comes up.
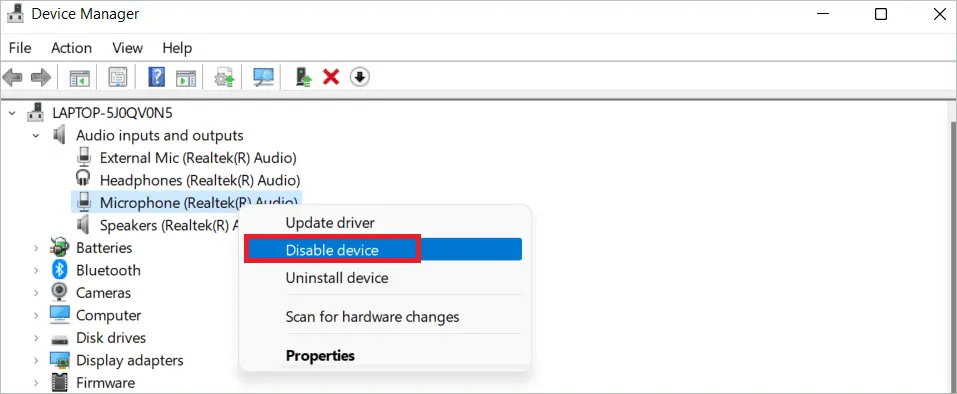
Double-click on “Audio inputs and outputs.” Right-click on the microphone and select “Disable device” from the context menu. Similarly, select “Enable device” to enable the microphone.
Using Windows PowerShell
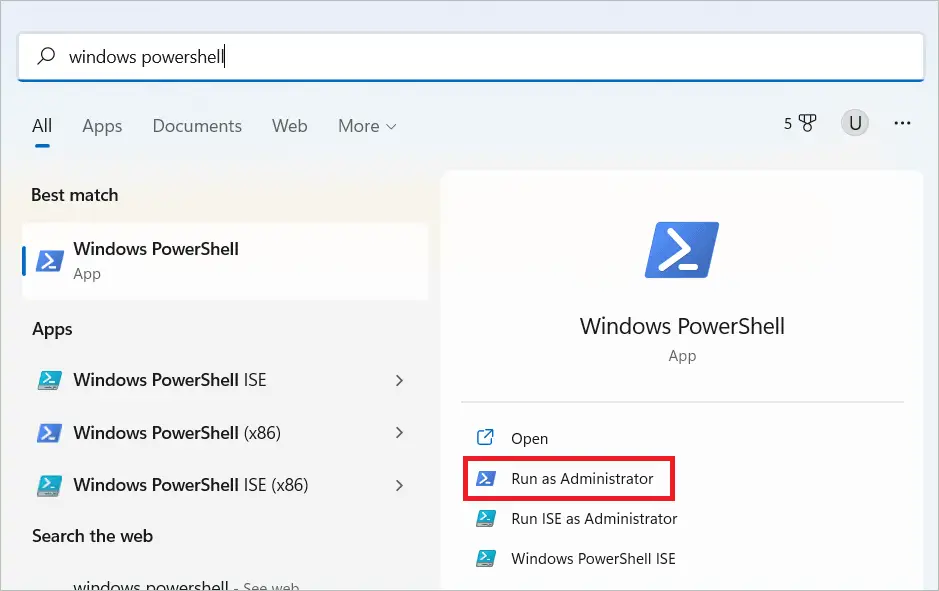
Type “PowerShell” in the search bar and open PowerShell as administrator.
Type the following command and press Enter to enable the microphone.
Get-PnpDevice | Where-Object {$_.FriendlyName -like ‘*Microphone*’} | Enable-PnpDevice - Confirm:$false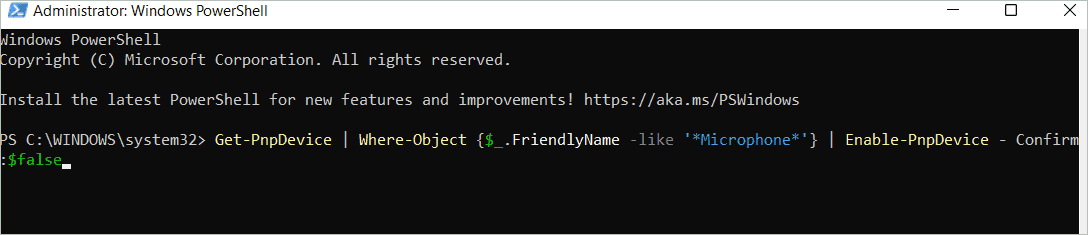
Type the following command and press Enter to disable the microphone.
Get-PnpDevice | Where-Object {$_.FriendlyName -like ‘*Microphone*’} | Disable-PnpDevice - Confirm:$false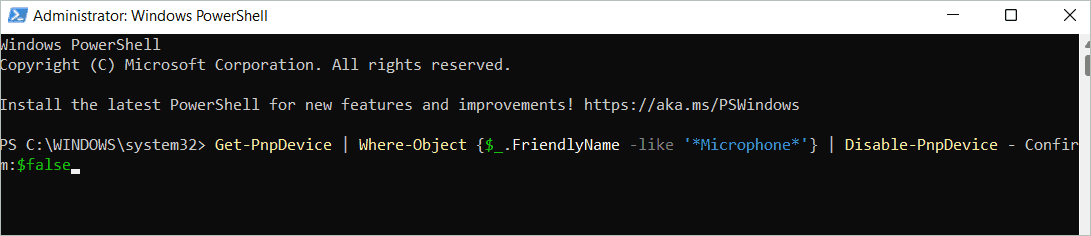
Using Privacy Settings
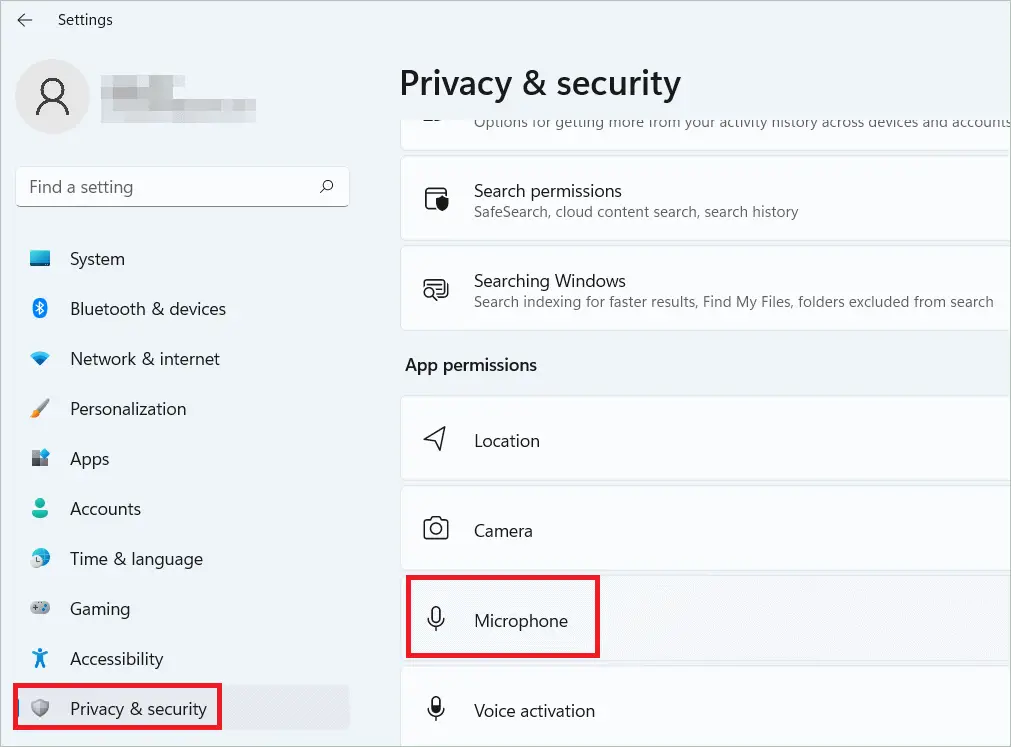
Microphone settings in Windows 11 can also be accessed through the Privacy & security settings. Here, you can enable the microphone and even decide what apps can access the microphone. Here are the steps.
Open Settings and select “Privacy & Security” in the left panel. Select “Microphone” under App permissions.
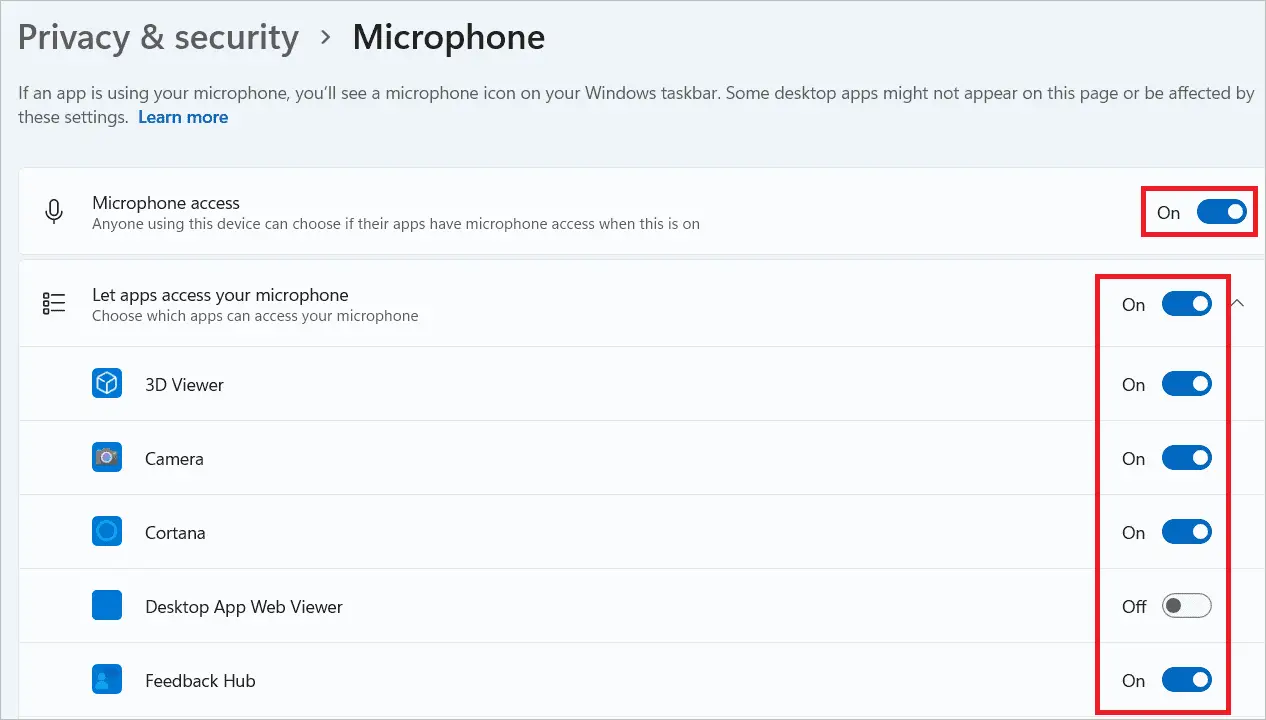
Toggle the switch near Microphone access to “On” to enable the microphone. Under “Let apps access your microphone,” you will see a list of apps. You can toggle the switch “On” and “Off” near each app to give or deny microphone access to individual apps.
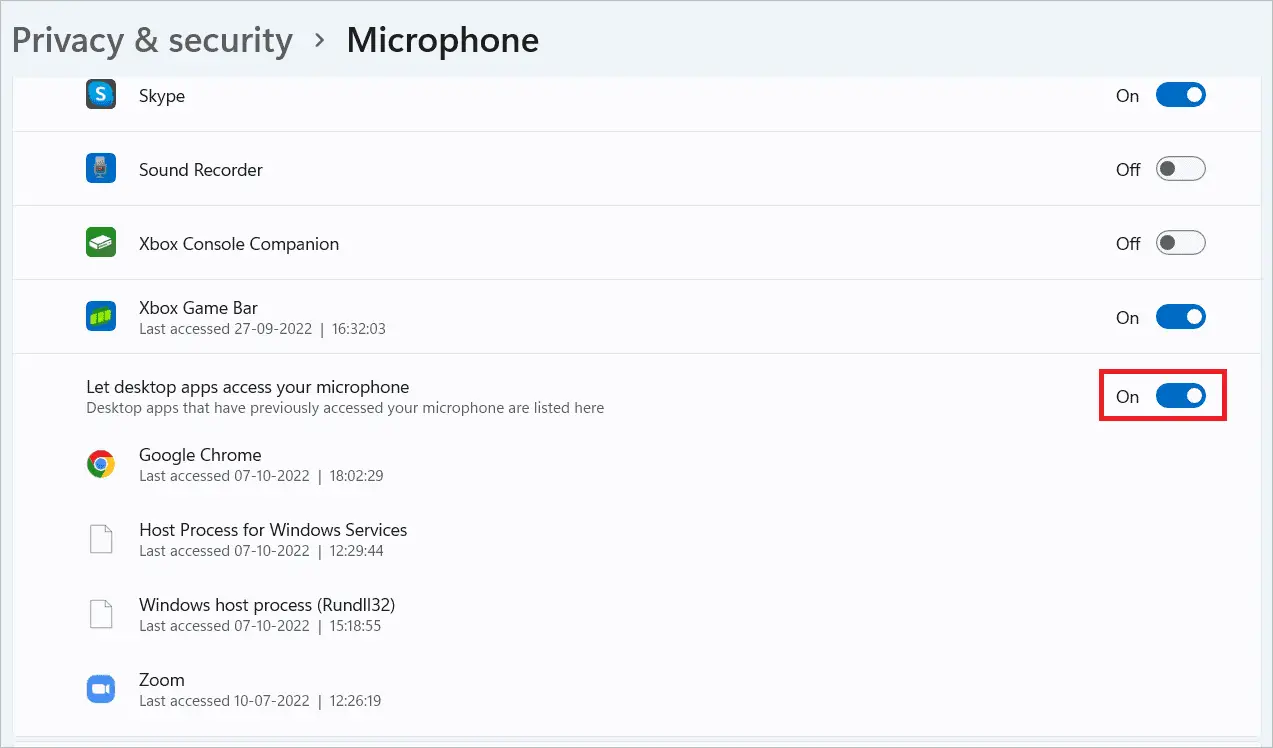
Turn on the – Let desktop apps access your microphone feature if you want the desktop applications to access the microphone. But here, you have no option to give access to individual apps.
Final Thoughts
Good quality sound input is inevitable for making calls, especially work-related ones. When you go to the microphone settings in Windows 11, you will find many settings that can be adjusted to make your voice more audible. You can also check if you accidentally clicked on the mute button or set the volume level too low. Also, if you face any network issues, you can reset Windows 11 network settings.
Our tutorial lets you access the audio features that boost the microphone volume, set a particular microphone as default, and many other things to ensure that the device works in perfect condition. Ensure your mic is enabled for the app you are currently using so there is no microphone issue.


