Over the past few years, Video conferencing has gained immense popularity and works wonders if you have a distributed team across the globe. Zoom is one of the best software when it comes to video conferencing, calling, chats, and webinars. With a secure and reliable cloud platform, you can connect with your teammates in the world via Zoom and also record Zoom meeting for reference.
Zoom can engage up to 1000 participants with 49 on-screen videos. The never-ending list of features makes Zoom the most preferred software for video conferences, webinars, and seminars. Along with the features, Zoom developers also provides you with extended security; it offers end to end encryption for all meetings.
Video Conferencing – Top 4 Ways to Record Zoom Meeting
Zoom allows you to record videos and audio of ongoing meetings and webinars. You can then store the recorded meetings locally or on the cloud. However, only the Zoom users having Pro, Business, or Enterprise license can save the recordings to the cloud.
The below-mentioned guide contains a list of ways you can record the Zoom webinars, on-going meetings, and seminars.
1. Record Using the Zoom Inbuilt Recorder
As mentioned above, only the license owner can save the recordings on the cloud. Other users can record the meetings but cannot save it on the cloud.
A host in Zoom can record meetings and allow some participants to record the meetings. If participants wish to record a specific webinar or meetings, he/she needs the host’s permission.
Step 1: To save the recorded meetings locally to a specific location, you need to mention the path in the settings.
Go to the Settings ➞ Recordings, and then click on Change.
Navigate to the desired location via folders and verify the path once done.

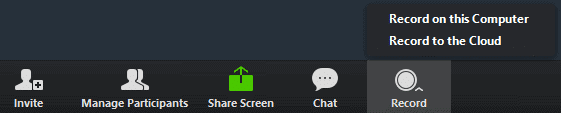
Step 2: To start the recording, click on the Record button present at the bottom of the screen.
You can see 2 options; Record on this computer and Record to the Cloud. Both options are only available if you are a paid user.
If you are using a basic plan, the recording starts as soon as the record button is clicked and gets stored at the location mentioned in step 1.
Step 3: You can stop and pause the recording in between by using the recording’s control buttons on the screen.

Once you finish recording the needed contents, the host will receive the mail for the same. If you used a local recording, you could access it from the mentioned folder.
2. Record Meeting using Third-party Tools
If you are not a host or paid user in Zoom, and wish to record important meetings or webinars, then you can use any third-party software from the list.
These third-party tools can be downloaded for both iOS and Mac.
Note: Please be aware that recording calls or videos without permission is illegal in certain states. Please refer to your local and state laws before you use any of the below-mentioned software. The information is for informational purposes only.
The article may contain affiliate links. Purchasing a product through these links may earn some commission for TechNorms at no additional cost to you.
1. ApowerREC
ApowerREC is a fantastic tool when it comes to recording anything on the screen. It can record games, videos as well as record zoom meetings. Many members of our team use ApowerREC for recording meetings and webinars, and they love how well it works for them.
It is a screen recorder that allows you to record screens on your Windows and MAC machines. With ApowerREC, you need to get a paid VIP plan if you wish to record the screen for more than 3 minutes.
The pricing for VIP starts at a price of 19.95 USD/month, which is a bit expensive. On the other hand, ApowerREC Yearly and ApowerREC Lifetime plans are quite affordable. Actually, they feel quite cheap compared to the monthly plan.
Let’s check how to record a Zoom meeting using ApowerREC.
Step 1: Download ApowerREC and install the software. It is easy to download and install.
Download ApowerREC here
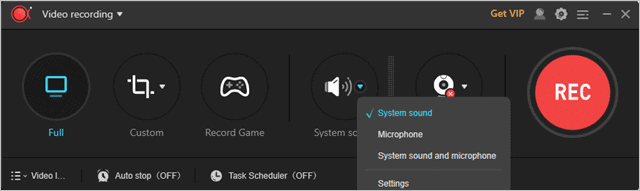
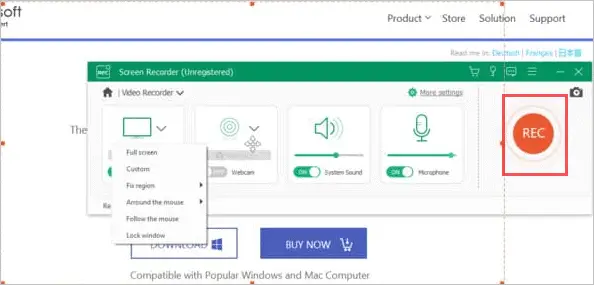
Step 2: When you open ApowerREC, there are many functions seen. Let’s get into the details of all the functions which can help you with recording a Zoom meeting.
Full: If you wish to record the full screen, you can click on Full and then on the REC button
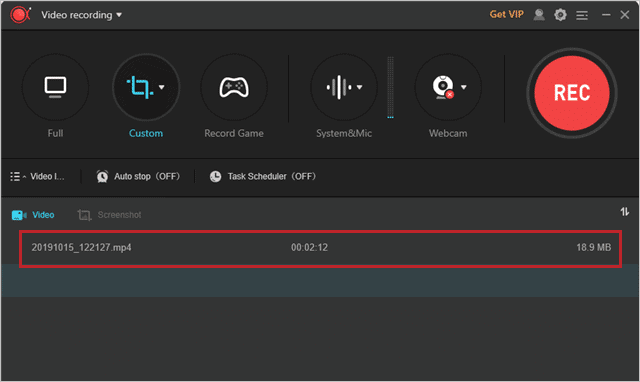
Custom: If you wish to record only a specific part of the window, you can click on Custom and adjust the recording borders as per your wish.
System sound: This is an important function when it comes to recording the audio along with the video. If you only wish to record the system sound select System sound, a good option for webinars and video meetings, where there is a single speaker.
If you wish to record your sound in the recordings, then you need to select System sound and microphone.
Tip: You can use System sound and microphone, and mute the microphone, to avoid any external sound disturbances while recording.
Step 3: Once the recording starts, you can see a small bar with all the recording controls on it. ApowerREC allows you to draw/paint over the screen. This can be helpful to mark something important during online presentations done via Zoom.

Step 4: Once done with recording, you can see it in the ApowerREC software.
With the simple steps mentioned above, you can not only record Zoom meeting but also educational webinars, important meetings, and seminars on the other platforms too.
2. Filmora Scrn
Filmora Scrn is used to capture screens. Hence, it can also be used to record Zoom meetings. The settings required to configure are easy and straightforward.
Download Filmora Scrn here
After opening the software, click on Get Started. You can change the Screen Capture option by clicking on the drop-down menu.
It can either be full or custom depending on your requirements.
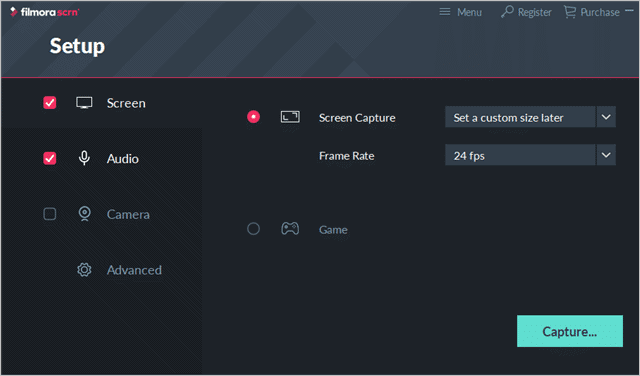
If you wish to record the audio, go to the Audio section from the left panel. There are 2 options here, if you only wish to record computer audio, you can select Don’t Capture for Microphone and vice versa. The microphone is used to record your sound during the Zoom video conferencing recording.
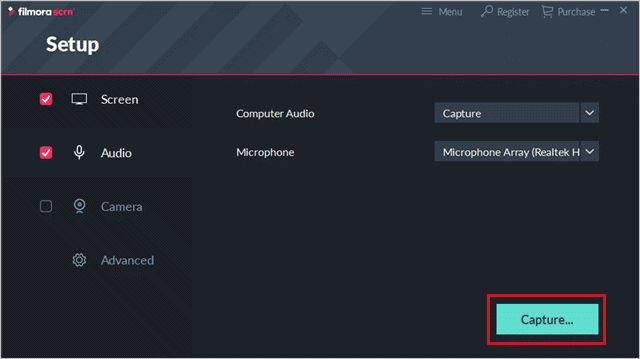
Open Zoom and start your meeting, and then click on the Capture button in the Filmora Scrn software.
The next step is for how to record a zoom meeting.
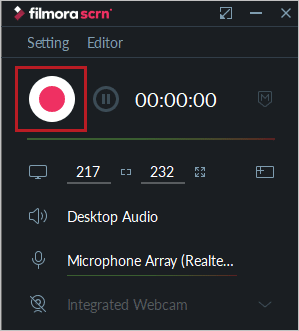
You can select the appropriate size for the screen capture and click on the record button to start the recording.
The software also lets you edit and record online courses, meetings, gameplay videos, and tutorials.
3. Callnote Pro
Callnote Pro is a software used to record the screen, messages, and other activities when an online video call is going on in Zoom, hangout, Skype, and many more. It records your screen as it is when a call is going on.
Callnote Pro offers a 14 days trial and then charges USD 39.95/year. It is available for both Windows and Mac machines.
To record a Zoom meeting, by using the Callnote’s video recorder, follow the instructions mentioned below.
Download Callnote Pro from the link below and install it using an Admin account. You need to register yourself first to start the download. Enter the mandatory credentials, and then click on download.
Download Callnote Pro here
Open Callnote Pro and click on the Zoom icon. Check the box next to Always start recording when a call starts and Record video.
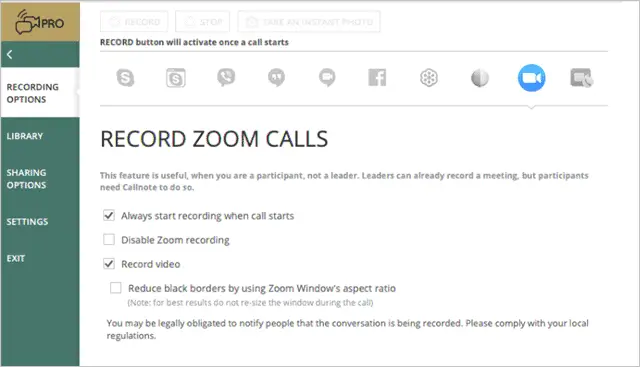
The button will be activated as soon as the call starts. You can start, pause, and stop recording through the recording controls.
4. Apeaksoft Screen Recorder
Apeaksoft Screen Recorder is a similar tool to record the Zoom meeting. You can download it from the link given below and install it.
Follow the instructions to start recording the Zoom meeting using Apeaksoft’s Screen Recorder.
Step 1: Download and install Apeaksoft Screen Recorder from the link given below.
Download Apeaksoft Screen Recorder here
Step 2: On the main interface link, click on the Video Recorder to record the Zoom meeting.
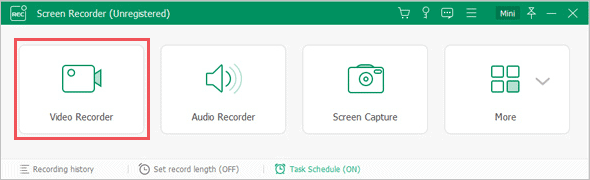
Step 3: Set the input audio source and then select the frame size. Click on the record button to start the recording.
You can also adjust the Microphone and System sound settings as per your requirement.
The default format of Zoom recording is MP4, but you can change the output settings. If you wish to do so, go to More Settings in the top right corner and navigate to the Output and change the format.
When the recording finishes, click on Save. You can preview the recording and also share it on YouTube.
3. How to Record a Zoom Meeting on Android Device
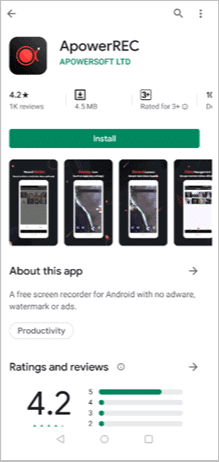
As Zoom video conferences and webinars can be joined or hosted via the Android device as well, so we need an application to record Zoom meetings on the Android device. ApowerREC mentioned above provides you with an Android app to record your screen.
A single tool for all the platforms makes it more convenient for use. All you need to do is install the ApowerREC application from Google Play Store, and then get started with recording Zoom meeting.
After the app is installed, you need to permit ApowerREC to display it over applications. You can give the specified permission by going to settings from your Android device, and toggle the switch next to Allow display over other apps.
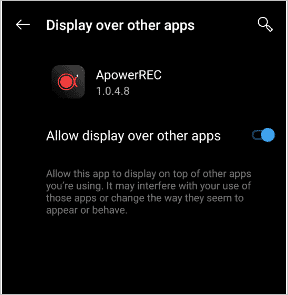
Once done with the settings, you will be able to record Zoom meeting.
Open ApowerREC and click on the record button present at the bottom of the screen. The recording starts after the countdown from 3.
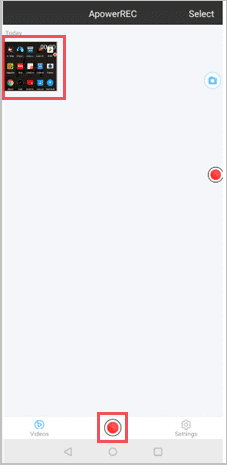
You can then start your Zoom meeting. The screen capturing continues in the background. All the recordings are available in the ApowerREC app itself.

If you wish to access recording controls in between the Zoom meeting, then you can click on the recording icon on the screen, mostly seen on the right of the screen.
Download ApowerREC here
4. How to Record Zoom Meeting on iOS Device
As mentioned above, ApowerREC can be used on any platform, including iOS. You do not need a jailbreak when you use ApowerREC to record or cast your screen.
So, if you own an iOS device, then you can go through the steps mentioned below. The instructions will give you a clear idea of how to record a Zoom meeting on your iPhone and iPad.
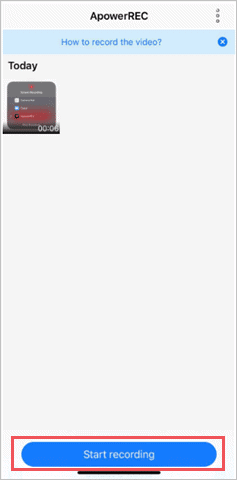
You can install the ApowerREC application from the Apple Store. After installing, open the app and click on Start recording to start recording the screen.
If you wish to save the recording on your phone then select Camera Roll, if you wish to have it on your ApowerREC then click on ApowerREC.
However, if you want to record the Zoom meeting, click on Zoom. It will start recording the meeting for you, but also notify other participants about the recording.
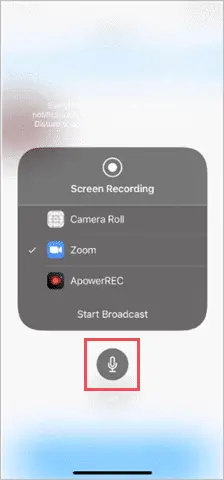
The microphone option can be enabled and disabled. If you want to record your sound, then you can enable the microphone option. You can then access the recordings via your iOS device.
Conclusion
You can use the methods mentioned above to record the webinars and seminars so that they can be referred to again. Zoom video meetings having a presentation on upcoming projects can be recorded to get precise details about something you missed during a meeting.
As Zoom meetings can be joined and scheduled from any device and platforms, the above article explains instructions to record Zoom meetings on all platforms. All the mentioned tools work on Mac and Windows. To record Zoom meetings on Android and iOS devices, you can use ApowerREC to simplify the process.
Also, check:
- Google Tools That Can Make Your Conference Calls Better
- Best Alternatives To Skype VoIP Service Available Today
- The Best Game Recording Software For Windows
- How to Record Screencast Videos on Your iPad or iPhone


