Skype for Business is a communication tool that allows businesses to integrate with common channels, conduct meetings, provide various services such as instant messaging, voice-over IP, file transfers, video conferencing, web conferencing, and email. However, if you are not using it frequently, you can always choose to uninstall Skype for Business.
People also uninstall Chromium and other apps, when they don’t need it, as you can get more space to install the software which you actually use. Skype for Business allows you to do one-on-one conferencing or even add around 250 people in the same call. Additionally, you can also use it for personal purposes, for video chatting with your friends.
Uninstall Skype For Business And Save Your Disk Space!
Since it consumes too much space, Skype for Business becomes a liability if you are not using it frequently. On that note, let’s have a look at ways to uninstall it and save disk space.
1. Use Skype settings to uninstall Skype for Business
Using Skype settings is one of the easiest and best solutions to go with if you wish to uninstall Skype for Business. This method can help you stop Skype for Business from starting automatically.
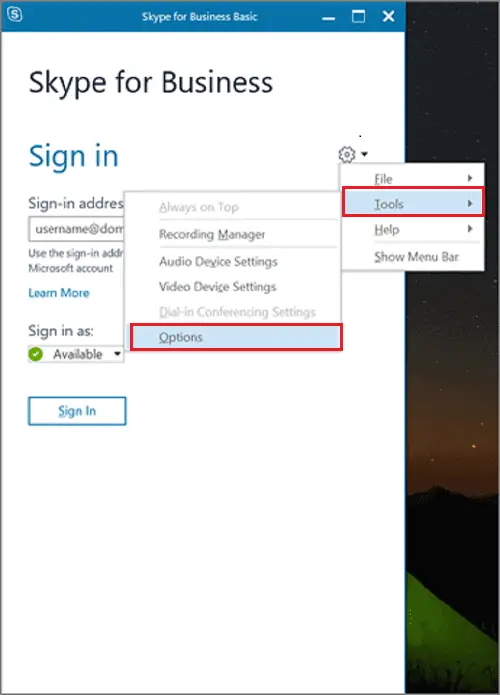
To start with, Open the settings of Skype for Business. Go to the Tools tab and click on Options.
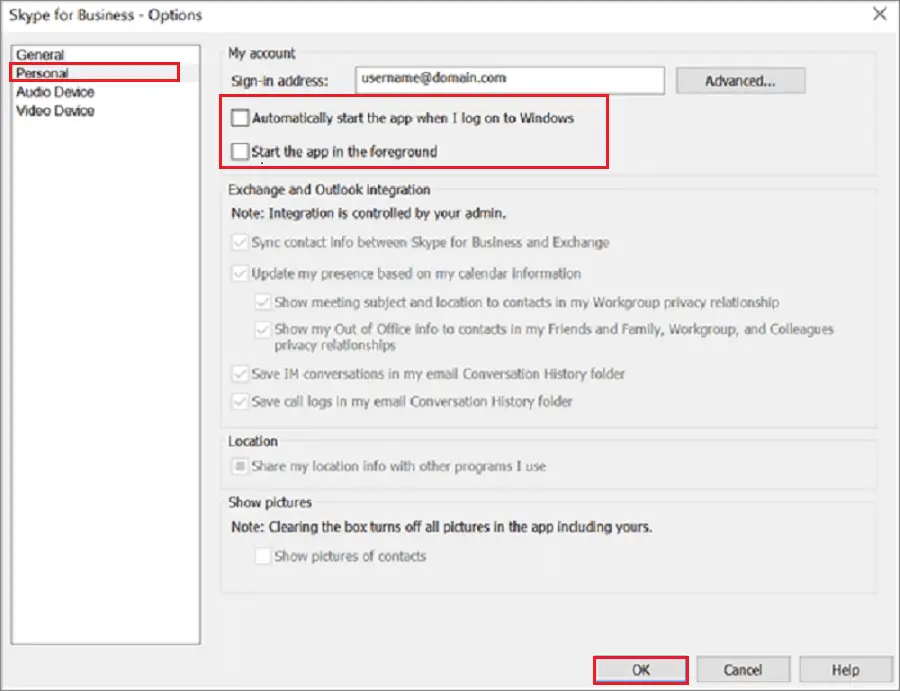
In the left pane, choose the Personal option. Then, untick the Automatically start the app when I log on to Windows 10 and Start the app in the foreground options. Click Ok to save the changes.
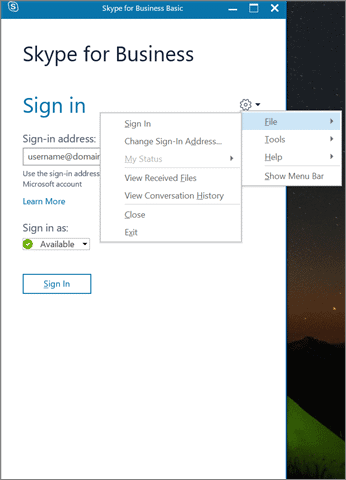
Then, go back to the Settings in Skype for Business.
Click on the File option and choose Exit.
Execute this step, and Skype for Business will get uninstalled from your computer system. This is the easiest way to uninstall Skype for Business.
2. Use Control Panel to uninstall Skype for Business
Uninstalling programs and software from the Control Panel is the most common way followed by users. You can use this method to remove Skype for Business from your computer.
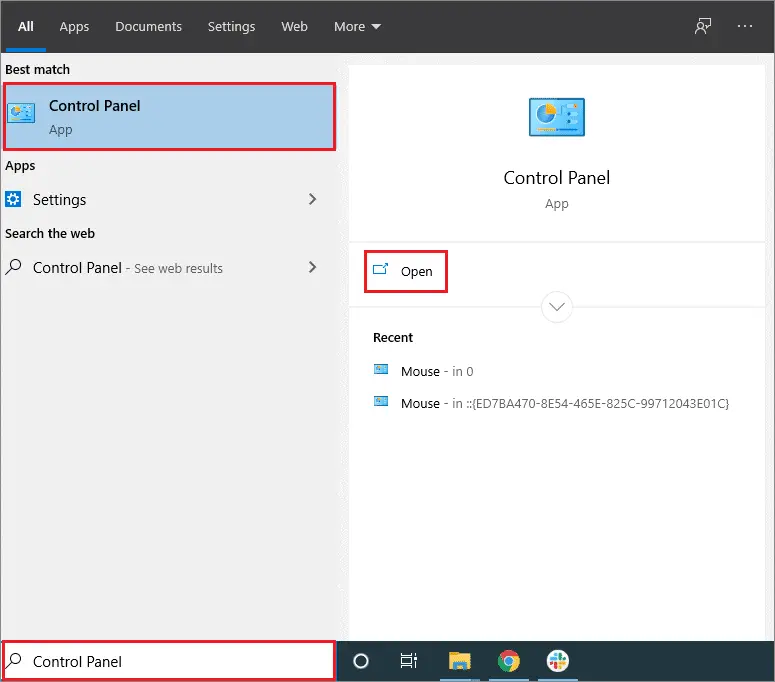
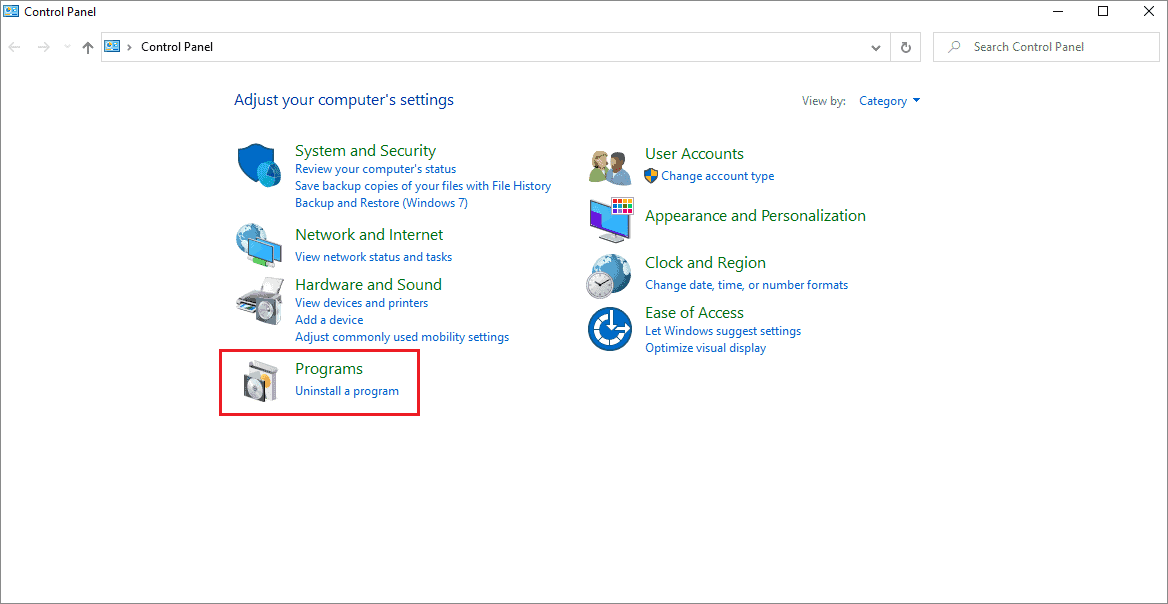
Type Control Panel in the search bar and click on Open.
Then, click on the Programs option.
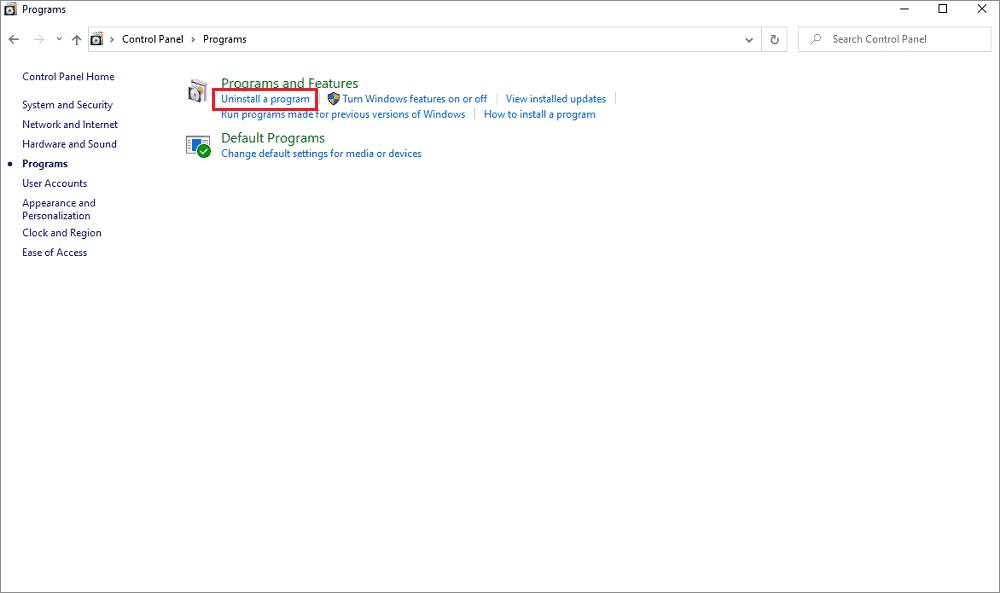
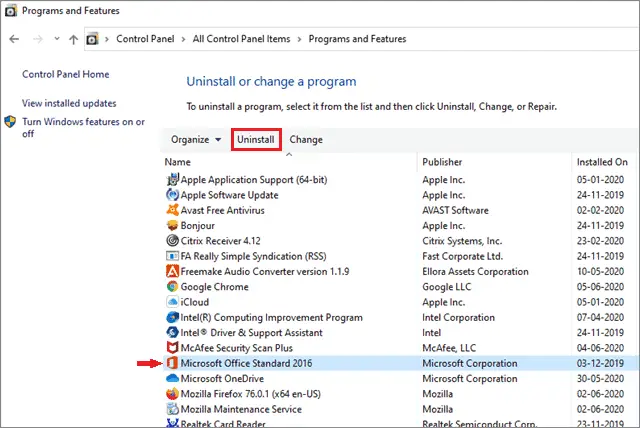
Navigate to Programs and Features. Select Uninstall or change a program option.
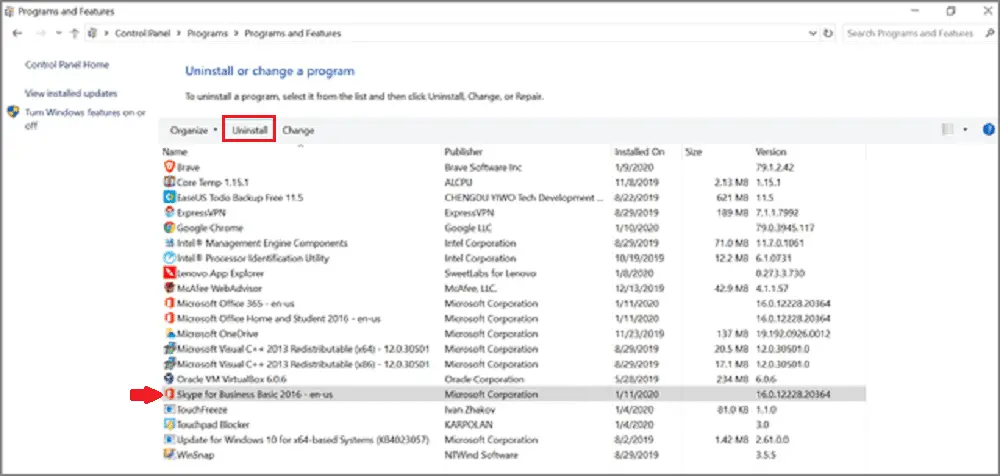
Now, find Skype for Business in the program list, click on it, and choose Uninstall.
You can choose to go with the Control Panel method only if the Skype Settings method for you. This is regarded as one of the easiest methods to uninstall Skype for Business.
3. Use Registry Editor
If the two ways mentioned above don’t work for you, you can try to uninstall Skype for Business in Windows 10 via the Registry Editor.
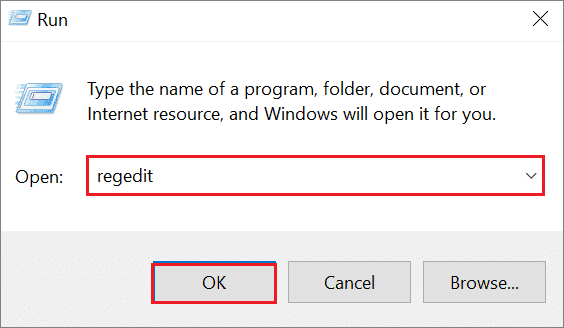
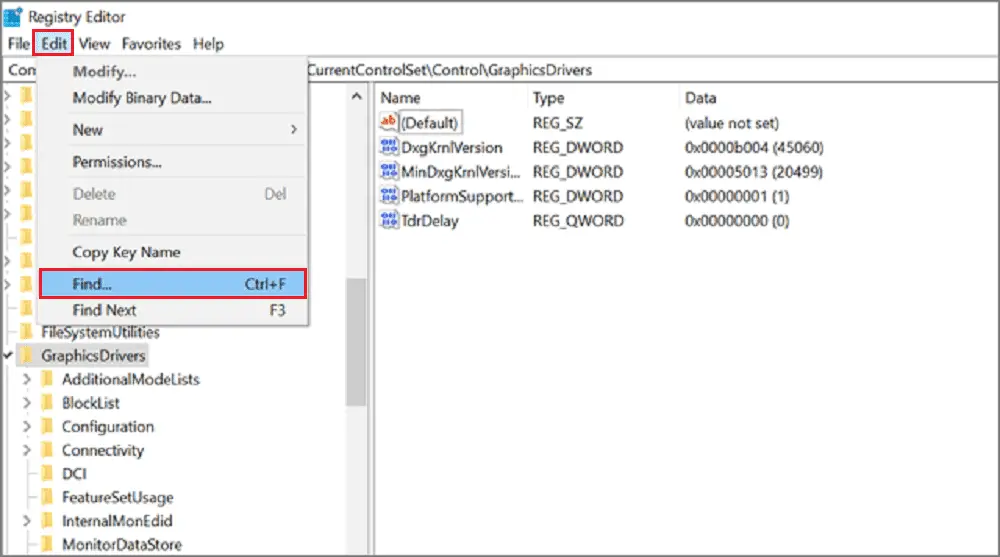
Press the Windows Key + R to open a Run dialog box. After it opens, type regedit and click on OK to open the Registry Editor.
Now, navigate to the Edit tab and select the Find option.
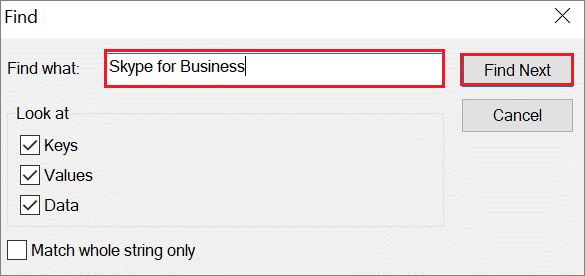
Once the Find dialog box opens up, type Skype for Business, and click on the Find Next button.
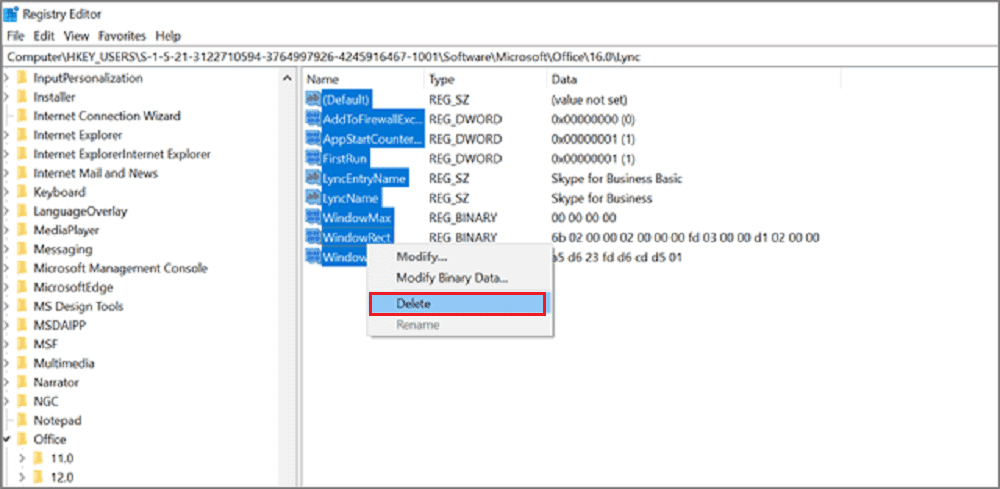
You will see several files related to Skype for Business in the right window pane. Select them, right-click on them, and select the Delete option.
This method will surely remove Skype for Business from your computer. The registry editor processor appears to be a bit lengthy, but it is easy to execute nonetheless.
4. Uninstall Microsoft Office
You can also remove Skype for Business by uninstalling the entire Microsoft Office suite. To begin with, navigate to the following path:
Control Panel > Programs > Programs and features > Uninstall or change a program
The process for navigating to this path is shown in the Control Panel method above.
Then, select MS Office from the list of programs and click on the Uninstall button. Doing this will delete the entire MS Office suite and Skye for Business with it.
If you are using Microsoft Office 365, you will need to uninstall the entire suite because the tool is integrated with other MS Office apps.
5. Use Third-Party Apps
You can also use third-party software to uninstall Skype for Business if you feel that the above methods are lengthy or difficult to execute in any manner. There are a slew of third-party uninstallers for Windows 10; you can choose any tool as per your convenience.
1. Revo Uninstaller

Revo uninstaller is one of the most popular tools for uninstalling programs in a Windows operating system. It is a speedier alternative to uninstalling programs in contrast to the standard Windows uninstaller.
Revo shows the program icons in the form of tiles, so it is easier for the user to distinguish programs and quickly take action. Added to that, it scans your system before uninstalling an application and also after completing the process.
Revo also comes with additional cleaning tools. It has a pro version for $12.97 and a pro portable version for $14.97.
2. Comodo Programs Manager
Comodo Programs Manager is also known for its impressive speed when it comes to uninstalling programs in a Windows 10 PC. Along with programs, it also removes the leftover files, folders, and any registry keys related to it.
Comodo monitors each program on the system and keeps a track of the changes made to each program. It also creates backups of the files, folders, and registry keys when it uninstalls a program.
Added to that, Comodo delivers a streamlined user experience, removes locked files, and manages Windows updates. Also, it provides malware information and updates other applications on the system. It is free for use.
Download Comodo Programs Manager
Related: The Complete Guide To Using Comodo Firewall – Safeguard Your PC from Online Threats
Conclusion
Skype for Business is an essential application for businesses, but only when it has adequate use. If not used enough, the best thing would be to uninstall Skype for Business. There are four ways to remove the application from your system. You can choose to implement any solution that can help you remove the application.
Using the Registry Editor method guarantees the maximum success rate. However, you can also try out the Control Panel and Skype settings methods to remove Skype for Business from your computer. Also, if you don’t want Skype, you can go for Skype alternatives and get almost the same features.


