Key Takeaways:
- Some changes in Windows 11 settings can help users elevate their gaming experience.
- You can enable Game Mode to get started with setting changes for gaming
- If Windows Xbox Game Bar is not required, terminating it along with its processes can be helpful
With Windows 11, Microsoft introduced many features and settings to enhance users’ gaming experience. However, you need to make a few changes in the Windows settings to have a fantastic experience while gaming. There are some best Windows 11 settings for gaming that you can apply easily via Windows 11 Settings app.
There are different settings to change in Windows 11 once you upgrade. However, once you are well acquainted with the operating system, you can start making changes to improve the overall gaming experience.
8 Best Windows 11 Settings For Gaming
We have listed some best Windows 11 settings for gaming. You can check out all the settings and make changes according to your preferences. You can open the Settings app using Windows key + I hotkey to perform the below-given settings change for gaming.
1. Enable Game Mode
You can enable Game Mode to enhance your gaming experience. For example, the Gaming Mode turns off background stuff to optimize your computer for smoother gameplay.
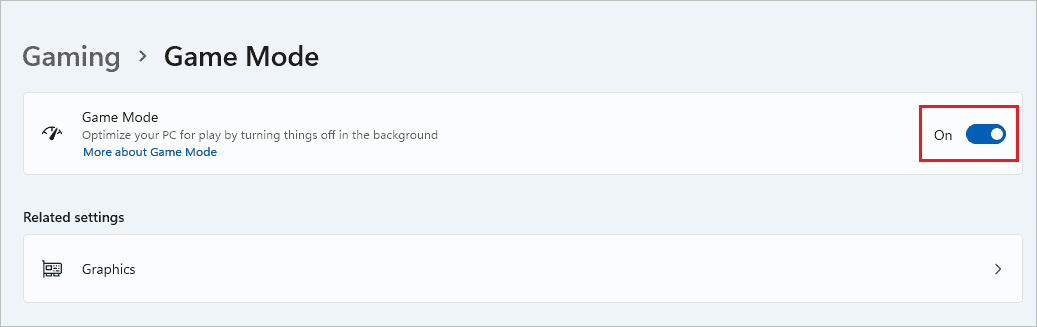
Open Settings app and go to the “Gaming” section. Next, click on the “Game Mode” subsection and then turn on the switch next to Game Mode to enable it.
It is not compulsory to turn on Game mode to play games. However, it can help to elevate your gaming performance as it is one of the best Windows 11 settings for gaming.
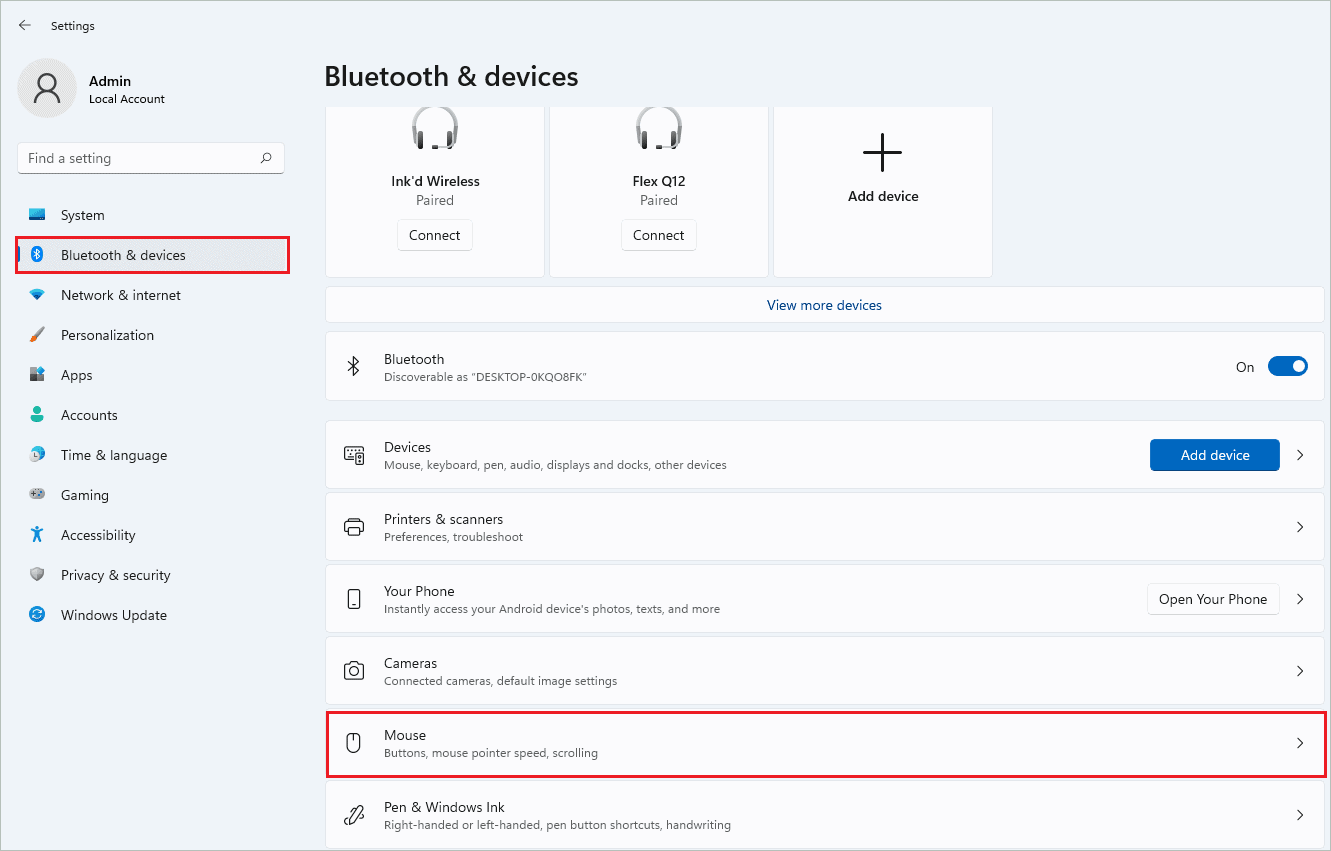
2. Disable Enhance Pointer Precision
The enabled Enhance pointer precision works well with work laptops. However, in gaming desktop PCs, this feature can add hardware acceleration. You can disable it conveniently by following the steps given below.
Step 1: Open the Settings app and go to the “Bluetooth & devices” section from the Settings menu.
Step 2: Click on “Mouse.”
Step 3: Scroll down and click on “Additional mouse settings.”
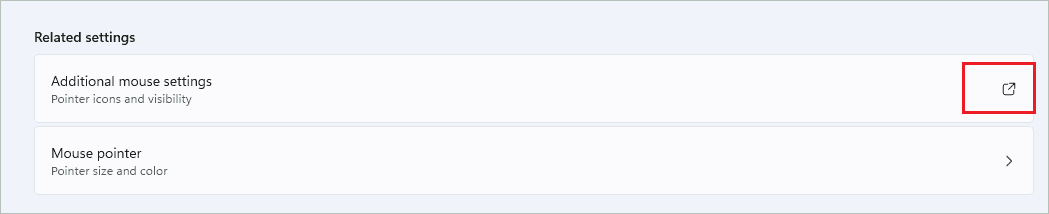
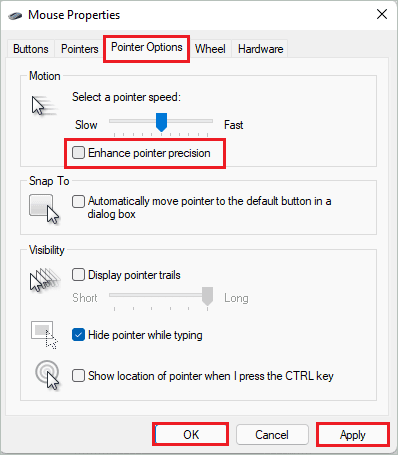
Step 4: Click on the “Pointer Options” tab and then uncheck the checkbox next to “Enhance pointer precision.”
Step 5: Click on “Apply” followed by “OK” to save the changes.
You can now enjoy gaming on your Windows 11 computer.
3. Use Auto HDR
The HDR display is better than SDR. Suppose you want better visual quality while gaming; you can enable Auto HDR and Use HDR in Display settings. Well, this is only possible on HDR-supported displays. It is one of the best Windows 11 settings for gaming visuals.
Go to Settings app ➜ System ➜ Display ➜ HDR and expand “Display capabilities.”
Now, toggle the switch next to “Use HDR” and “Auto HDR” such that they are turned ON to enable HDR capabilities while gaming.
4. Change GPU Preferences for Gaming Applications
If you have a gaming PC with 2 GPUs, that is, dedicated GPU and integrated GPU, you can assign GPU on a per-application basis. This is one of the best windows 11 settings for gaming. The gaming applications can use high-performance discrete GPU, while other apps rely on integrated GPU. However, if you only have a single graphics card, all the apps will rely on the same GPU.
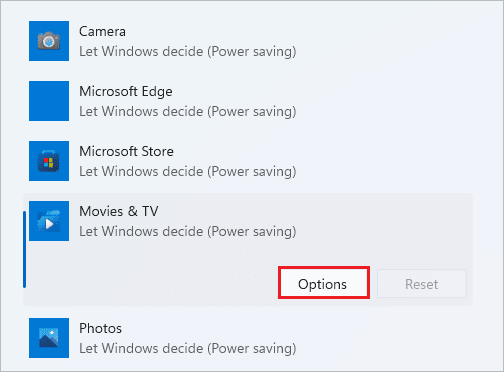
Step 1: Launch the Settings app and go to System ➜ Display ➜ Graphics. Alternatively, you can press the Win key, search for graphics, and open Graphics settings from the search results.
Step 2: In the Graphics settings, click on the app whose graphics preference you wish to change.
Step 3: Click on the “Options” button.
Step 4: Select the Graphics preference for the app. It can be “Power saving” or “High performance.”
Step 5: Click on “Save.”
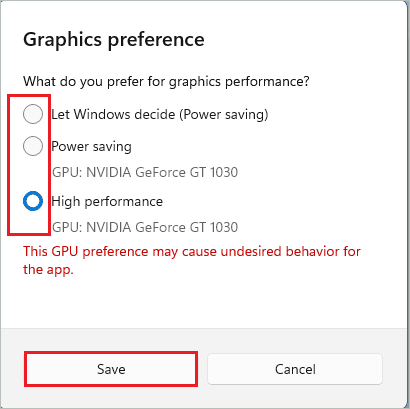
If you are unsure which preferences to select, you can let Windows decide.
5. Modify Game Capture Settings
You can capture screenshots and video clips while playing games. If you are one of the gamers who like capturing incredible moments, you probably have some best apps for that. In this case, you can disable screen and audio recording from the Windows 11 Settings app.
You can apply this best Windows 11 Settings for gaming for a better experience.
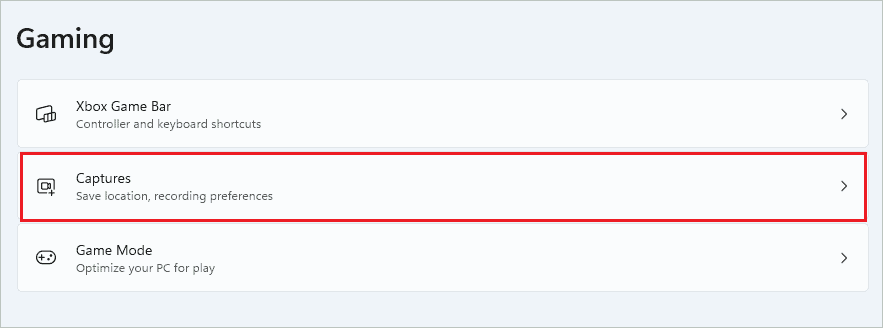
Launch the Settings app and click on “Gaming” from the left sidebar.
Next, click on “Captures” to modify the settings.
Now, turn off the switch next to “Record what happened.”

Also, toggle the switch next to “Capture audio when recording a game” such that it is disabled.
Once the changes are made, close the Settings app and start your gaming session.
6. Disable Unwanted Apps in Startup
If there are too many apps and processes running in the background, it can slow down your computer while gaming. You can disable unwanted apps from startup.
Open the Settings app and go to Apps ➜ Startup. Now, turn off the switch next to the apps that are not needed at startup.
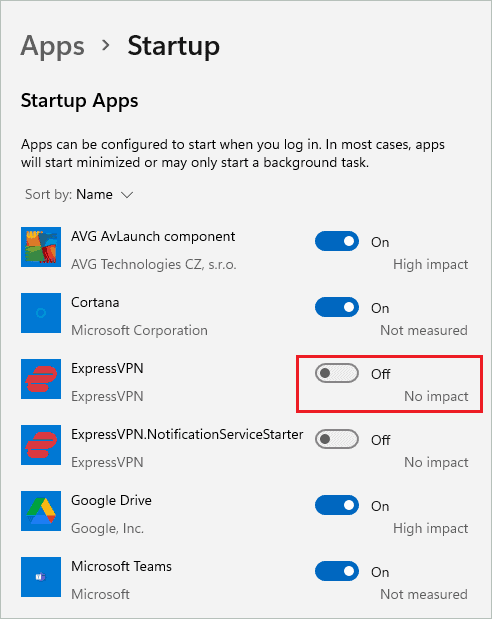
The unwanted startup programs will be disabled on your Windows 11 PC. You can launch this app whenever you want while using your computer.
7. Change Power Plan
You can set the power plan to high performance to improve Windows 11 gaming performance. Well, this setting needs to be changed from the traditional Control Panel. Follow the steps below to apply the last best Windows 11 settings for gaming.
Step 1: Press the Windows key and search for “Control Panel” in the search bar. Then, open the same from the search results.

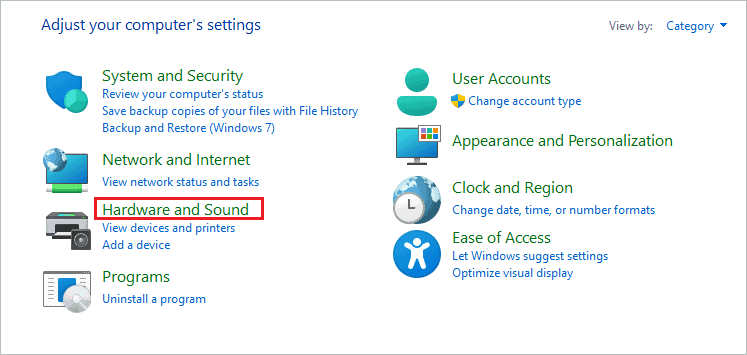
Step 2: In the Control Panel window, click on “Hardware and Sound.”
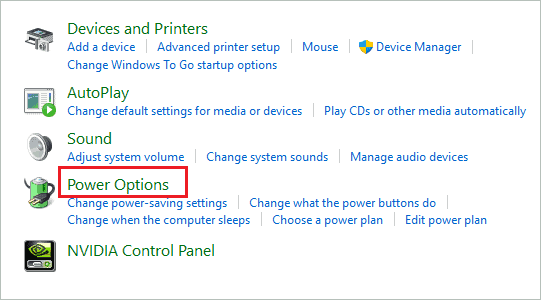
Step 3: Click on “Power Options.”
Step 4: Select “High performance” from the different power plans available.
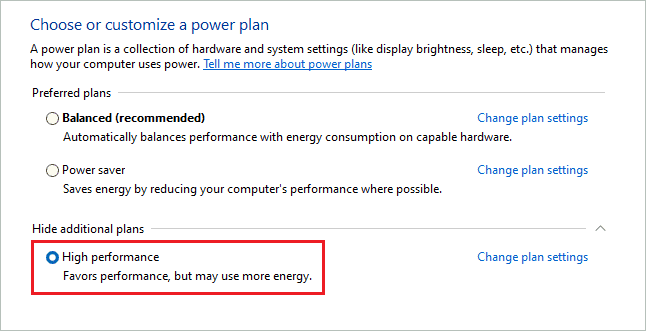
Note: If you cannot find a High performance plan, click on Show additional plans to find it.
Once done, close the Control Panel and reboot your computer.
8. Turn Off Xbox Game Bar
Unlike Windows 10, you cannot turn off the Xbox Game Bar completely in Windows 11. However, if you are not using this feature, it is recommended that you terminate it from the Settings app. This can help you save some memory and CPU usage.
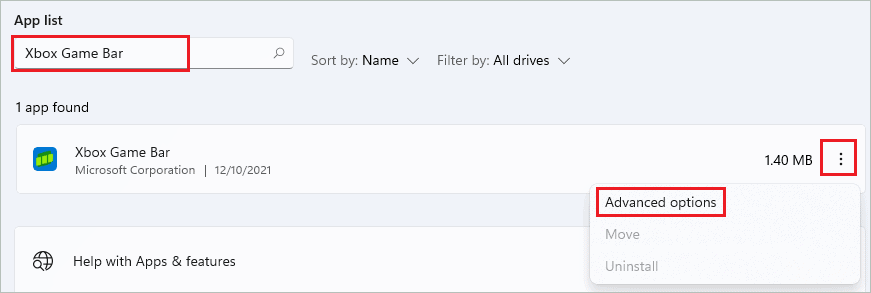
Go to Settings app ➜ Apps ➜ Apps & features and search for “Xbox Game Bar” in the App list search bar.
Click on the three dots next to the Xbox Game Bar from the search results and select “Advanced options.”
In the Advanced options, scroll down and click on the “Terminate” button to terminate the app and its processes.
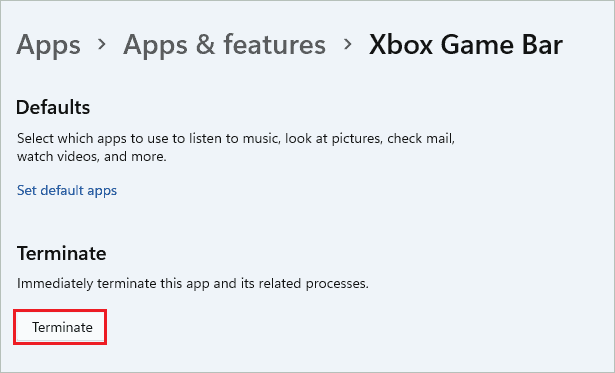
Now, nothing will pop up on your screen when you press Win + G on your keyboard.
After making the best Windows 11 settings for gaming, if you wish to optimize your Windows 11 PC, you can check out our guide on optimizing Windows 11 for gaming.
Final Thoughts On Best Windows 11 Settings For gaming
When it comes to gaming on the PC, we want the best experience possible. With Windows 11, you can achieve that with few changes in the settings. The above guide contains the list of the best Windows 11 settings for gaming. Check out all the settings and apply them to your PC to improve your gaming experience.
The Game Mode, Auto HDR, and graphics preference settings can help you play games like never before on your Windows 11 PC. Also, make sure you change the power plan and game capture settings before starting the game.
FAQs
How do I change my PC settings for gaming?
You can enable Game Mode and Auto HDR, change power plane and GPU preferences, disable Enhance pointer precision and unwanted startup apps and turn off the record what happened feature on your Windows 11 PC for gaming.
Is Windows 11 good for gaming?
Yes, Windows 11 can give you the best gaming experience. You can check out Windows 11 features to know more about it.
How can I make games run faster on Windows 11?
You can enable game mode and disable unwanted startup apps to make games run faster on Windows 11. Well, running the game on a dedicated GPU can also help. You can also change the power plan to high performance to run games faster.


