Key Takeaways:
- Sometimes the new PC comes in a display language that is unfamiliar to us.
- You can change the display language to your familiar language using the Settings app and Windows PowerShell.
- Microsoft also allows you to install dozens of languages as per your requirement in Windows 11.
Display language should be the language you understand. For example, if you purchased your PC from France, Japan, or China, the languages can be French, Japanese, and Chinese. This can be confusing if you only understand English. Therefore, one must know how to change display language in Windows 11.
Once you change the display language, you can also change the settings in Windows 11 to get started with it. So, let’s begin and set your preferred language as the display language.
How To Change Display Language in Windows 11
The below instructions are for how to change display language in Windows 11 from English (India) to English (USA). Both languages are somewhat similar, so finding the settings won’t cause difficulty. However, if your system is in a language that is not familiar, you can just follow the steps and refer to screenshots to change the display language.
Before changing the display language settings, there are some optional prerequisites.
Optional Prerequisite
You need to do this prerequisite only if you log in via Microsoft account to your Windows 11 PC. If you don’t need to reflect your language preferences on all the devices that use the same Microsoft account, you can disable syncing language preferences in that case.
However, this is optional and can be ignored if you want the same language on all synced Windows 11 devices. Additionally, you can skip this prerequisite if you use a local account to log in to your computer.
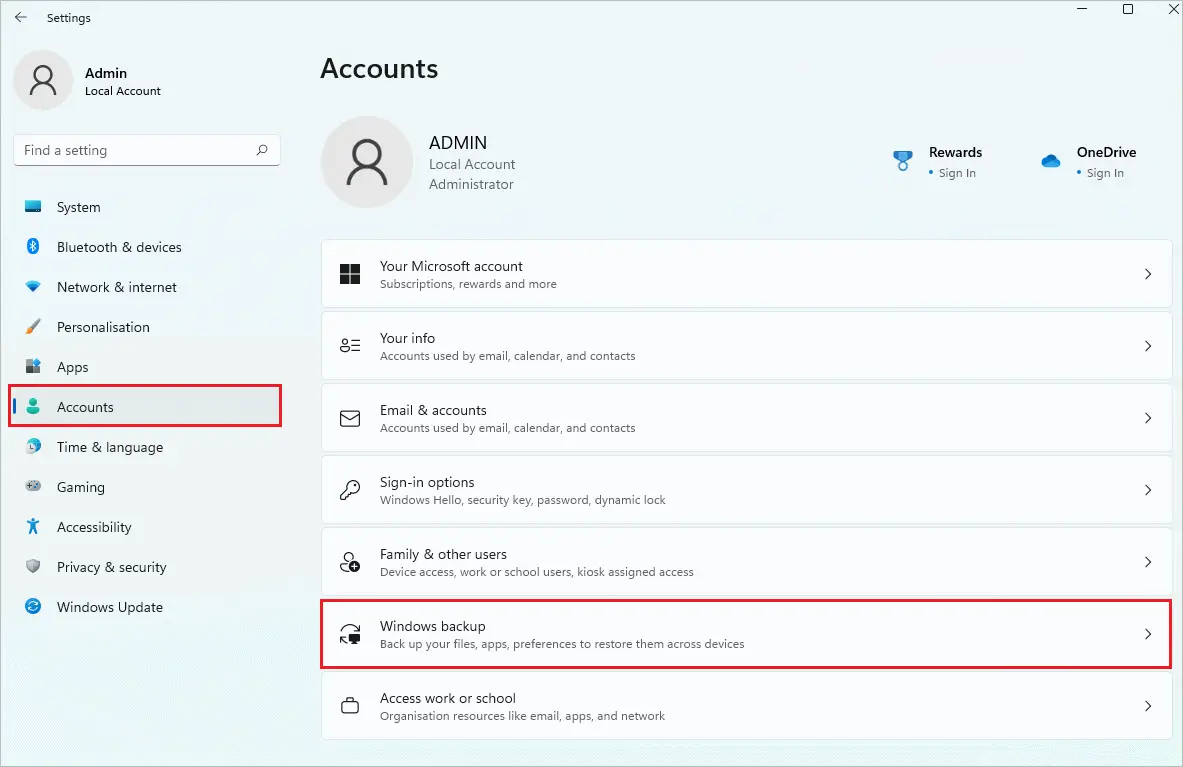
Press Windows key + I to open the Settings app and go to the “Accounts” section from the left panel.
In the Accounts settings, click on “Windows backup.”
On the next screen, expand “Remember my preferences.”
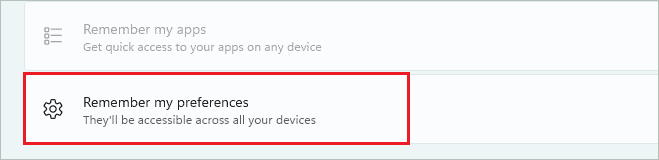
Uncheck the checkbox next to the “Language preferences” option to disable language sync across devices.
Now, let’s see how to change display language in Windows 11 using the Settings app and Windows PowerShell.
1. Use Windows Settings App
Changing the display language using the Windows 11 Settings app is easy.
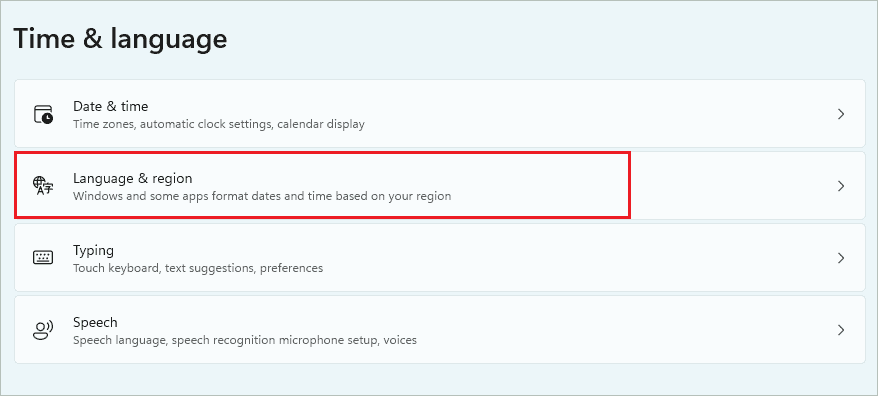
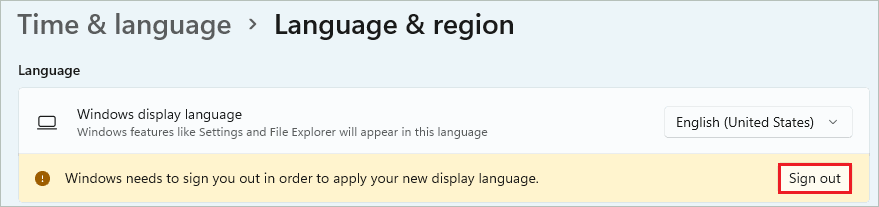
Step 1: Open the Settings app and go to the “Time & language” section from the left panel.
Step 2: Click on the “Language & region” subsection.
Step 3: Select the preferred language from the drop-down menu in the “Windows display language” option.
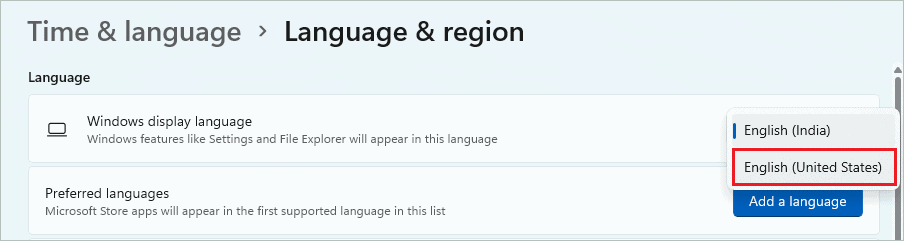
Step 4: Once you select the language, you must sign out to apply the changes.
Simply click on the “Sign out” button seen in Language & region settings.
If you don’t find the preferred language in the dropdown menu, you need to install the language pack on your computer.
How To Install New Language Pack To Change Display Language?
You can manually install the additional languages on your computer and set it as the display language.
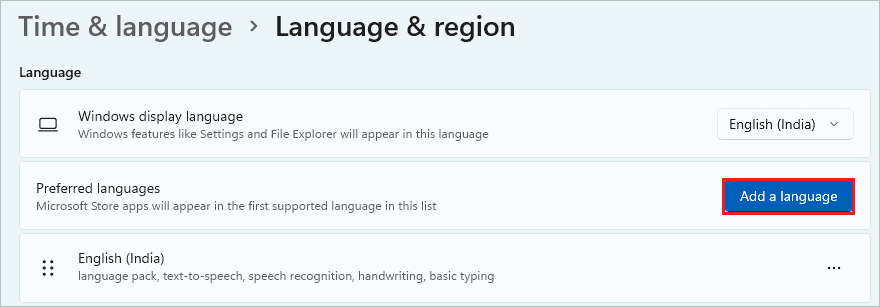
Go to Settings app ➜ Time & language ➜ Language & region and click on the “Add a language” button next to “Preferred languages.”
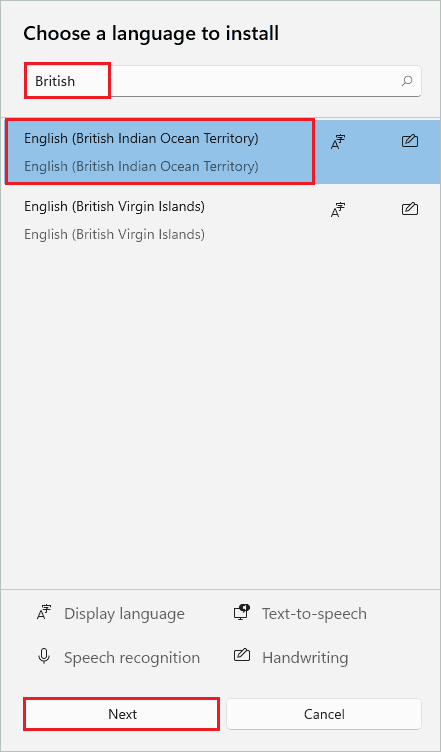
Now, search for the language you want, as it can be time-consuming to search it from the entire language list.
Once the language is found, click on it and click on “Next” to proceed.
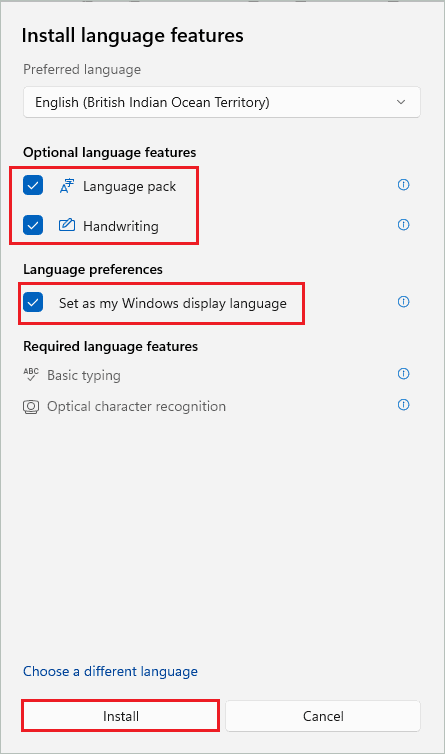
Now, check the checkbox next to “Language pack,” “Handwriting,” and “Set as my Windows display language.”
Click on “Install” to install the language pack on your computer.
The language will be set as display language as soon as you install it. You may need to sign out and sign in again to apply the changes.
If, by any chance, the installed language pack is not set as display language, you can refer to steps 1 to 4 to know how to change display language in Windows 11.
2. Use Windows PowerShell
If you are more comfortable with commands and command-line arguments, you can use Windows PowerShell to change language for display.
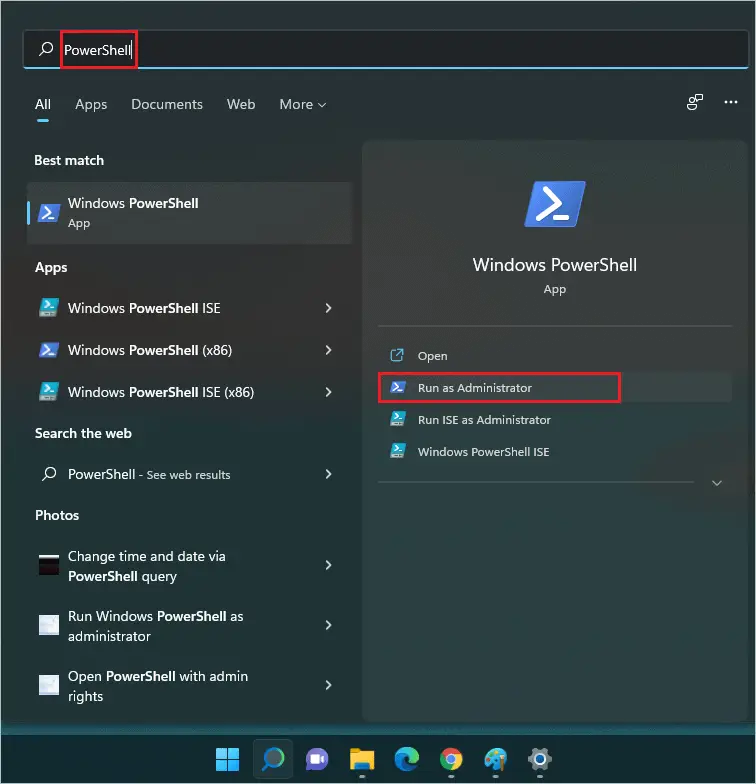
Step 1: Click on the Start menu on the taskbar and search for “PowerShell” in the search box.
Step 2: Click “Run as administrator” under Windows PowerShell to launch it with admin privileges.
Step 3: In the PowerShell window, type the below command and press Enter to execute it
Get-WinUserLanguageListThis command will list all the language packs installed on your computer.
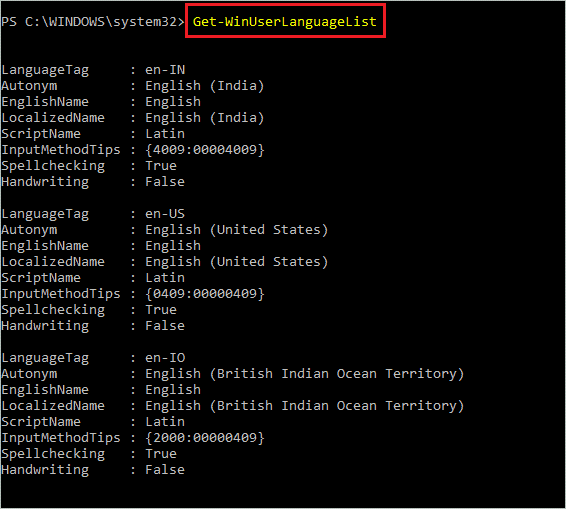
Step 4: Once you find all the language packs, note down the “LanguageTag” of the language you wish to set for display.
Step 5: Now, run the below command on your computer.
Set-WinSystemLocale LanguageTagHere, replace the LanguageTag with the one you noted in step 4. For example, if you want English (United States) as your display language, the command will be –
Set-WinSystemLocale en-USStep 6: Execute the following command to change the display language in Windows 11.
Set-WinUserLanguageList LanguageTag -ForceReplace the LanguageTag in the word with the actual tag. In our case, the command goes as –
Set-WinUserLanguageList en-US -Force
You now need to sign out and sign in to apply the changes to your Windows 11 PC. It takes only 3 PowerShell commands to know how to change display language in Windows 11. However, you need to have the language installed on your PC.
Conclusion
It is vital to be familiar with the display language to make the most of your Windows PC. However, if your display language is not understandable, you can change it easily via the Settings app and Windows PowerShell.
The above guide explains how to change display language in Windows 11 using both ways. You may need to install the language package if it is not already available on your computer. There can be complications if the display language is not at all known to you. In such a case, you can follow the screenshots mentioned in the guide and make changes accordingly. You can have multiple languages installed on your computer and use them as per your requirements.
FAQs
Why is my computer in a different language?
Your computer can be in a different language if the display language is set to an unfamiliar language. For example, this can happen if you have purchased your Windows PC from a different country or changed the display language by mistake.
Can you change the Windows language?
Yes, you can change the Windows language.
Where is Time and language in settings?
You can find Time and language in the left sidebar of the Windows 11 Settings app.
How do I change Windows from Chinese to English?
Open the Settings app and go to Time & language ➜ Language & region. And select English from the drop-down menu next to Windows display language. You can install the language pack and change the display language if you don’t find English there.


