Key Takeaways:
- Notifications are essential to know about a new message or email.
- Sometimes, unwanted notifications can pop up while working.
- You can mute or turn off notifications when you don’t want unwanted distractions.
Sometimes, we just want to work in peace without any distractions. You can temporarily disable all notifications or at least the unwanted ones in such a case. It is helpful to know how to turn off notifications on Windows 11 to keep the notifications at bay.
You can customize Windows 11 and prevent unwanted suggestions from popping up in the notification area. Likewise, you can customize turning off notifications as per your preference. So let’s dive deep into the guide below to see how we can manage notifications in Windows 11.
How To Turn Off Notifications On Windows 11
You can turn off all notifications via the Settings app, Registry Editor, Focus Assist, and Group Policy Editor. If you want to disable notifications for an individual app, you can use the notification center or the Settings app.
1. Turn Off All Notifications Using Settings App
You can turn off notifications from all apps, browsers, and Windows operating systems. It is easy to disable all notifications.
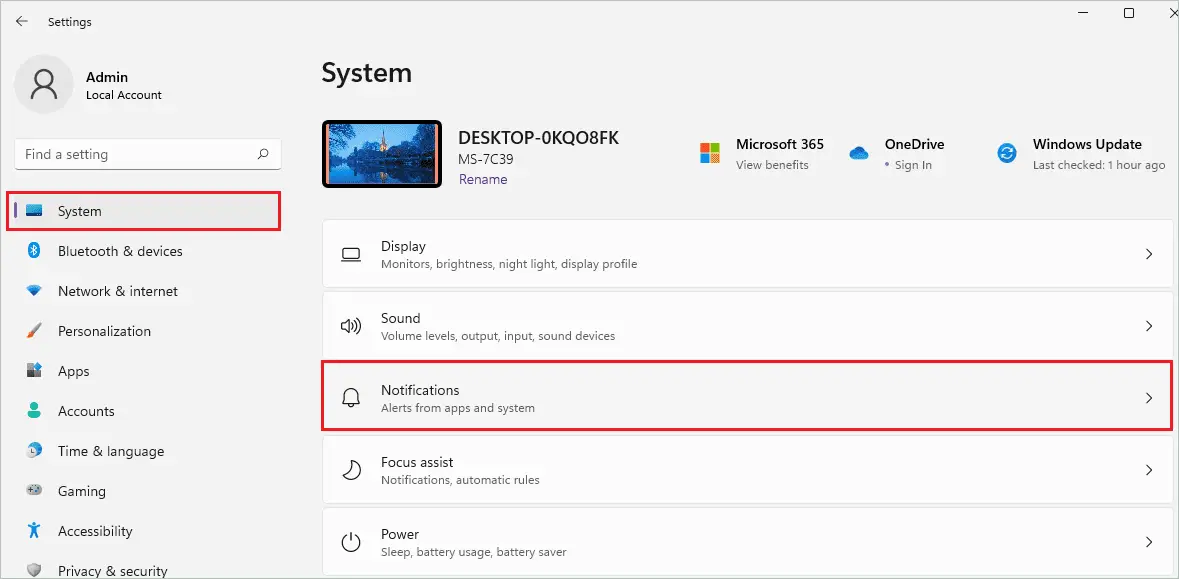
Press Windows key + I to open the Windows 11 Settings app and go to “System” from the left pane.
Next, click on “Notifications” settings.
Now, toggle the switch next to “Notifications” to turn it off.
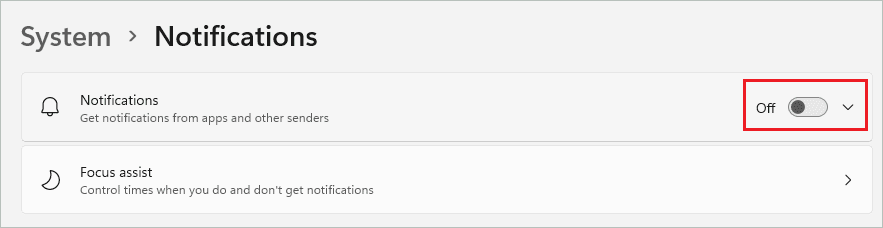
You won’t receive any notifications unless you turn on the Notifications switch again.
2. Use Registry Editor To Disable All Notifications
If the Windows Settings app is not opening, you can use the Registry Editor. Although it can get overwhelming to modify the Registry Editor, you can follow the steps below to do it correctly. Also, make sure you backup the registries before making changes, so if something goes wrong, you can restore it easily.
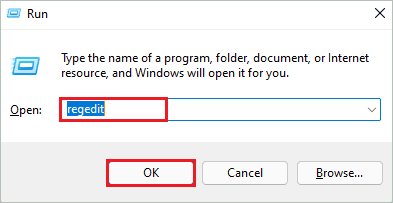
Step 1: Press Windows key + R to open the Run window and type “regedit” there. Click OK or press Enter key to open the Registry Editor.
Step 2: In the Registry Editor window, go to the below-mentioned path.
HKEY_CURRENT_USER\Software\Microsoft\Windows\CurrentVersion\PushNotificationsStep 3: Now, search for “ToastEnabled” DWORD in the right frame of the Registry Editor window. If you find ToastEnabled, you can jump to step 6. However, if you don’t find ToastEnabled, you need to follow all the steps below.
Step 4: Right-click on the “PushNotification” key in the left panel and click on New ➜ Dword (32-bit) Value.
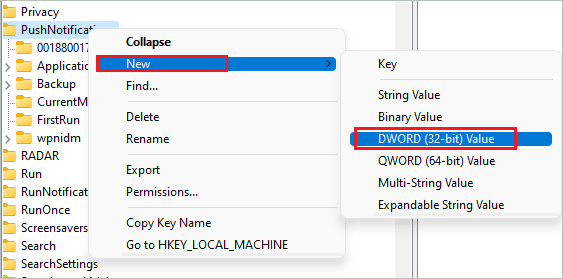
Step 5: Name the new DWORD as “ToastEnabled.”
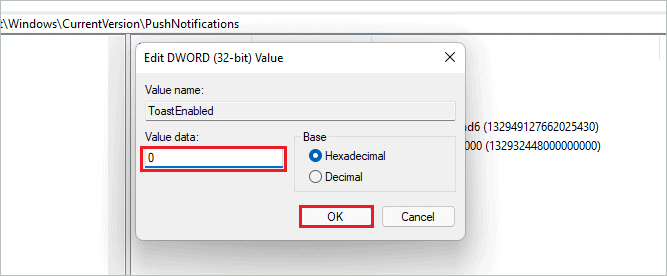
Step 6: Double-click on the ToastEnabled and set the Value data as “0.” Finally, click OK to save the changes.
You can then reboot your computer to apply the changes. If you wish to enable the notifications in the future, change the ToastEnabled Value data to 1.
3. Disable All Notifications from Group Policy Editor
You can use Group Policy Editor actually to turn off tile and toast notifications.
Note: The Group Policy Editor is only available on Windows 11 Professional and Enterprise versions. You can use the Registry Editor or Settings app to disable notifications if you have the Home version.
Let’s see how to turn off notifications on Windows 11 using Group Policy Editor.
Step 1: Open the Run window and type “gpedit.msc” there. Click OK to open the Group Policy Editor.
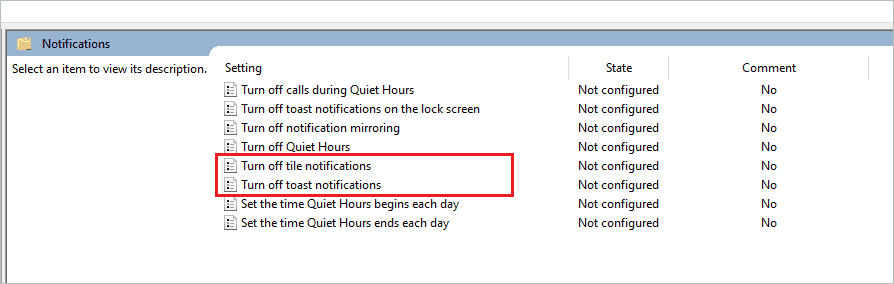
Step 2: In the Group Policy Editor, go to User Configuration ➜ Administrative Templates ➜ Start Menu and Taskbar ➜ Notifications.
Step 3: Now, there are two policies that you need to alter. The first is “Turn off tile notification,” and another is “Turn off toast notifications.”
You need to enable both of them to turn off notifications on Windows 11.
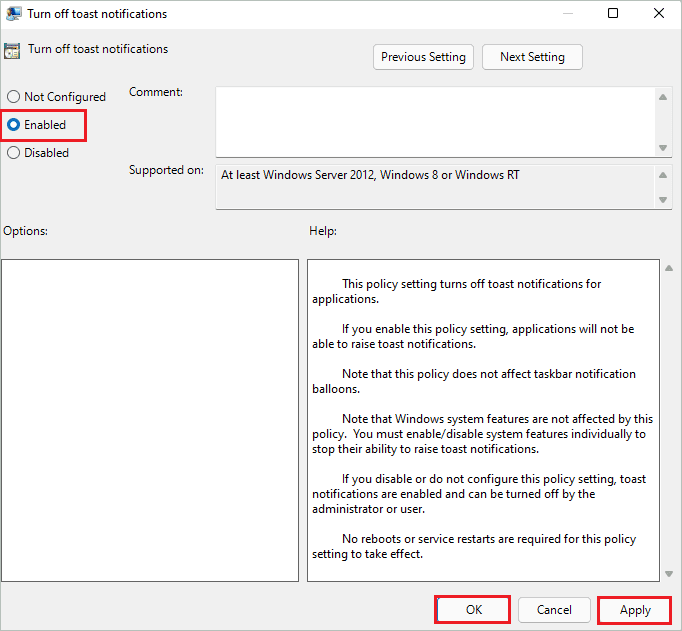
Step 4: Double-click on “Turn off toast notifications” and select “Enabled.”
Click on Apply, followed by OK, to save the changes.
Step 5: Enable “Turn off tile notifications” in the same way.
Once both the policies are enabled, you can reboot your PC to apply the changes.
How To Turn Off Notifications on Windows 11 for a Specific App?
If you just want to disable notifications for some apps, you can do so easily. Check out all the sections to get rid of unwanted notifications in Windows 11.
1. Disable Notifications For Some Apps From Settings App
If you don’t want notifications from one or two apps, you can disable them via the Settings app.
Open the Settings app and go to System ➜ Notifications from the Settings menu.
You can find the list of apps under “Notifications from apps and other senders” in the Notifications settings.
Turn off the toggle switch next to the application you don’t want to get notifications from.
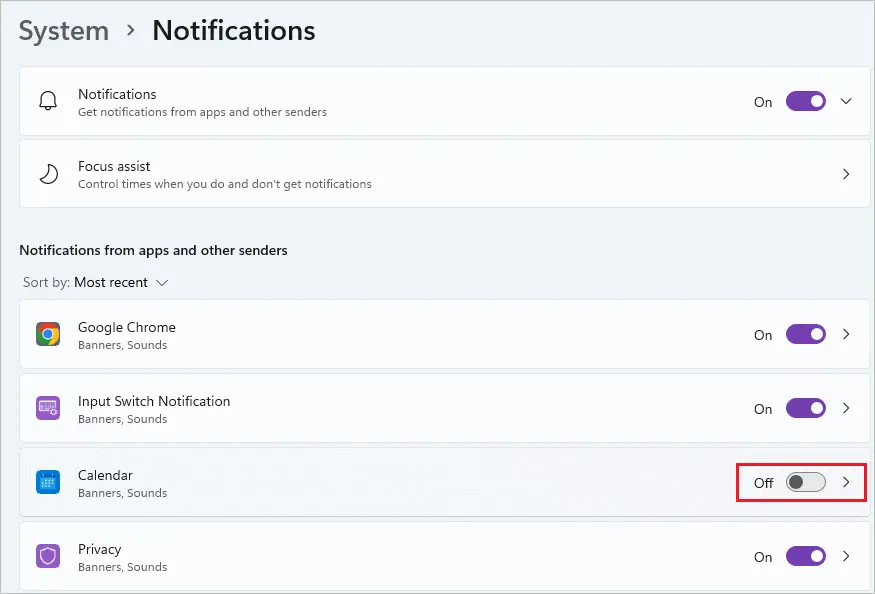
You can turn off notifications for as many apps as you want.
2. Turn Off Notifications From Notification Center
You can turn off notifications directly from the notification area. However, this is possible only if you have notifications from that app in the notification center.
Press Windows key + N to open the Notifications Center on your computer. Click on the three dots next to the notification and select “Turn off all notifications for Google Chrome.”
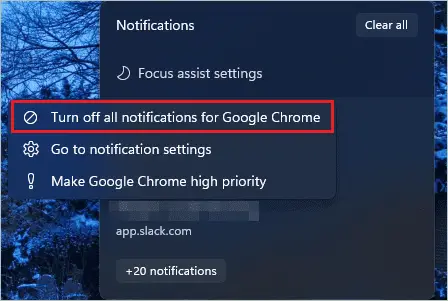
We have disabled Google Chrome browser notifications; you can do it for any app you want.
3. Disable Suggestions and Tips
The tips and suggestions can get annoying sometimes. You can turn off notifications that have suggestions and tips from Windows 11.
Navigate to Settings app ➜ System ➜ Notifications and scroll down to the end of Notifications settings.
Uncheck the checkbox next to “Offer suggestions on how I can set up my device” and “Get tips and suggestions when I use Windows” options.

The suggestion and tips will no longer pop up on your Windows 11 PC. However, you can enable them by checking the checkbox next to them in the future, if required.
How To Manage Notifications Settings?
If you want to turn off notifications from showing on the lock screen, you can do that too. You can also disable sound for notifications without turning off the volume. Managing notification on the Windows 11 computer is easy!
Go to Settings app ➜ System ➜ Notifications and click on the down arrow next to the Notifications option.
You can then uncheck the checkbox next to the settings you wish to disable.
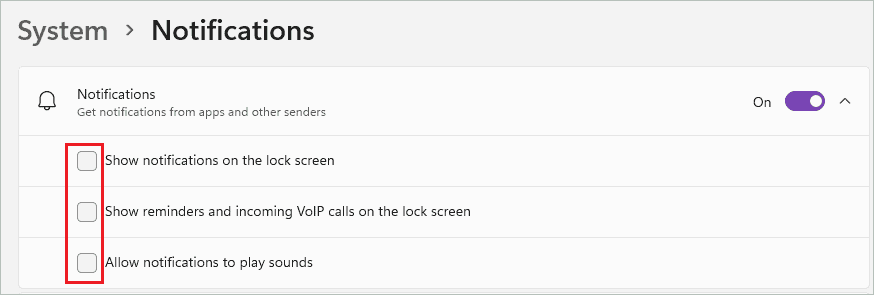
You can disable notifications, reminders, and incoming VoIP calls on the lock screen. If you uncheck the checkbox next to “Allow notifications to play sounds,” the notifications will pop up without any sound. This can help you get rid of annoying notification chimes.
It is fun to set the notifications settings as per one’s preference.
Turn Off and Manage App Notifications
Now, you know how to turn off notifications on Windows 11. However, it is equally important to know how to manage notifications for specific apps. You can check out the instructions below to manage apps notifications.
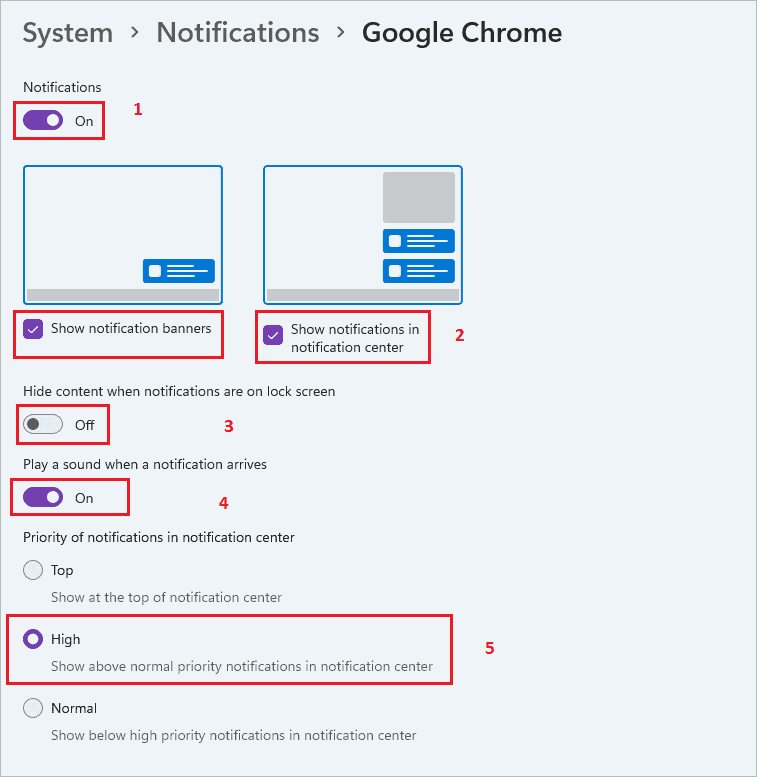
Open Notifications settings and click on the app for which you want to change notifications settings.

The app-specific notifications settings are as follows:
1. Turn off and on the notifications for the app.
2. Manage how you want to see the notifications – You can enable or disable the notification banner from here. If you don’t want to see notifications in the notification center, you can uncheck the ” Show notifications in the notification center ” checkbox. Likewise, you can eliminate frequent notifications banners by disabling them here.
3. If you have sensitive information on notifications, you can hide content on the lock screen for that app.
4. Enable or disable notification sound – You can turn off the notification sound for the app using this setting option.
5. Set the priority of notifications for that app – This helps in showing the notifications from important apps at the top.
You can set the preferred notification settings for the apps.
How To Clear Windows Notifications?
To remove all the notifications from the notification center, you can open it and click on the “Clear all” option.
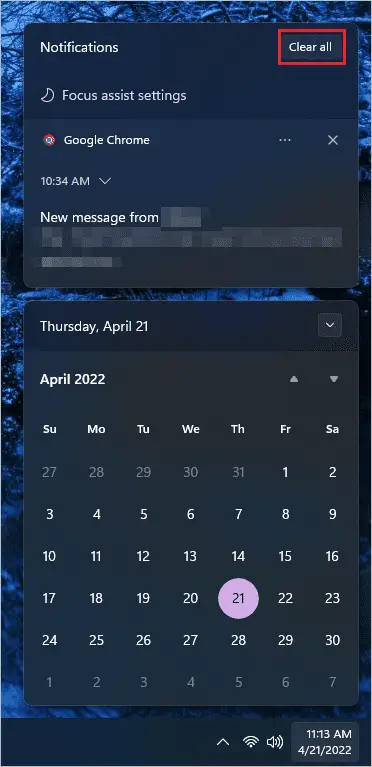
This will instantly clear all the notifications from the notification panel.
Conclusion
When we are working on something important, turning off the notifications from unwanted applications is essential. With Windows 11, you can manage the notifications as per your preference and requirements. You can turn off all notifications or just disable them for a few apps.
You can use the Registry Editor, Group Policy Editor, and Settings app to disable notifications on Windows PC. The above-detailed guide shows how to turn off notifications on Windows 11. You can also know how to manage notifications settings.
With the help of the guide, you can have different notification settings for all the apps on your computer.
FAQs
How to silence notifications in Windows 11?
You can go to Settings app ➜ System ➜ Notifications and click on the drop-down arrow next to the Notifications switch. Now, uncheck the checkbox next to “Allow notifications to play sounds.” This will silence notifications in Windows 11, and you won’t hear the chime of notifications.
How to turn off notifications on Windows 11?
Go to Settings app ➜ System ➜ Notifications and turn off the switch next to “Notifications” to turn off notifications on Windows 11.
Where are the notifications on Windows 11?
You can find notifications in the notification center on Windows 11. Press Windows key + N from your keyboard to access the notification center.


