Whenever any new updates are rolled out by Apple, we want to update our iPhones to check out the new features and functions. Usually, the update process is smooth and completes without any hindrance. However, sometimes due to many reasons, you might find yourself in a situation where the iPad/iPhone won’t update.
The common reasons that can cause issues in updating the iPhone are:
- Insufficient storage
- Weak WiFi connection
- Low battery
- Unreachable update server
There can be many other reasons that may prevent the iPhone from updating to a new iOS. You can check out all the solutions listed below and get your iPhone updated.
iPhone Won’t Update to iOS 13!
Everybody wants new software on their phones. However, the device’s hardware should have the capability to handle the update. Before trying to update the iPhone, make sure it supports the new software version.
In the case of iOS 13, you can check the list of devices it supports given on Apple’s official site.
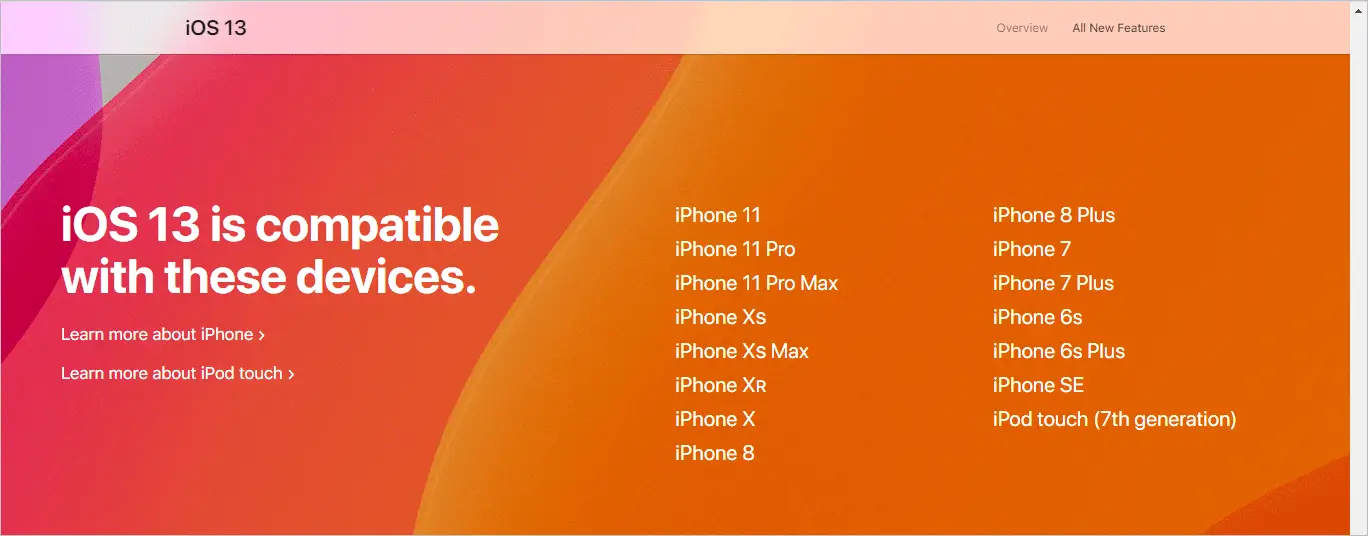
You can also check the details here. Well, if your model is present in the list and still your iPhone won’t update, then you need to try the fixes listed below.
Top 14 Solutions to try when your iPhone won’t Update
The solution that may work for you depends on the issue that was causing the iPhone not updating issue. The solutions mentioned below can work for all the iOS versions, be it iOS 13, 12, or before. Let’s fix and update your iPhone with the quick fixes mentioned below.
1. Reboot the iPhone
If there is a minor technical glitch in the iPhone and your iPhone won’t update, a quick reboot can fix your issue. To reboot iPhone, press and hold the power button until you see the slide to power off option. Now, leave the power button and slide the power off option from left to right.

When the phone shuts down, hold the power button to switch it on. You can then check whether you can update your iPhone. If you face the same issue again and your iPhone won’t update, then check other fixes mentioned below.
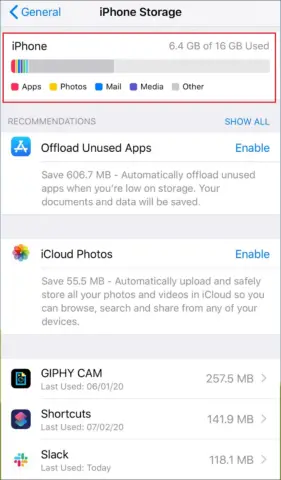
2. Check for Available Storage
Every update needs sufficient space on your phone. If sufficient storage is not available, your iPhone won’t update.
You can check your storage by going to Settings ➜ General ➜ iPhone Storage.
You can check the update size, to make sufficient space on your iPhone. To check the update size, go to Settings ➜ General ➜ Software Update. Below the version number of the update; you can see the size of the update.
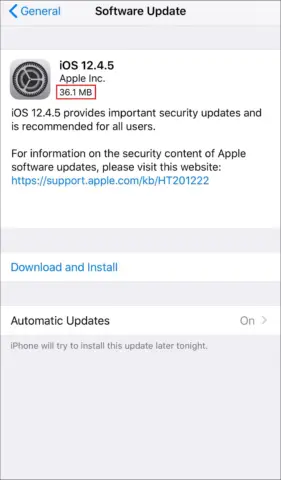
You should keep more free space then the update size. Once you have made enough free space for your update, try to update your iPhone again. If space was an issue, then this will probably solve it.
3. Reconnect WiFi
A minor network issue can also stop the download and your iPhone won’t update. Installation of your iOS update won’t happen irrespective of the version. You can forget the currently connected WiFi connection and then reconnect it. This can remove the issues in the connected network if any.
To disconnect the WiFi and also forget the network, go to Settings ➜ Wi-Fi. Click on the connected network, and then select Forget This Network.
Note: You will need the WiFi network’s credentials to reconnect the network once you forget it.
Once the network is disconnected, you can reconnect by choosing it from the list of networks shown in Choose a Network section.
After you have connected to the WiFi network again, try updating your iPhone.
4. Turn on Automatic Updates
Your iPhone will not update on its own even after sending you the alert about the update if the automatic updates are off. You can turn on the automatic update if you want your iPhone to install the update once it is available.
To enable or turn on automatic updates, go to Settings ➜ General ➜ Software Update ➜ Automatic Updates.
Once the Automatic Updates is opened, toggle the switch to turn it on so that it turns green.
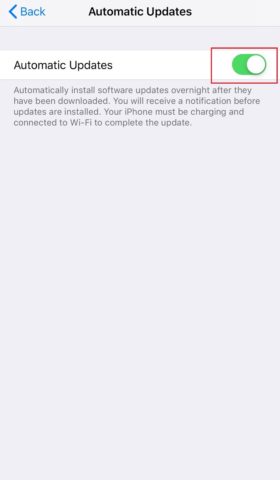
Now your iPhone will update iOS automatically when it is connected to WiFi and charger. You can turn off automatic updates when you wish to by following the same steps.
5. Turn Off Content & Privacy Restrictions
When you have restricted access to particular apps like iTunes, that might be causing issues while updating the iOS version, and thus, your iPhone won’t update. You can temporarily turn off Content & Privacy restrictions and try updating the iPhone.
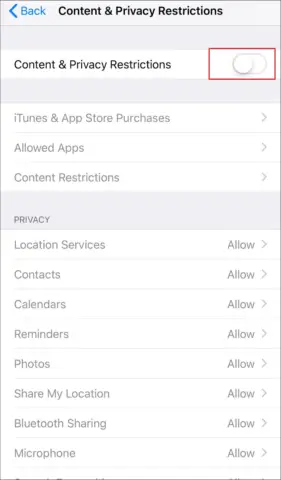
Go to Settings ➜ Screen Time ➜ Content & Privacy Restrictions.
You may need to add the Screen Time Passcode if enabled to enter Content & Privacy Settings. Once you enter the required settings, turn off the switch next to Content & Privacy Restrictions.
Once your iPhone is updated, you can turn on Content & Privacy Restrictions again.
6. Use iTunes to Update your iPhone
If you are using iPhone settings to update your phone, then you can try switching to iTunes.
To update the iPhone using iTunes, follow the instructions given below.
Step 1: Connect your iPhone with the Mac or Windows PC using lightning cable/charging cable.
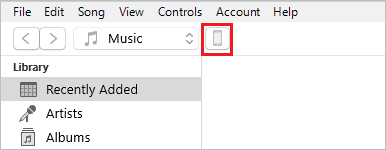
Step 2: Open iTunes and click on the phone icon.
Step 3: In the right-panel, click on the Update.
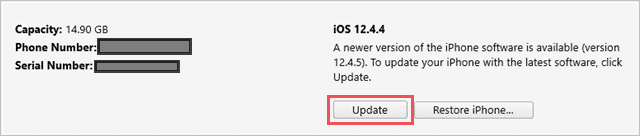
Step 4: Confirm the update when asked for confirmation.
When your iPhone won’t update, this fix might resolve the issue.
7. Use Settings App to Update your iPhone
You can make a switch from iTunes to the Settings app to update your iPhone. If there are issues with iTunes, the Settings app can come to rescue.
Go to Settings ➜ General ➜ Software Updates and click on Download and Install.
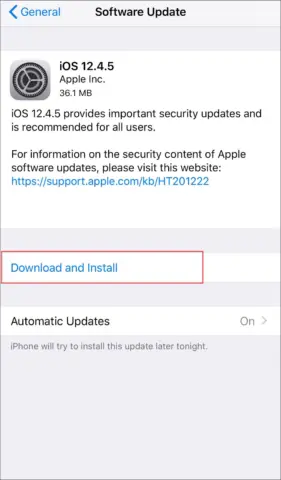
This will let you download the update and install it if you have sufficient storage space, as mentioned above.
8. Force Restart the iPhone
Sometimes, the normal reboot doesn’t fix the technical glitch on your iPhone and your iPhone won’t update. In such cases, you need to force restart the iPhone. Well, different models have different ways of force restarting it. You can refer to the table below and find the way for the iPhone/iPad you are owning.
Once done with force restart, you can try updating the iPhone using iTunes or Settings app. If still, your iOS won’t update, then you need to try the other solutions from the list.
9. Check if Update Servers are Working
When a new update comes, everyone wants it. In such scenarios, Apple servers may become overloaded and your iPad/iPhone won’t update. You need to have patience and wait for some days to update your iPhone.
Sometimes, the servers may have downtime due to some issues. And you may not be able to reach the servers for verification and downloads. You can check about Apple servers with the Apple care store. They will tell you if the servers are down or overloaded and when you can actually update your phones.
10. Delete the Update
If you are not able to install the new update, then you can try deleting the downloaded update. The downloaded update is the update that is yet to be installed. Once it is installed, you cannot delete it.
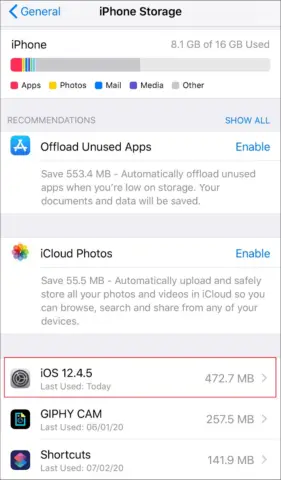
To delete the downloaded update, go to Settings ➜ General ➜ iPhone Storage.
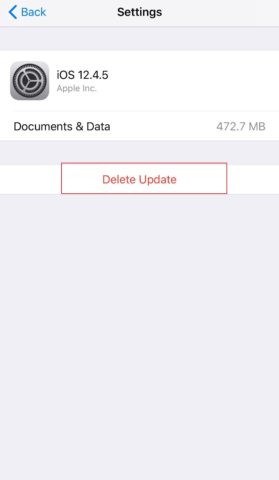
Click on the update you recently downloaded. In our case, it was iOS 12.4.5.
Now, click on Delete Update to delete it from your iPhone.
Once the update is deleted, you can download the update and try installing it on your iPad/iPhone.
11. Reset Network Settings
If your update is abruptly stopping in between, then a recent change to network settings can be an issue and your iPad/iPhone won’t update. You can reset the network settings. Resetting network settings won’t delete your personal data from the phone.
Only the paired Bluetooth devices, connected WiFi networks, and other such network-related settings will be erased from your device.
To reset network settings, go to Settings ➜ General ➜ Reset.
Next, click on Reset Network Settings. You will need to enter the passcode to continue with the reset.

Reboot your iPhone and check if the iPad/iPhone update issue is fixed with this reset.
12. Reset All Settings
Have you made any changes to your iPhone Settings recently? If yes, then maybe that didn’t go well, and thus, your iPad/iPhone won’t update. You can reset all iPhone settings.
To reset all the settings, go to Settings ➜ General ➜ Reset. Click on Reset All Settings. Enter the passcode when asked. All your settings will be erased.
Once done, reboot your iPhone. If settings were causing this issue, then the reboot will fix it for you.
13. Restore iPhone
One of the final solutions is to restore the iPhone. If any apps or other issues are residing and misbehaving, then restoring will help you fix it. Take a backup of your iPhone before restoring it.
To restore the iPhone, connect it to Mac/Windows using the charging cable. Open iTunes/Finder and click on the phone icon, as shown in solution 6. Click on Restore iPhone.
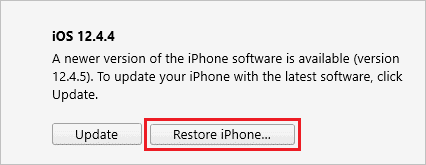
After the restore, you might be able to update it.
14. DFU Restore
However, after trying out all solutions, the last resort is to perform a DFU restore. Well, this is the most critical restore you can do on your iPhone. Please refer to our guide on DFU restore to know more about the process and implement it.
Conclusion
Now you should have a new OS version on your iPhone. The above solutions might have helped you to fix the issue when your iPad/iPhone won’t update. Whenever a new update is rolled out, you need to check whether your device supports it or not. Once you know the max iOS version your iPhone supports, you can find the appropriate fixes.
Also, check:
- A Step-by-step Guide On How To Set Alarm On iPhone
- How To Restart iPad Without Using The Power Button?
- Get 3D Touch (Force Touch) on an Old iPhone or iPad


