We don’t mess around with screen brightness on computers and laptops. Some of us wish to have the same brightness throughout the day, while others prefer to keep changing the brightness as per lighting around them. Now, what if the screen keeps dimming in Windows 10 PC on its own? Well, that can get annoying, especially if bright lights are surrounding you.
Many users complain that the brightness dims automatically even after manually changing it. Windows 10 allows you to change brightness as per your wish, but if brightness dims on its own, this feature is of no use. You can make a few changes to Windows 10 settings and fix this issue on your computer.
What Causes Screen To Dim Automatically In Windows 10
Some factors can lead to screen brightness dim issues. It can be incorrect settings or some other reason that makes the screen dim automatically. Some of the common causes are:-
- Outdated, unstable, and corrupt graphics driver
- Enabled adaptive brightness
- Power saving feature turned on
- Issues with some startup apps
- Hardware faults and failures
Some workarounds can resolve the issue with drivers and settings conveniently. However, if the fault is with hardware, the only way to resolve the issue is by replacing the faulty component.
17 Solutions To Fix Screen Keeps Dimming In Windows 10
Note: We recommend trying out the solutions below in chronological order to avoid putting extra effort into minor issues. You may need administrator credentials in some of the fixes, so it is better to keep them handy before you start with the solutions given below.
1. Disable Adaptive Brightness
The adaptive brightness adjusts the laptop screen brightness depending on the light it perceives around you. Well, this can be helpful, but it can get on your nerves when you want to work on specific brightness settings, and the adaptive brightness feature changes it to something else.
You can disable adaptive brightness manually by going to Control Panel ➜ Power Options. However, the automatic brightness adjustment will not work after this. Once the adaptive brightness is disabled, you can reboot your PC once and then check if the brightness issue is resolved or not. You can then change the brightness level as per your wish.
2. Turn Off Monitor’s Auto-Dimming
Many monitors have an auto-dimming feature of their own. You need to disable it to fix the screen keeps dimming in Windows 10 issue. Well, this feature is hardware-specific and depends on the manufacturer. Therefore, you need to check the manufacturer’s website to get information and steps to disable the monitor’s auto-dimming feature.
If your monitor setting doesn’t have such a feature, you can move on to the next solution to resolve the screen brightness issue.
3. Run Windows Power Troubleshooter
Some incorrect power settings can also cause the automatic screen dimming issue. You can run the Power troubleshooter to fix this problem.
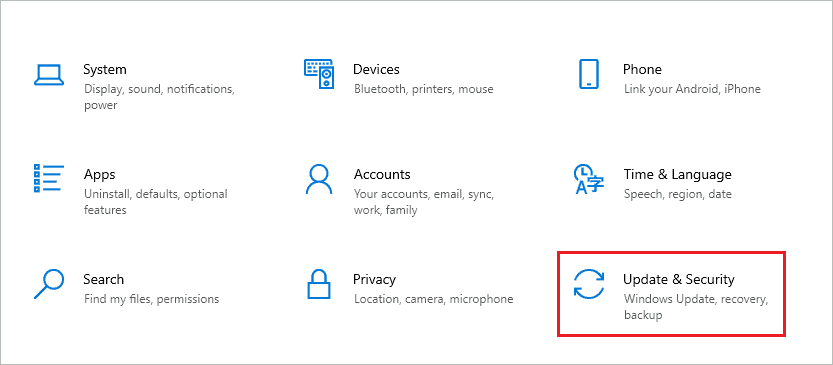
Step 1: Press Windows key + I to open the “Settings” app and then click on “Update & Security.”
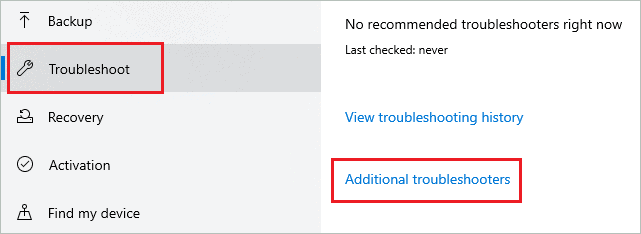
Step 2: From the left panel, click on “Troubleshoot.”
Step 3: Click on the “Additional troubleshooters” link to see the list of troubleshooters.
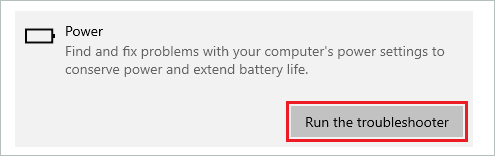
Step 4: Now, search for “Power” under the “Find and fix other problems” section. When found, click on it and then click on the “Run the troubleshooter” button.
Let Windows run the troubleshooter and fix the incorrect power settings for you. Once the settings are modified, you can check if the screen keeps dimming in Windows 10 issue is resolved or not.
4. Check Power Supply Sockets, Ports, and Laptop Battery
If your laptop or computer is not getting enough power, the screen brightness can go dim. You need to check the power supply sockets along with the charging port on your laptop for any damage.

Also, check if the laptop battery is charging properly without any issues. If any of the power-related hardware is damaged, you can replace it with a new one and then check if the brightness problem resolves or not.
5. Uninstall Recent Windows 10 Update
You can remove the most recent Windows 10 update to fix the screen keep dimming issues. Well, try this only if you started experiencing problems with brightness after updating Windows Operating System.
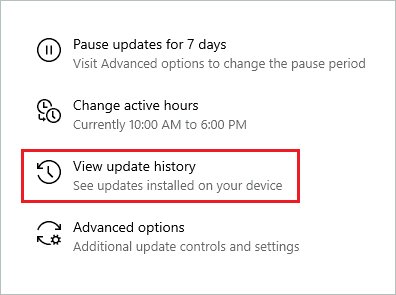
Launch the “Settings” app and go to the “Update & Security” section. Next, in the Windows Update section, click on “View update history.”
On the next window, click on “Uninstall updates.”

Now, the Control Panel window will open on your screen, scroll down to the “Microsoft Windows” section, and right-click on the most recent update. If you are not sure about the recent update, check the “Date” column to find it.
Click on the “Uninstall” option to remove the recent update from your computer.

Once the update is uninstalled, restart the computer and check if the screen gets dimmed or not.
6. Check Startup Programs/Applications List
If the screen goes dim after one of the startup programs launches, the issue might be with that specific application. You can disable all the startup apps and then enable them one by one to find the culprit.
To disable the startup apps, go to Settings app ➜ Apps. Now, from the left frame of the Settings window, click on “Startup.”
You can toggle the switch next to the app to disable it from launching after startup.

Make sure you avoid disabling the apps and programs that are important for other things to function properly.
Once the unwanted apps are disabled, reboot the PC and check if screen dimming has stopped or not. If it stops, you can enable the apps one by one using the above way to find the culprit.
7. Disable Intel’s Display Power Saving Technology
This solution is only applicable to users with Intel graphics cards on their Windows PC. In addition, you need to disable the power saving mode to prevent the screen from dimming on its own.
Open “Intel Graphics Control Panel” from the Start menu. When the utility opens, click on the “Power” option.
Next, from the left panel, click on “On Battery” and then select “Disable” under “Display Power Saving Technology.”
From the bottom, click on “Apply” to save the changes you made.
The screen keeps dimming in Windows 10 will probably resolve after this fix.
8. Use Battery at Best Performance
The screen keeps dimming in Windows 10 if the battery is used in battery saver mode. Well, you can change it to best performance to avoid such issues. However, doing so will increase battery power consumption on your laptop, so move ahead with caution.
Click on the “Battery icon” on the taskbar and move the slider to the extreme right for best performance.
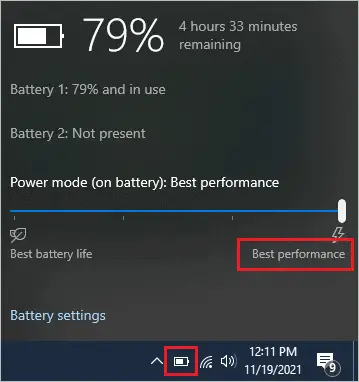
There are four options available – Best battery life, Better battery (Recommended), Better performance, and Best performance. To avoid screen dimming, you can opt for the Best performance.
However, once the issue is resolved, you can move back to a Better battery or some other option of your choice to decrease power consumption.
9. Modify Display Color Calibration Settings
Making a few changes in the Display Color Calibration utility can help you resolve the automatic screen dimming issue in Windows 10.
Open Display Color Calibration by searching for it in the Start menu. If you have opened it for the first time, you may need to click on the “Next” button in the bottom-right corner three times or until you see the “Adjust gamma” screen.
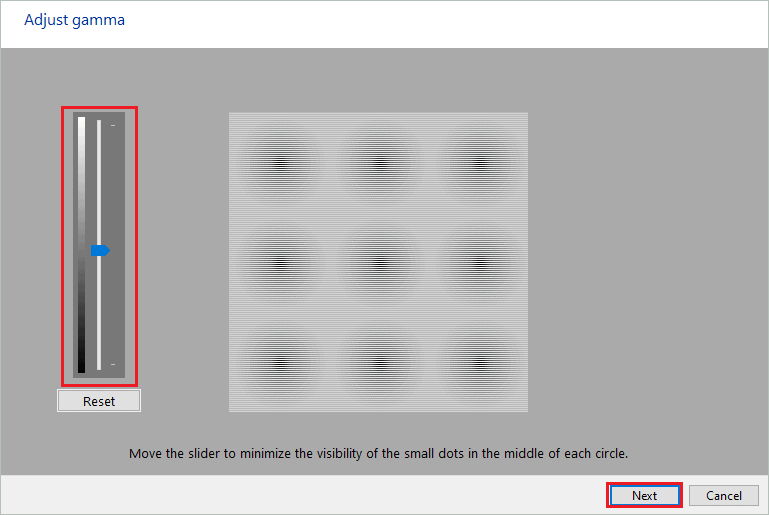
Move the slider up and down to adjust gamma and then click on Next. If you are not sure about gamma adjustment, simply set it in the middle.
After making adjustments, click on “Next.”
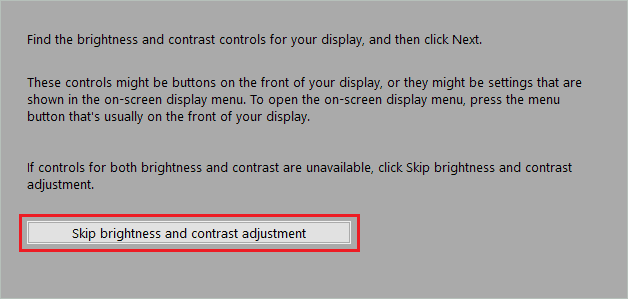
Now, on the next screen, click on “Skip brightness and contrast adjustment.”
Keep clicking on the Next button till you see the “Adjust color balance” screen. You can move the red, blue, and green slider as per your preference.
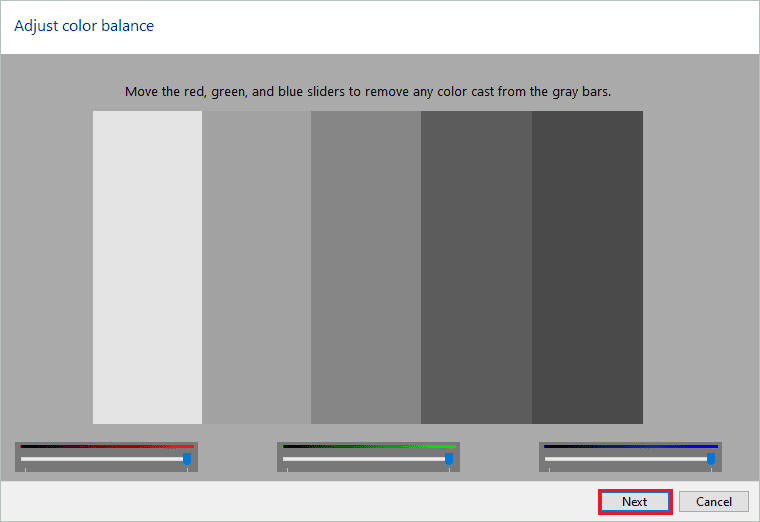
Lastly, click on “Finish” to save the calibration changes you made.
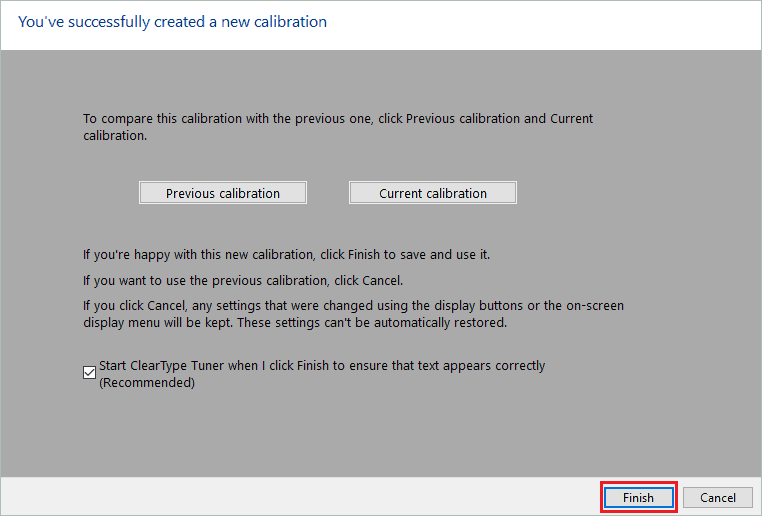
Now, check if the screen keeps dimming in Windows 10 issue is resolved or not.
10. Update Graphics Card Driver
The outdated drivers can be a major cause of screens brightness issues. You can update the device drivers using Device Manager to resolve the automatic screen dimming problem.
You can find the graphics driver under Display adapters in Device Manager. Make sure you update driver using a stable and compatible driver version downloaded from the trusted source. You can also use an automatic driver updater like Driver Booster to update the display driver.
11. Make Changes to Windows Registry
Many users made changes in the Registry Editor to resolve the screen keeps dimming in Windows 10 issue. As the registry holds crucial data about your computer, it is always recommended to back up the registry before modifying it.
Once the registry is backed up, move on to the below steps to make the right changes.
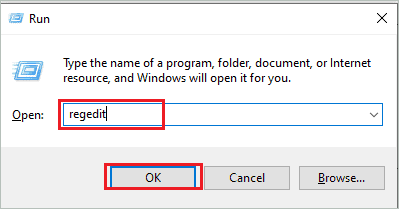
Step 1: Press Windows key + R to open the “Run” window and type regedit there. Click “OK” or press the “Enter” key to open the Registry Editor via Run.
Step 2: In the Registry Editor window, go to the below-mentioned path.
Computer\HKEY_LOCAL_MACHINE\SYSTEM\ControlSet001\ControlClass\{4d36e968-e325-11ce-bfc1-08002be10318}\0001Step 3: Look for “FeatureTestControl” in the right frame of the Registry Editor.
If you don’t find it there, you can press the Ctrl key + F and search for it via the search box. Many users found this key in 0000, so the search function can help you with the right path.
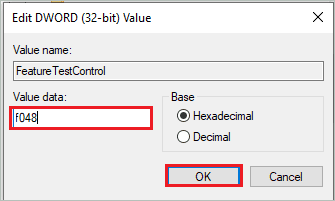
Step 4: Double-click on FeatureTestControl and change its “Value data” to “f048.” Lastly, click on “OK” to save the changes.
Now, close the Registry Editor and reboot your computer. After the PC restarts, check if the issue you were experiencing with display brightness is resolved or not.
12. Disable Microsoft ACPI-Compliant Control Method Battery
You can fix the screen keeps dimming in Windows 10 issue by disabling Microsoft ACPI-Compliant Control Method Battery in Device Manager. It is easy to enable and disable devices in Device Manager.
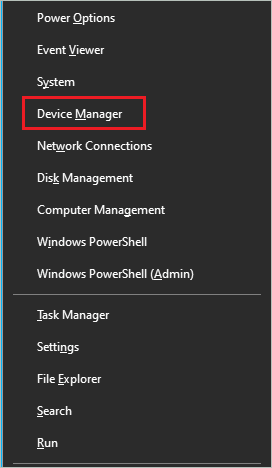
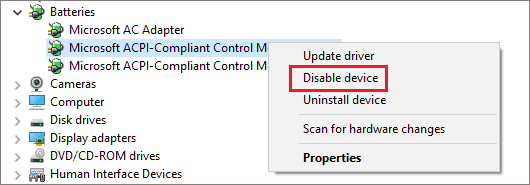
Step 1: Press Windows key + X to open the quick link menu and click on “Device Manager” to open it.
Step 2: In the Device Manager window, expand Batteries and right-click on Microsoft ACPI-Compliant Control Method Battery.
Step 3: Select Disable device from the context menu.
Once the device is disabled, you can reboot your PC and check if the issue is resolved or not. If the issue persists, you can enable the device driver again and move on to the next fix.
13. Reinstall or Roll Back Graphics Driver
If you started experiencing issues with screen brightness after updating the graphics card drivers, you need to roll back it to a previous version. Sometimes, incompatible or unstable versions of device drivers create unwanted problems on your computer. In such scenarios, rolling back device drivers to a previous version is the only way to resolve the issue.
However, if the roll-back version is greyed out or you have not updated display device drivers recently, you can reinstall them to resolve screen dimming issues. In addition, you can uninstall the drivers and reinstall them easily via Device Manager.
14. Change the Display Resolution
The screen keeps dimming in Windows 10 can occur if the display resolution is not correctly set. You can change the screen resolution and set it to the recommended option to avoid issues with brightness.
Open the Settings app and go to “System” settings. Now, from the left panel, go to “Display.”
From the drop-down menu below Display resolution, select the recommended resolution.

When asked for confirmation, click on “Keep changes.”
You can then set a brightness and check if it reduces on its own or not.
15. Disable Game Mode and Xbox Game Bar
Many Windows users experience screen dimming issues while playing games on their computers. In such cases, you can disable the Game Mode and Xbox Game Bar options to resolve the issue.
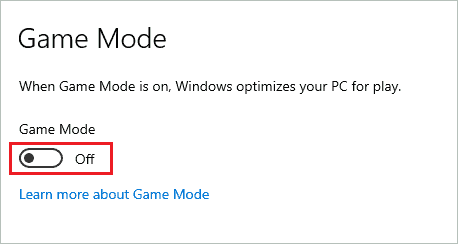
Go to Settings app ➜ Gaming and click on “Game Mode” from the left panel.
Next, toggle the switch below Game Mode such that it is disabled.
Now, go to the “Xbox Game Bar” option from the left frame and toggle the switch below “Xbox Game Bar” to disable it.

Once both the options are disabled, relaunch the game on your PC and check if brightness is affected or not.
16. Disable Dynamic Backlight Control in BIOS
You can disable Dynamic Backlight Control in BIOS to resolve the screen keeps dimming in Windows 10. However, doing so may require some technical expertise, as wrong BIOS changes can permanently ruin your system.
Firstly, enter BIOS either by using Advanced Startup options or manufacturer-specific way. Every manufacturer provides a specific key to enter BIOS during the startup process. You can find this information on the manufacturer’s website or instruction manual that came along with the system.
Go to “Video” from Settings in the BIOS and then select “Disabled” for Dynamic Backlight Control.
Once changes are made, click on “Save & Exit” to save the changes and exit the BIOS. You can then reboot your computer in normal mode and check if the brightness stays as it is without any issues.
17. Check for Hardware Faults
If none of the above solutions helped you resolve the screen dimming issue, you need to check for hardware issues. The faults and damages in the monitor or its cable can cause issues with screen brightness in Windows 10. You can connect to another monitor and use a different cable to check for issues.
If you are not sure about it, you can get help from the field’s experts to find the hardware failures. Once the problem is detected, you can either replace damaged hardware or repair it.
Final Thoughts On Screen Keeps Dimming In Windows 10
You can set the brightness of your computer screen as per your requirements. However, if there are some issues, the brightness will increase or decrease automatically. For example, many users complain that their screen keeps dimming in Windows 10 PCs. Well, this can be because of the enabled adaptive brightness option.
However, if this feature is not enabled and the brightness is decreased automatically, you need to resolve the issue. Some workarounds mentioned in the above guide can help you fix the problem with screen brightness.
Well, if the issue does not resolve with workarounds, you may need to replace the hardware components of the monitor.
FAQs
Why does my screen keep dimming itself?
If the adaptive brightness is enabled, the brightness changes on its own as per surrounding lighting. However, the screen may keep dimming because of graphics driver issues, power saving features, hardware faults, and third-party applications.
How do I stop the screen from dimming on its own?
You can update, reinstall, roll back display drivers, change brightness settings, uninstall recent Windows 10 updates, change display resolutions, modify BIOS settings, and fix the hardware failures to stop the screen from dimming on its own.


