Key Takeaways:
- Microsoft changed the right-click menu in Windows 11.
- You need to perform an extra step to see the classic Windows 10 menu in Windows 11.
- It is possible to customize Windows 11 right click menu and change it to Windows 10 classic context menu.
- You can also add apps to the right-click menu after customizing them.
Microsoft introduced a sleek design with the new Windows 11. The overall look and feel of Windows are improved with Windows 11. Even the right-click menu, known as the contextual menu, is changed. However, the change in the right-click menu didn’t go well with many users. If that is the case with you, you can customize the Windows 11 right click menu to get the legacy context menu back on your PCs.
After upgrading to Windows 11, some users loved the new design, while some wanted the old design back. You can also get the old Start menu back on your Windows 11 PC. Now, let’s dive in deep and get the old contextual menu back on your computer.
Where Is The Full Right-Click Menu In Windows 11
If you are just searching for the full right-click menu, you can get it easily from the new Windows 11 context menu. There is no customization or additional options required in this case.
To find the classic right-click context menu, right-click on any item and click on “Show more options” from the menu.
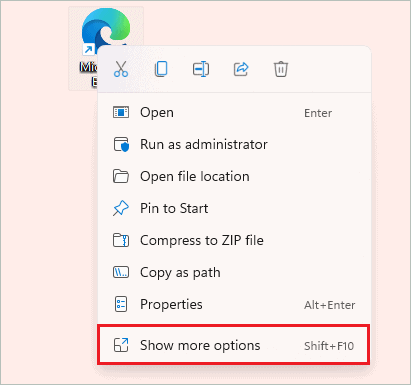
The classic Windows 10 right click context menu bar pops up on your screen.
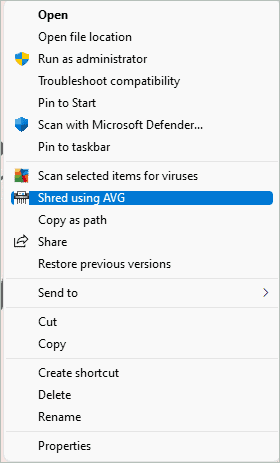
You can now click on the action you want to perform on the app.
How To Customize Windows 11 Right Click Menu
If you don’t want to navigate through two menus to perform one task on the app, you can customize the Windows 11 right click menu. You can use Registry Editor or Command Prompt to get the old contextual menu back on your Windows 11 computer.
1. Use Windows Registry Editor
You can make some changes in the Registry Editor to customize Windows 11 right click menu. However, make sure you backup the entire Registry before making any changes. So, if anything goes wrong, you can revert the changes using backup.
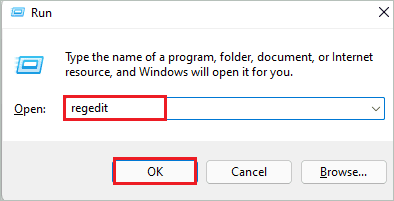
Step 1: Press Windows key + R to open the Run window and type “regedit” there. Click OK to open the Registry Editor.
Step 2: In the Registry Editor window, navigate the path below.
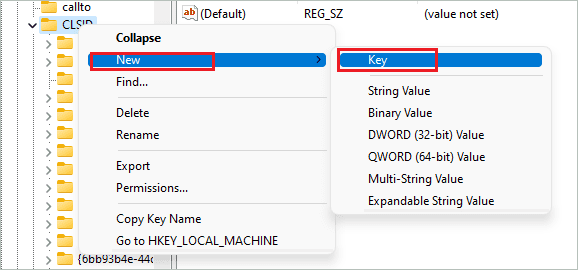
HKEY_CURRENT_USER\Software\Classes\CLSIDStep 3: Right-click on the CLSID in the left pane and select New ➜ Key.
Step 4: Name this new key as below.
{86ca1aa0-34aa-4e8b-a509-50c905bae2a2}Step 5: Create a new registry key in {86ca1aa0-34aa-4e8b-a509-50c905bae2a2} by right-clicking on it and selecting New ➜ Key.
Name this key as InprocServer32.
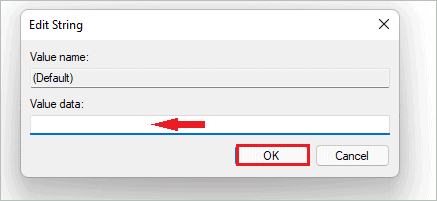
Step 6: Now, in HKEY_CURRENT_USER\Software\Classes\CLSID\{86ca1aa0-34aa-4e8b-a509-50c905bae2a2}\InprocServer32, double-click on the “(Default)” DWORD.
Step 7: Keep the Value data empty and click on “OK” to save it.
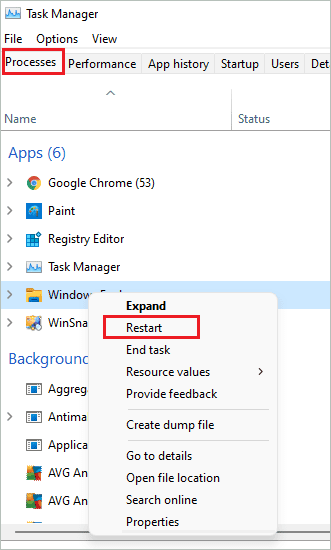
Step 8: Close the Registry Editor and open Task Manager by pressing Ctrl + Shift + Esc keys simultaneously.
Step 9: In the Task Manager, ensure you are in the “Processes” tab and right-click on the Windows Explorer. Select “Restart” from the context (right-click) menu.
Note: If you don’t find the Windows Explorer process, launch File Explorer on your Windows 11 PC by pressing the Windows key + E.
You can now go to the Desktop and right-click on any app. You will old right click menu back on your Windows 11 PC.
If you don’t wish to restart Windows Explorer, you can either restart your computer or sign out to your computer to apply the changes.
You won’t be able to see the customized Windows 11 right-click menu unless the Windows Explorer is restarted.
2. Use Command Prompt
If you don’t want to perform so many steps in the Registry Editor, you can use Command Prompt to get the old context menu back. Then, you just need to execute one command, and the changes will be applied in the Registry Editor.
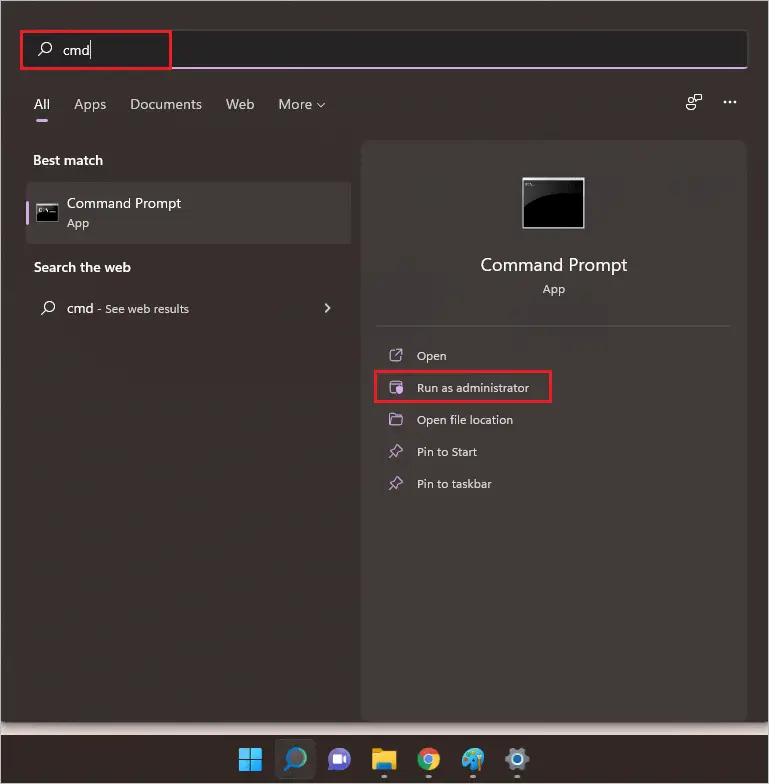
Press the keyboard shortcut for the Windows key and search for “cmd” in the Start menu search bar.
Next, click on “Run as administrator” to open the Command Prompt as administrator.
In the Command Prompt window, enter the following command and press Enter key to execute it.
reg add "HKCU\Software\Classes\CLSID\{86ca1aa0-34aa-4e8b-a509-50c905bae2a2}\InprocServer32" /f /ve
You will see “The operation completed successfully” if the command is executed without any issues.
Once the commands are executed, all the keys will be created in the right location, and you will get the Windows 10 context menu in Windows 11. This is a faster method than a registry settings hack to get the classic context menu back.
How To Add Apps To Windows 11 Right Click Menu
You can add apps of your choice to the right click menu in Windows 11. This is possible only if you customize the Windows 11 contextual menu to the classic Windows 10 contextual menu. The below step is to add the Calculator app to the right-click menu.
Step 1: Open the Registry Editor on your computer.
Step 2: In the Registry Editor, navigate to the below path.
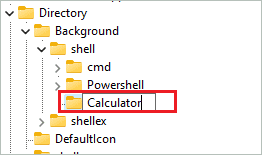
HKEY_CLASSES_ROOT\Directory\Background\shellStep 3: Right-click on “shell” and select New ➜ Key.
Name the key as “Calculator.”
Step 4: Double-click on “(Default)” in the Calculator key and change its Value data to “&Calculator.” Finally, click on OK to save the changes.

Step 5: Under the Calculator key, create a new key name, “command.”
Step 6: Go to the newly created command key and double-click on the “(Default)” DWORD there.
Change the Value data of (Default) to “calc” and click on “OK” to save changes.

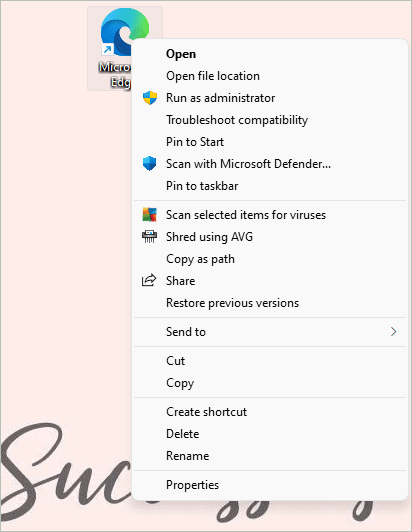
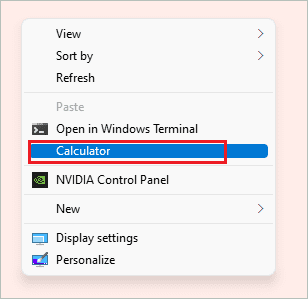
Now, right-click on the Desktop and see “Calculator” there.
You can similarly add many such apps. However, folders cannot be added to the right-click menu. To access folders and files quickly, pin them to the taskbar.
How To Undo Changes to Right-Click Menu
If you want Windows 11 right click menu back, you can simply delete the registry entries. However, make sure you delete the right one; otherwise, there can be severe consequences. Once the entries are deleted, restart the “Windows Explorer” process from Task Manager to get the modern context menu back.
Conclusion
If you frequently use options from the old right-click menu, it makes no sense to do two clicks to get to that menu. In this case, you can change Windows 11 right click menu to the classic Windows 10 menu. Unfortunately, you may have to use a separate process. You need to change the Registry Editor or execute a command, as there is no direct way to get the classic full context menu back.
The above guide can help you with simple actions and instructions to customize Windows 11 right click menu on your computer. You can also add apps of your choice to the changed contextual menu with the help of this guide.
FAQs
Why does the Windows 11 context menu have fewer entries?
Microsoft removed the clutter from the context menu. Many applications insert themselves in the context menu, making it unnecessary longer. You can see the entire context menu when clicking on Show more options.
Where is the copy, paste and rename options in the context menu in Windows 11?
You can find the copy, paste and rename option at the top of the context menu in Windows 11. In addition, the horizontal bar on the context menu includes cut, copy, paste, and rename options.
How to restore the classic Windows 11 right click menu in Windows 11?
You can execute the below command in elevated Command Prompt to restore the classic Windows 11 right click menu in Windows 10.
reg add “HKCU\Software\Classes\CLSID\{86ca1aa0-34aa-4e8b-a509-50c905bae2a2}\InprocServer32” /f /ve


