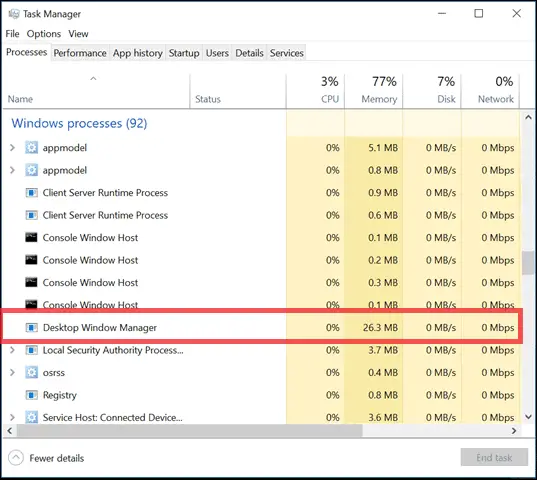
The Task Manager is an OS component that is present in all Windows versions. It tells you about all the currently running processes on Windows 10, its CPU, memory, disk, and network consumption. So, have you ever checked Task Manager and stumbled on this Windows process called Desktop Window Manager?
If yes, then you would have also wondered what is dwm.exe? And how is it different from Task Manager?
Task Manager gives you essential information about all the processes currently running on Windows. You can also check the performance of each process with the Task Manager. To open Task Manager press Ctrl + Alt + Delete together and then click on Task Manager.
Desktop Window Manager is a Windows process that is responsible for managing visual effects on your computer. The visual effects handled by Desktop Windows Manager in the latest version of Windows 10 comprises glass window frames, 3D window transition, high-resolution support, and also basic elements like Windows themes and wallpapers.
Whenever you open any application on your desktop, the application does not directly display its window. Instead, they write the display in some buffer. Desktop Window Manager then combines the display of application windows using the contents from the buffer.
This helps Windows to add different visual effects like transparency and live thumbnails in Windows 10 display.
Is it Possible to disable/stop the Desktop Window Manager?
The process mentioned above runs in the background as managing the display, and visual effects are an essential part. There is no way to prevent it in Windows 10. If you are using Windows 7 or vista, you can stop the process running this Desktop Window Manager. However, from Windows 8, (dwm.exe) Desktop Windows Manager has become a vital part of Windows.
What to Do When Desktop Window Manager is using High CPU
Desktop Window Manager cannot be stopped, prevented or removed from your Windows 10 PC. If you are facing a high CPU consumption issue by Desktop Window Manager only when you try using RDP, then you are probably using version 1903 of Windows 10.
Not sure about the Windows version that you are currently using?
Follow the instructions listed below to find out the version you are using.
In the search menu, type cmd.
Then, open Command Prompt.
Next, type winver in the Command Prompt and hit Enter.
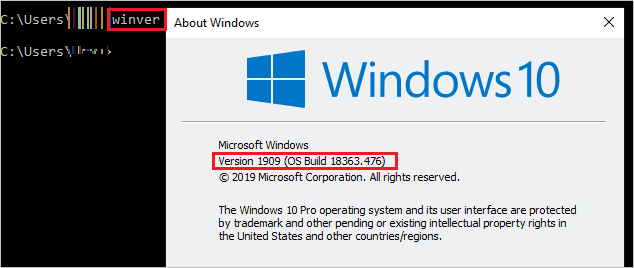
The popup window will highlight the Windows version. It is 1909 in our case. If you are on version 1903 and have not updated your Windows since June, then you need to do it as early as possible.
Microsoft solved this bug in its KB4522355 update released on 24th October. To update your Windows, type update in the search menu.
Now, click on Check for updates.

Download and install the updates and then restart your PC. You can now check if there is an issue with dwm.exe.
However, if the Desktop Windows Manager is still having high CPU utilization or dwm notification error window problem, then you can try the different solutions from the list below.
1. Change the Wallpaper and Themes
As you know, dwm.exe in Windows 10 is responsible for handling Windows wallpaper and theme. So, to solve the issue of high CPU utilization by Desktop Window Manager, try changing the Personalization settings.
Press Windows key + I to open Settings Application and select Personalization.
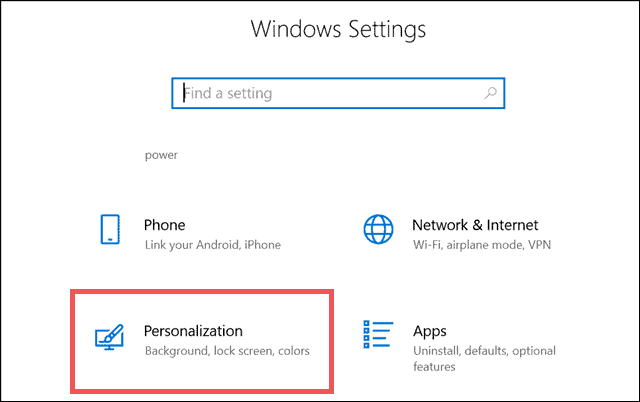
Navigate to Backgrounds and select a different background.
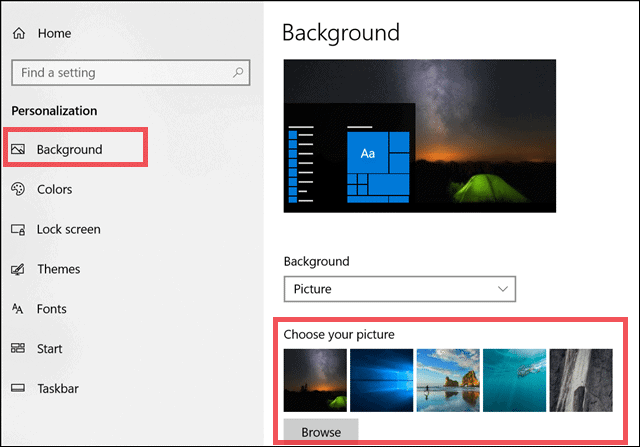
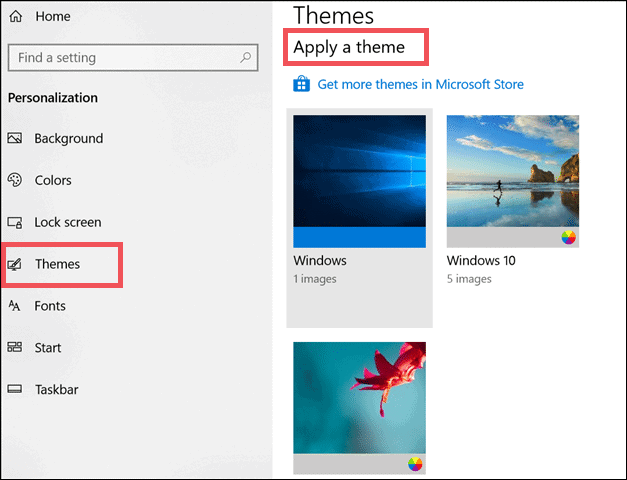
For changing the theme, go to Themes and select a theme from the list of themes available.
Check if the CPU utilization has gone down with this simple change.
Our gallery has some of the best Windows themes around the internet. Do check it out!
2. Turn Off the Screen Saver
Sometimes, the screen saver may cause an issue. The black screensaver, which seems like an off-screen, has the processes running in the background. Disable the screen saver and check if it is the culprit behind the high CPU usage by Windows Desktop Manager.
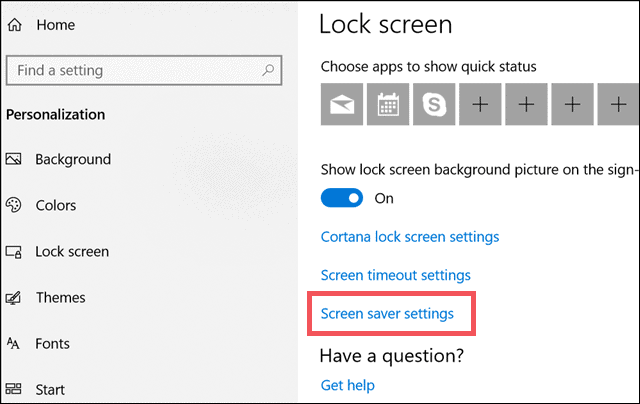
Launch the Settings app and go to Lock Screen.
Click on Screen saver settings.
When the Screen Saver Settings window appears on the screen, select (None) under Screen Saver.
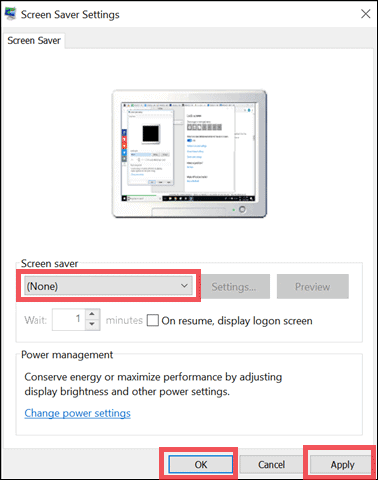
Click Apply to save the changes, then click on OK.
3. Change Default App mode
Try changing the default app mode to reduce the CPU utilization by Windows Desktop Manager.
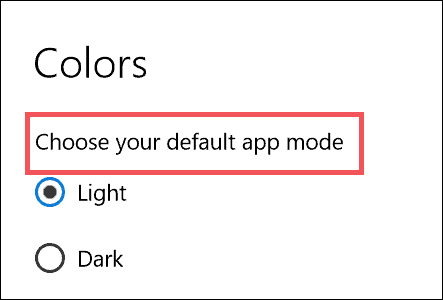
Go to Personalization under Settings App. Click on Colors. Search for Choose your default app mode and change the color.
This would work as a solution for desktop window manager high CPU issues.
4. Update Graphics Drivers
Sometimes the outdated Display drivers can be the reason for your system lag. You can update the drivers by following the steps below:
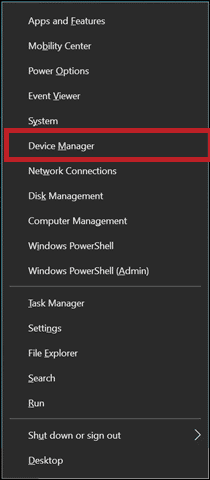
Press Window key + X and click on Device Manager.
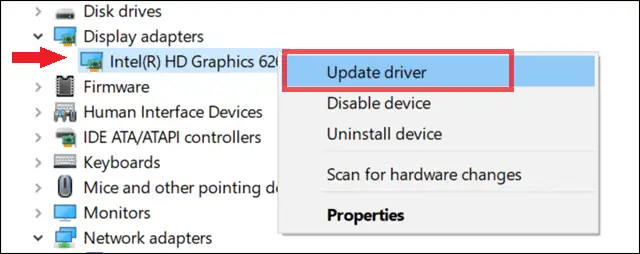
When the device manager opens, search for Display adapters and right-click on the options present under it.
Click on the Update driver.
Check for the CPU utilization by dwm.exe in task manager, to confirm if this solution worked for you. Please see our complete driver management article to explore other options to update the graphics drivers.
5. Check for Virus
A virus can cause your dwm.exe to use high CPU and make your computer run slower. However, it is rare to replace your dwm.exe file with a virus, but it is better to be safe than sorry.
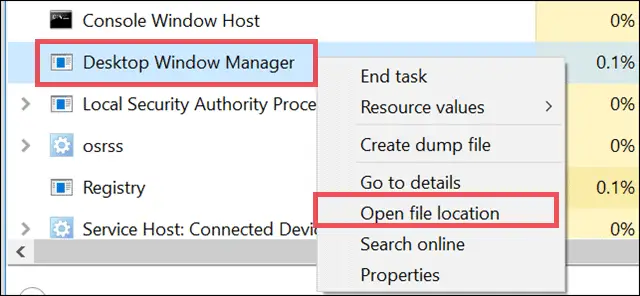
To check if dwm.exe is the virus open Task Manager by pressing ctrl + alt + delete.
Right-click on Desktop Windows Manager. Then, select the Open file location.
Check if the file location is C:\Windows\System32. If the file is not present in the System32 folder, then there are chances of the virus in the system.
Scan the system using the antivirus software to find out the details.
However, if the file is present in the System32 folder and still your PC lags, then check out for other solutions from the list.
6. Disable Hardware Graphics Acceleration
Hardware acceleration is to use computer hardware to perform some tasks more efficiently than the software. You can disable this hardware acceleration for the Microsoft office files. This may solve the Desktop Windows Manager using high CPU issue
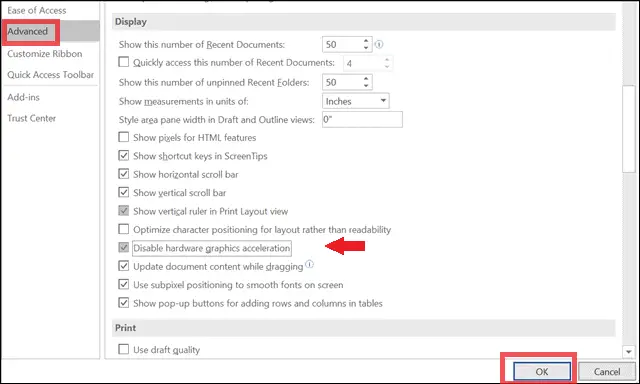
Open any blank Microsoft office file and go to File from the menu bar.
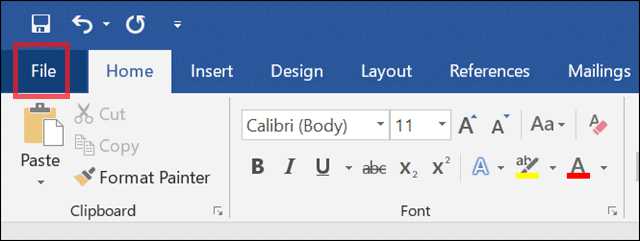
Now click on Options.

A new window appears on the screen, click on Advance.
In Advance option, search and locate Display.
Under Display, check the checkbox next to Disable hardware graphics acceleration.
Click on OK to save the changes.
Restart the PC and check if the issue is resolved.
7. Adjust for the Best Performance
Editing the performance option may solve the performance issue caused by dwm.exe.
Search for the control panel in the start menu and open the Control Panel. Search for performance in Control Panel and click on Adjust the appearance and performance of Windows.

Click on the radio button next to Adjust for best performance under the Visual Effects tab.
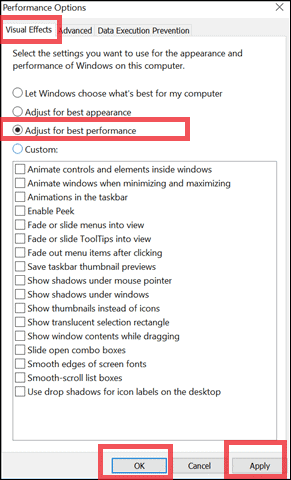
Click Apply to save the changes and then click on OK.
8. Run Performance Troubleshooter
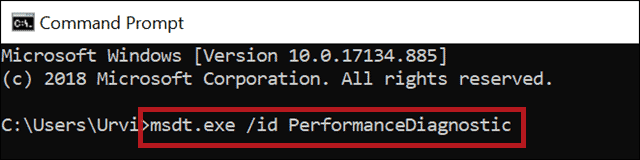
If the above solutions are not able to solve your high CPU utilization issue, then you can try to use Windows troubleshooter. You need to log in as an administrator to execute the command for performance troubleshooter. This command can find the fault and also solve the issue for you.
Open the command prompt from an Admin account. Type the following command:
msdt.exe /id PerformanceDiagnostic
Hit Enter.
A new window appears on the screen.
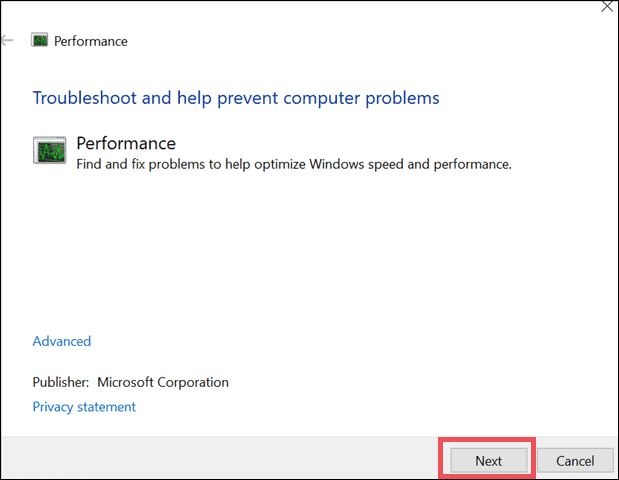
Click on Next to start the troubleshooting process.
9. Uninstall recently added Applications
If you are facing the issue of Desktop Window manager using high memory after installation of particular software or updating existing software. Then, you can try disabling or uninstalling the software and check if it resolves the issue.
If the issue gets resolved after uninstalling the software, then you can keep it as it is. Then, search for other options for the same type of application or speak to the customer care executive about the same.
Also read: Fix memory leaks in Windows to speed it up.
Final Thoughts on Desktop Window Manager
The issue of high CPU utilization by Desktop Window Manager is prevalent in Windows 10. However, there are many solutions to fix this issue. You can try out the solution which is feasible and straightforward for you.
Sometimes, simply changing the wallpaper may fix the issue, or you may also need to update the drivers in some cases. This issue has different causes and hence, various solutions.
Also read: Driver issues bug Windows users all the time. To address that, we have written the most detailed guide to Windows Device Drivers on the web.


