The task manager shows you complete information about the processes running, which includes disk, memory, and CPU usage. Sometimes, you see 100 percent disk usage in Windows 10. In that case, your system becomes slow and its performance is affected. At times, the disk usage escalates to 100%, even when no such heavy process is running. In such cases, even opening a single file can take ages.
Well, 100 percent disk usage in Windows 10 is an issue, which can be solved using simple workarounds and can be fixed conveniently.
Solutions to Fix 100 percent Disk Usage In Windows 10
We have listed 18 solutions to fix 100% disk usage in Windows 10 because the cause of the issue can be different for different users. The fix that can work for you may not work for your colleague or friend. Hence, our team of experts came up with all possible solutions you can use to fix 100 percent disk usage in Windows 10.
1. Restart your System
As all Windows users know, restart can solve many issues. So, there are high chances of fixing disk usage issues with a simple restart.
Click on the Windows icon seen on the taskbar and then on the Power button. Next, click on the Restart option.
Here, make sure you restart your system and not shutdown it. As after restart, your system will start from a fresh state, probably fixing the issue for you. If, after the restart, you still face 100 % disk usage in Windows 10, then check out the next solution.
2. Update Windows
Windows tries to fix various bugs with each update. So, if you are using an outdated or old version of Windows, then you need to update it to fix disk usage issues.
Step 1: Press Windows key + I to open Settings and click on Update & Security.
Step 2: Go to Windows Update from the left panel.
Step 3: Click on Check for Updates seen in the right frame of the Settings window.
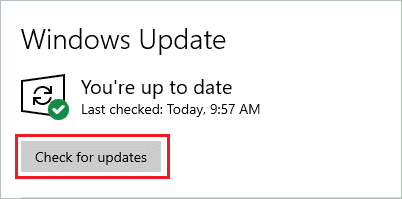
Step 4: If there are any updates, download and install it.
After the install, open the task manager and check the disk usage. If it is still showing 100 percent disk usage in Windows 10, you can try out the other solutions.
3. Change Power Option
Many of the users fixed the 100% disk usage issue of Windows 10 by changing the Power option.
Step 1: Type control panel in the search menu and click on Control Panel from the search result.
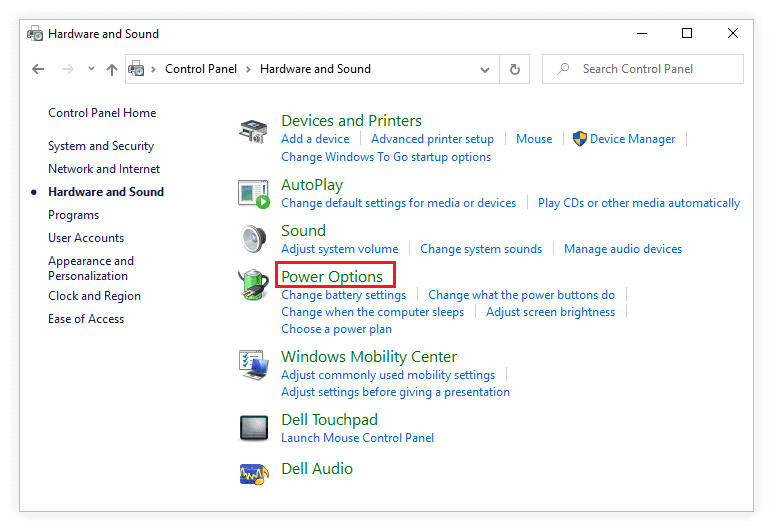
Step 2: Click on Hardware and Sound. Next, click on Power Options.
Step 3: Under the selected plan, click on Change plan settings.
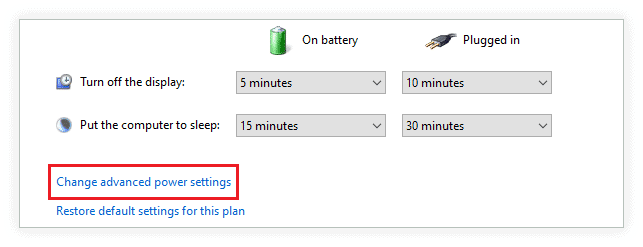
Step 4: Next, click on Change advanced plan settings.
Step 5: When the Power Options window opens, select High performance from the drop-down menu.
Step 6: Click on Apply, followed by OK.
Now, check if the Windows 10 issue of 100 percent disk usage is fixed.
4. Check for Virus
The virus residing in your system can also cause issues with your disk usage. You can use your third-party antivirus software or Windows Security to scan your computer. If there is any trace of the virus, you can remove the infected file or folder.
Once the malware is removed from your computer, restart your PC. Now, check if you see disk usage showing 100 percent in Windows 10.
5. Run A Disk Check Command
A disk check may show the details on the health of the hard disk of your computer. If there are any issues, then you may know after executing the command for disk check.
Step 1: Press the Windows key + X keys and choose Windows PowerShell (Admin). If you are not logged in as Administrator, then you will be asked for admin credentials as soon as you click on PowerShell.
Step 2: When the terminal opens, type in the below-mentioned command and hit Enter.
chkdsk /f /r
If you see a message on your screen, “Would you like to schedule this volume to be checked the next time the system restarts? (Y/N)”
Press Y and hit Enter
Step 3: Restart your system. The disk check process will start. It will take time, depending on the data you have on your drive.
After the disk scan, your system will start as usual. You can open the task manager and check if the problem of high disk usage is resolved.
6. Update Device Drivers to fix 100 % disk usage issue in Windows 10
Sometimes, the issue might be caused by device drivers that aren’t updated. You can update your device drivers to see if it fixes the 100% disk usage in Windows 10 problem for you.
There are two ways of updating your Windows 10 device drivers, one is to use official utilities, and another is to do it manually. To know the process to update your drivers, you can refer our complete guide on Windows device drivers.
7. Disable Windows Search
Windows Search is a great help to find files on your computer. It indexes all the files and makes it easy to search. Sometimes, this can cause high resource utilization of your computer. You still have the search option for files on your computer, but it will take much longer than before.
You can temporarily disable Windows search to check whether 100 percent disk usage in Windows 10 was caused by it. Follow the steps given below to temporarily disabled Windows search.
Step 1: Right-click on the Windows icon and choose Windows PowerShell (Admin). Add in the credentials or click on Yes when asked by the warning prompt.
Step 2: When PowerShell opens, type net.exe stop “Windows search” and hit Enter.
Now, go to the task manager and check disk usage, if it is not showing 100%, you can disable the Windows Search permanently by following the steps given below. However, if it is still 100%, then Windows Search was not the culprit, you need to move on to the next solution in this list.
Step 1: Press Windows key + R keys to open Run. Type in services.msc in the text box and press Enter.
Step 2: Look for Windows Search, and when found, double-click on it.
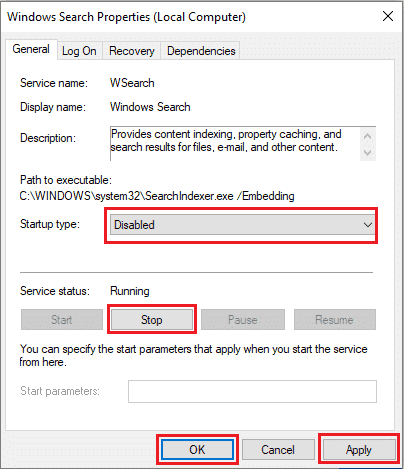
Step 3: When the properties window opens, click on Stop and change the Startup type to Disabled using the drop-down menu. Lastly, click on Apply, followed by OK.
Restart your system and check if the problem of high disk usage is resolved in the task manager.
8. Reset Virtual Memory
Virtual memory is created by combining the RAM and some parts of the hard drive. When the computer runs short of RAM, Windows will store files temporarily in virtual memory and then move them back to RAM when there is space. At times, if you reset the virtual memory, it removes the high disk space on your computer.
Step1: Open the Control panel and then navigate to System and Security ➜ System. Click on Advanced System Settings from the left panel.
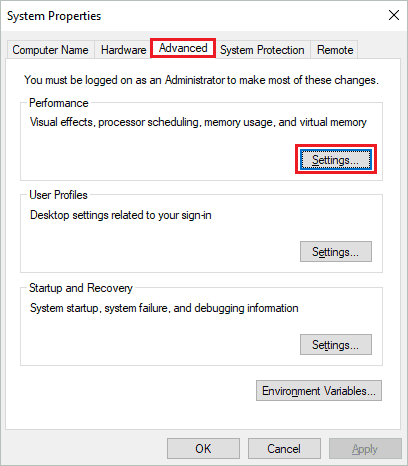
Step 2: Click on the Advanced tab of System Properties, and then click on Settings present under the performance.
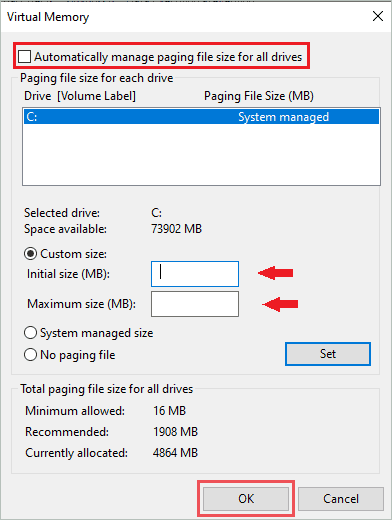
Step 3: Disable Automatically manage paging file size for all drives by unchecking the checkbox next to it.
Step 4: Choose the drive (usually C) and click on Custom size. Now, enter the initial size and maximum size. This size depends on the RAM size of your system and is different in all cases.
Once done, click on OK.
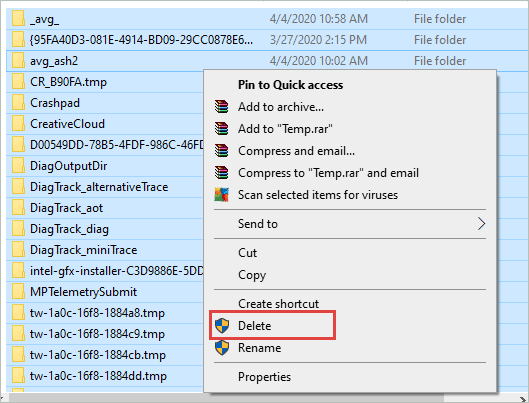
Step 5: Next, clear all temporary files on your system. For that, you need administrator credentials. Press Windows key + R to open Run and type in temp in the text box, followed by clicking on OK. Enter the admin credentials if you are not logged in as Administrator.
Step 6: When the temp folder opens, press Ctrl + A to select all the files and folders. Right-click and choose Delete from the context menu.
Now, check if it is showing 100 disk usage on Windows 10 system.
9. Disable SuperFetch
SuperFetch is an important feature that helps decrease boot time by loading programs more efficiently. It has been known to cause 100% disk usage in Windows 10. Follow the steps below to disable SuperFetch in Windows 10.
Step 1: Press Windows key + X and click on Windows PowerShell (Admin).
Step 2: Type the below-mentioned command and hit Enter.
net.exe stop superfetch
Step 3: If there is a prompt showing that the above one is not a valid command, then execute the below-mentioned command.
net.exe stop sysmain
Wait for some time till the SuperFetch gets disabled and then check the disk usage of your system.
10. Fix the StorAHCI.sys Driver
The source of this fix is Microsoft’s official site. Sometimes, Advanced Host Controller Interface PCI-Express (AHCI PCIe) can cause issues of 100 percent disk usage in Windows 10. Well, you can find out if this is an issue in your case and also fix it with small tweaks.
Firstly, you need to check whether you have an AHCI driver. To do so, follow the steps mentioned below.
Step 1: Press Windows key + X and click on Device Manager.
Step 2: Search for IDE ATA/ATAPI Controllers and expand it. You will see the AHCI controller below it, double click on it.
Step 3: Navigate to the Driver tab and click on Driver Details in that tab.
Step 4: Under driver files, if you see storahci.sys, then you have StorAHCI in your system. Now, close the details window.
Well, if you have StorAHCI, the below steps will help you fix it.
Step 1: From the Driver tab, go to the Details tab in the properties window
Step 2: Now, under Properties, there is a drop-down menu, click on it, and select Device Instance Path.
Step 3: Below value, you will see some path, copy this path from VEN till the end and paste it notepad for future reference.
Step 4: You need to make some changes in the registry editor. And it is always recommended to back up the registry before tweaking it.
Type regedit in the start menu, and open Registry Editor from the search result.
Step 5: Next, navigate to
HKEY_LOCAL_MACHINESystemCurrentControlSetEnumPCI <AHCI Controller>Device ParametersInterrupt ManagementMessageSignaledInterruptProperties
Here <AHCI Controllers> is the path you copied in Step 3.
Step 6: In the right panel of the window, double click on the MSISupported key. Change its Value data to 0 and click on OK.
Restart your computer and open the task manager to check if the problem of high disk usage is resolved after fixing StorAHCI.sys Driver.
11. Uninstall Skype
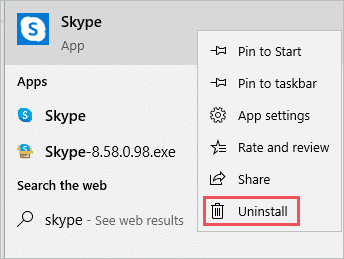
Sometimes, Skype can also cause issues with 100 disk usage. You can temporarily uninstall it and check if your issue is resolved. To uninstall Skype, type skype in the start menu. Now, right-click on Skype from the search result and select Uninstall from the context menu.
Restart your system after uninstalling Skype and check if the issues 100% disk usage in Windows 10 is resolved.
12. Disable Antivirus
Sometimes, the antivirus program itself causes the 100% usage of the disk on Windows 10. In such cases, disable the antivirus program and see if it helps in bringing the disk usage back to normal.
Well, If it does return to normal after disabling the antivirus program, you can check with the support team to get your issue fixed. You can also opt for another antivirus to protect your system and avoid disk usage issues.
13. Turn off Windows Notification
Well, this may sound weird to some users, but it has worked for many. Plus, there is no harm in disabling some unwanted notifications if it brings down the high disk usage and consumption.
Step 1: Press Windows key + I to open Settings and click on System.
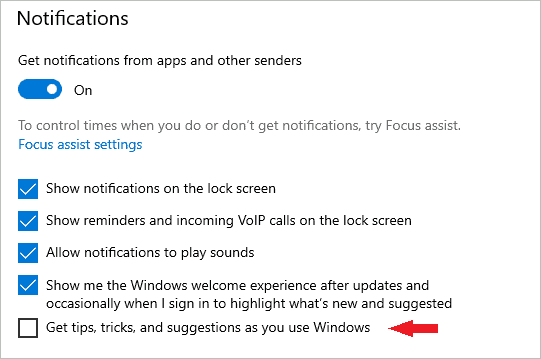
Step 2: From the left panel, click on Notifications & actions.
Step 3: Uncheck the box next to Get tips, tricks, and suggestions….
Now, check if the disk consumption gets better after this.
14. Perform A Clean Boot to Fix 100 % disk usage Windows 10
A clean boot is a good diagnostic tool to figure out what is creating the 100% disk usage issue. When you perform a clean boot, it loads Windows with the least number of drivers and startup programs.
To clean boot a system, follow the steps mentioned below.
Step 1: Type msconfig in the start menu and click on System Configuration from the search result.
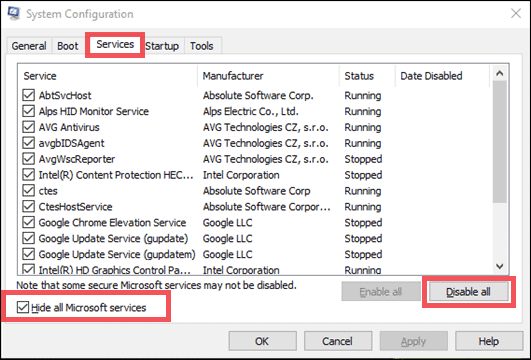
Step 2: When the System Configuration opens, go to the Services tab and check on ‘Hide all Microsoft services’ checkbox. Then, click on Disable all to disable all other services except the Microsoft one.
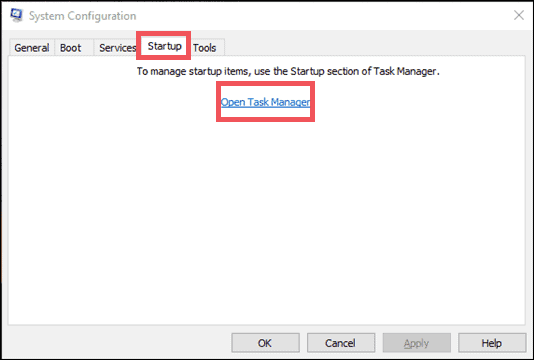
Step 3: Once you complete the process mentioned above, go to the Startup tab and click on the Open Task Manager.
Step 4: When the task manager opens, disable all the services. Please note that the list can differ from system to system.

Step 5: Now, close the task manager and click on OK in System Configuration.
Restart your PC and then check if the disk usage went down. If yes, then one of the third-party programs is the culprit. Now, you can start enabling the other programs one by one. This will help you to figure out which program is causing the disk usage issue. If you find the source of the problem, you can either disable that program or simply uninstall it.
Well, this can be a time-consuming process, but it can give you relief from disk usage issues.
15. Upgrade RAM
If you are having too small RAM, especially 1 or 2 GB, then you can end up having 100% disk usage issues in Windows 10. Well, this is not always the case, there are people whose PCs work perfectly fine with 1 or 2 GB RAM, but then it also depends on their usage. In the case of users with heavy software and processes, you need a minimum RAM of 4 GB for Windows 10.
You can try updating your RAM as one of the final resorts of disk issues.
16. Upgrade SSD to Fix 100 % disk usage Windows 10
SSDs are used to speed up Windows 10 and boost its performance. However, sometimes, this SSD can cause issues with your Windows 10 and increase the disk usage. You can try upgrading your SSD if you feel that it is the culprit.
Conclusion
The various solutions listed above are for the ones looking for, “How to fix 100 disk usage windows 10?” Now, you may have your disk usage issue fixed with one of the solutions. There are various solutions because the reason for 100 percent disk usage in Windows 10 can differ from system to system. For some, only rebooting systems may work, while others may need to fix their StorAHCI.sys driver.
The solutions depend upon how critical the issue is. However, a word of advice here is that your hard drive should never have 100 percent disk usage in Windows 10. Because your system cannot function properly and may slow down. Well, prevention is better than cure. So, be safe and don’t wait till the last moment.
Also, check:
Best Tools to Keep Any Software/App Always on Top in Windows and Mac
A Simple Guide On How To Use Startup Repair In Windows 10
How To Install Fonts In Windows 10 And Manage Them With Ease


