You can search for any files, applications, and even settings in Windows 10 using its search option by using Cortana or typing the name of the needed service. It is a simple feature that brings ease and convenience in using the Windows 10 system. However, sometimes you can end up in a situation where Windows 10 search is not working as expected.
Well, it can be because of a recent update, temporary glitch, or some other issues with indexing. You should make sure that the problem is not with the start menu in Windows 10, but with search functionality. The solutions mentioned below solutions will help you fix the Windows search bar not working issue conveniently.
Solutions to Fix Windows 10 Search Not Working
At times, you can’t type in the search bar in Windows 10, or Cortana search is not working correctly. In such cases, you can open settings, files, and applications via File Explorer, Windows button, or shortcut keys, as an alternative, until you find the permanent fix.
Note: Some of the solutions mentioned below will require administrator access, so ensure you keep administrator credentials handy.
1. Restart your Computer
Restarting your system can fix temporary glitches caused because of some settings or apps. To restart your system, click on the Windows button seen on the taskbar. Next, click on the Power button and then on Restart.

Once your system restarts, try searching for an app or setting to check if Windows 10 search is fixed post restart.
2. Check for Updates
Windows updates can fix bugs in the system. So, if you face a search issue because of some bugs, you should try updating your system to fix it.
To update Windows 10, follow the steps mentioned below.
Step 1: Press Windows key + I to open Settings and then go to Update & Security
Step 2: From the left panel, go to Window Update and then in the right window, click on Check for updates.

If there are any updates, download and install them. You will need to restart your computer to install the update. After installing a new update, check if Windows 10 search not working issue is resolved.
3. Run the Troubleshooter
The troubleshooter can fix the search not working in Windows 10 for you quickly. You need to run the Search and Indexing troubleshooter to fix the search box. Follow the instructions mentioned below to do it.
Press Windows key + I to open Settings, click on Update & Security and go to Troubleshoot from the left navigation pane.
In Troubleshoot, search for ‘Search and Indexing’ under ‘Find and fix other problems.’ Once found, click on it, followed by ‘Run the troubleshooter.’

On the next window, check the checkbox next to the issues you face with Windows’s search feature. If your problem is not listed, you can tick on the last checkbox, saying, ‘My problem isn’t listed above.’
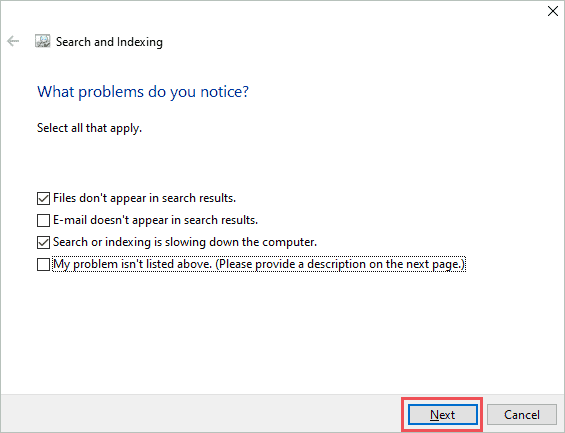
Once you select all the problems, click on Next and follow the wizard on-screen to complete the troubleshooting. You can later check if the Windows 10 search bar not working issue is fixed using Windows troubleshooter; if not, check out the next solution.
4. Restart Windows Search
You can restart Windows search easily by ending a task in Task Manager. Follow the steps mentioned below to restart the Windows search.
Step 1: Press Ctrl + Shift + Esc together to open Task Manager.
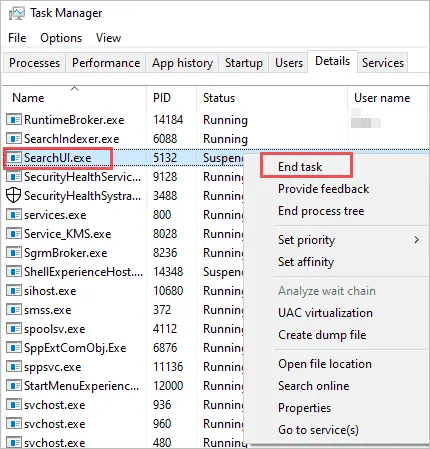
Step 2: Go to the Details tab in Task Manager and search for SearchUI.exe in the Name column.
Step 3: Once you find SeachUI.exe, right-click on it and select End task
Now, click on the search bar and check if the issue is fixed. Windows automatically restarts the ended task as soon as you click on the search bar.
5. Remove Bing from Windows Search
Removing Bing from Windows 10 search feature can fix the search issue for many users. And also, there is always an option to perform a Bing search using your browser. The Bing search is removed by making changes in the registry, so we recommend you back up the registry before making any changes. Once you finish with the backup process, follow the steps mentioned below.
Step 1: Press Windows key + R to open Run, type regedit there, and click OK
Step 2: When the registry editor opens, navigate to the path mentioned below.
HKEY_CURRENT_USERSoftwareMicrosoftWindowsCurrentVersionSearch
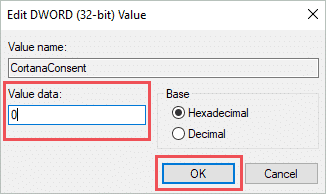
Step 3: In the Search folder, search for CortanaConsent in the right pane and double click on it when found.
Step 4: Change the Value data of CortanaConsent to 0 and click on OK.
Step 5: Now, right-click on the right pane and click on New, followed by DWORD (32-bit) Value.
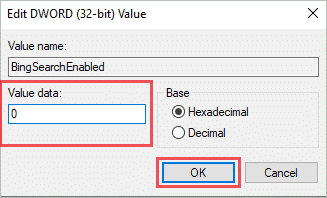
Step 6: When the New value gets created, right-click on it and click on Rename to name it as BingSearchEnabled.
Step 7: Post renaming, double-click on it, and make sure the Value data of BingSearchEnabled is set to 0. If it is not 0, then change it to 0 and click on OK.
Once done with modifying the registry, close it, and restart your system. Post restart, check if Windows 10 search is not working issue is resolved, and you can normally perform the search.
6. Disable Third-Party Antivirus
Sometimes, new antivirus software or a recent update on your existing antivirus software can conflict with Windows system files. This results in some of the Windows features behaving abnormally. You can temporarily disable antivirus software initially and then check if the issue is resolved or not.
If disabling antivirus software fixes your search bar, you can thoroughly uninstall the current antivirus and opt for other malware remover software compatible with your system. However, if you have already paid for antivirus software subscriptions, then speaking to customer care can be of help.
7. Check the Windows Search Service
You can check if the search service is running or not; sometimes, the services are disabled by Windows because of some issues. If the service is not running, you can run it manually.
Step 1: Open Run by pressing Windows key + R, type services.msc there and hit Enter.
Step 2: When the Services open, search for Windows Search service and check if it shows ‘Running.’
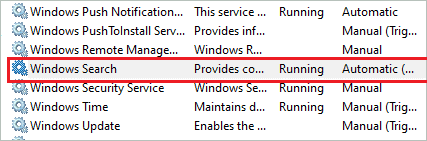
Step 3: If it is not showing Running, you can right-click on the Windows Search service and click on Start to start the service.
Once the service starts, try searching for something in the search bar and check if it works normally. If the Status is Running and still you cannot search for anything in the search bar, then check out other solutions from the list.
8. Enable Background Apps When Windows 10 Search Is Not Working
It may sound weird, but keeping the background apps option enabled in Windows 10 is essential for the search function’s smooth functioning.
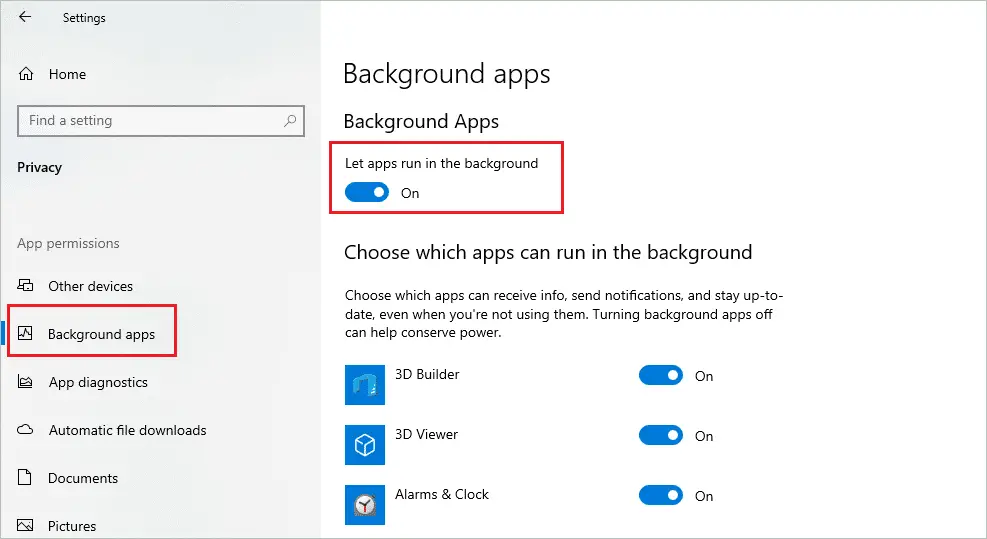
Press Windows key + I and open the Settings app. Next, go to Privacy and go to Background apps seen under App permissions from the left pane.
Now, enable the switch below ‘Let apps run in the background.’ If you don’t wish to run any specific set of apps from the list, you can disable them individually by toggling the switch next to them. However, make sure the main switch for background apps is enabled.
Once done, close the Settings app and check if Windows 10 search not working issue is resolved with this.
9. Uninstall Recent Windows Update
If you are facing issues with the search bar right after updating the Windows, then maybe the problem is with the update, or your system is not compatible with the recent update. In such cases, you can uninstall the recent updates from your system.
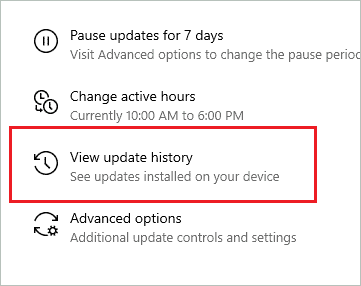
Open Settings, click on Update & Security. Next, go to Windows Update from the left panel and click on View update history.
On the next window, click on Uninstall updates, and when the Installed Updates (control panel) window opens, search for most recent Microsoft updates. Right-click on the recent update and click on Uninstall.

Restart your computer once and check if windows 10 search is not working or if the issue is resolved. Don’t worry about the removed update; it will be installed with the next Windows update on your computer.
10. Disable and Enable Cortana
You can disable and enable the Cortana feature to fix the search not working on Windows 10. As Cortana is a part of the search feature, turning it on and off can fix your search bar. To disable Cortana, you need to follow some simple steps.
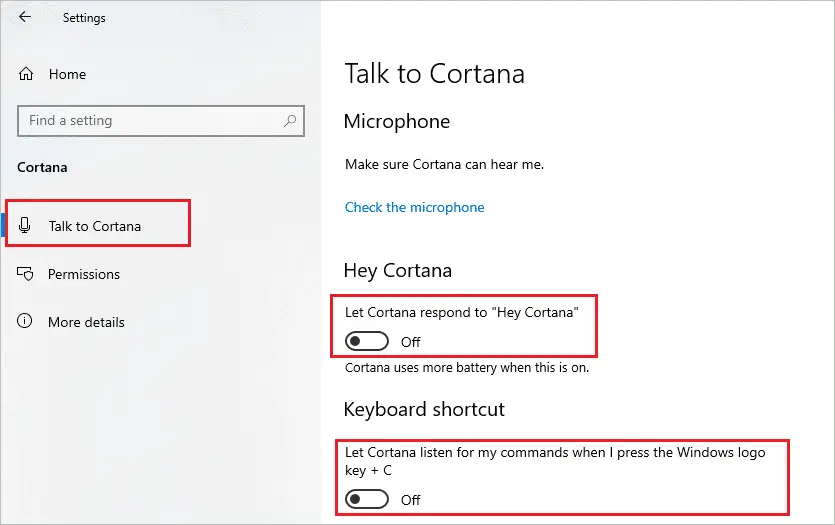
Open Settings by pressing Windows key + I. Then, click on Cortana. From the left panel, go to Talk to Cortana.
Next, disable ‘Hey Cortana’ and ‘Keyboard shortcut’ by toggling the switch below it.
Close the Settings app, and then open the Cortana settings again and enable it. Once you enable it again, check if the search bar functions normally. If you are still facing the issue, then check out the other solutions mentioned below.
Related: Windows 10 Guides: How to Use Cortana on Windows 10
11. Run SFC Scan
System files are the most crucial files of Windows 10; if they are damaged or corrupted, the system can behave weirdly. So, if your search bar is not working, the reason can be damaged system files.
You can use the SFC utility provided by Windows 10 to scan and fix the damaged file in Windows 10. The sfc /scannow command is used to use this utility in Windows 10. You can execute the command in command prompt or PowerShell terminal with admin privileges.
12. Change Windows Search Service
If the Windows Search service is not configured correctly, then also your search bar will not function properly. You need to make some changes so that your search can be easy with a functioning search bar.
Open Services app using Run, as mentioned in solution number 7. Once Services open, search for Windows Search, right-click on it, and select Properties from the context menu.
Click on the drop-down menu next to Startup type and select Automatic. Lastly, click on Apply, followed by OK to save the changes you made. Once done, restart your system and check if Windows 10 search not working issue is fixed with this.
13. Rebuild Index
If the troubleshooting index didn’t fix the search issue, you could try rebuilding the index. It is a time-consuming task, but if the issue lies with the index, it can quickly fix it. Follow the steps mentioned below carefully to rebuild the index without any issues.
Step 1: Press Windows key + R to open Run and then type control /name Microsoft.IndexingOptions and hit Enter to open Indexing Options.
Step 2: When the Indexing Options open, click on Modify.

Step 3: On the next window, click on Show all locations
Step 4: Now, come back to the Indexing Options window, and click on Advanced
Step 5: When the Advanced window is seen on the screen, click on the Rebuild button.
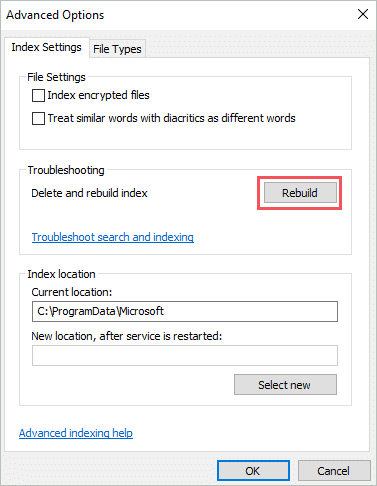
There will be a warning message saying the rebuild will take time; click on OK and let Windows continue with the process. Once done, restart your PC and check if the Windows 10 search not working issue is resolved.
14. Restart Windows Explorer
Restarting Windows Explorer fixes many issues like taskbar not hiding, battery icon missing, and many more related to the start menu and taskbar. And as the search bar is part of the taskbar, restarting Window Explorer can fix it for some users, especially the ones who are facing issues with the search after opening Windows Explorer.
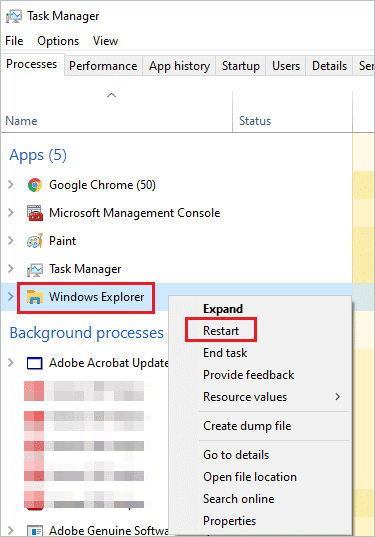
To restart Windows Explorer, open Task Manager by pressing Ctrl + Shift + Esc. Next, go to the Process tab. Right-click on Windows Explorer and click on Restart from the context menu.
If you don’t find Windows Explorer in the Process tab, you can go to File ➜ ‘Run new task’ in the Task Manager window. And then, type explorer.exe in the ‘Create new task’ window and hit Enter. Once the Windows Explorer window opens, you will see the Windows Explorer task in the Process tab. Simply launching Windows Explorer will also make the Windows Explorer task visible to you in the Task Manager.
Once done with restart, check if the search bar is back to normal or not.
15. Use Command Prompt to Run the Troubleshooter
You can run the search diagnostics using the command prompt as well. We recommend the user interface troubleshooter (solution number 3) for the one who is not comfortable with the command prompt terminal.
Step 1: Press Windows key + R to open Run and type cmd there. Press Enter
Step 2: In the command prompt terminal, type the following command and press enter to execute it.
msdt -ep WindowsHelp id SearchDiagnostic

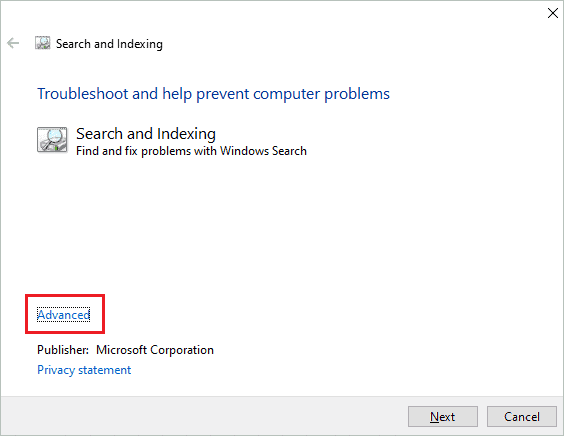
Step 3: In the Search and Indexing troubleshoot window, click on the Advanced button.
Step 4: Make sure the checkbox next to ‘Apply repairs automatically’ is checked.
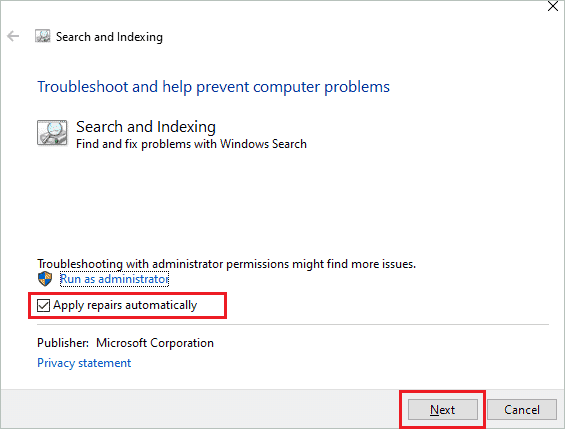
Step 5: Click on the problems you experience and then proceed with the troubleshooting process by following the on-screen instructions.
Once done, check if the Windows 10 search not working issue is resolved.
16. Reset Windows Search
If you are still unable to fix the search bar issue, try resetting the Windows search. The reset procedure depends on the current version of your system. So, to begin with, reset, check the Windows version by following the steps mentioned below.
Open Settings ➜ System ➜ About and scroll down to the Windows specifications section. Note down the number next to Version in Windows specifications.
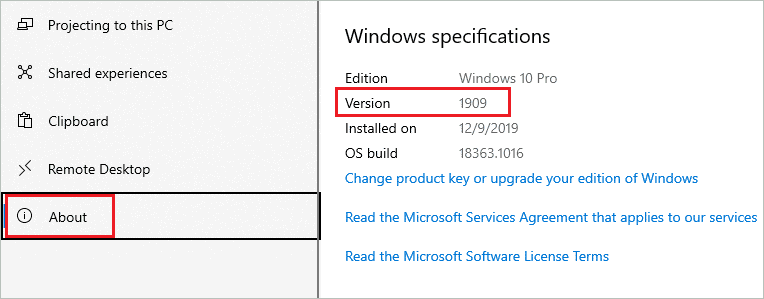
In our case, it is 1909. Now, follow the further process based on your Windows version.
Reset Procedure for Windows Version 1809 and earlier
In the Windows version 1809 or earlier, you need to reset Cortana to reset Windows search.
Step 1: Click on the Start button (Windows Icon) on your screen, and then right-click on Cortana from there.
Step 2: Select More from the context menu and then click on App Settings.
Step 3: When the Cortana settings open, click on Reset there.
Reset Procedure for Windows Version 1903 and later
You need to login to the administrator account to follow the process mentioned below.
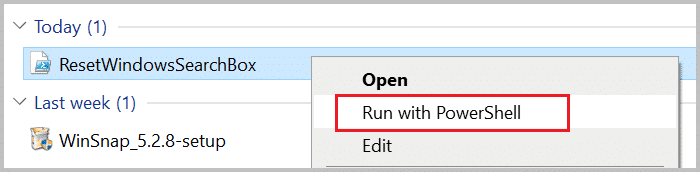
Step 1: Download the PowerShell script from Microsoft’s official website. This script is to reset Windows search via PowerShell terminal.
Step 2: Once the script is downloaded, right-click on it, and select Run with PowerShell from the context menu.
Step 3: When the PowerShell terminal opens, there will be a warning message about the security risks involved, and you will be asked if you wish to continue. Press Y there and press Enter to continue with the process.
Step 4: If there is a question ‘Do you want to allow this app to make changes to your device?’, click on Yes
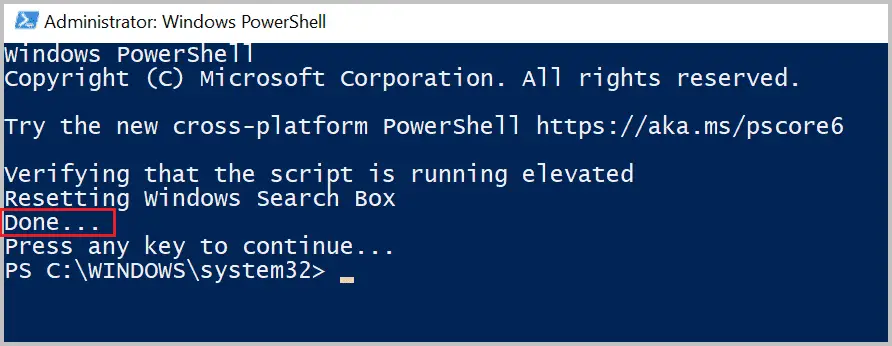
Step 5: Now, let the script run and wait till you see Done on your PowerShell terminal.
Some users may face errors like ‘Cannot be loaded because running scripts is disabled on this system’ while executing the downloaded script. In such a scenario, you need to execute the below-mentioned command.
Get-ExecutionPolicy
Note down the execution policy value displayed post the command execution, as you will need it for future reference. In our case, it was ‘Restricted.’
Type in the below-mentioned command and hit Enter.
Set-ExecutionPolicy -Scope CurrentUser -ExecutionPolicy Unrestricted
There will be a warning message that shows the security risks involved, type Y, and press Enter to continue. Now, again follow steps 2 to 5, and once you see Done, execute the below mentioned commands to avoid security risks.
Set-ExecutionPolicy -Scope CurrentUser -ExecutionPolicy Restricted
Here, Restricted is the execution policy value noted above; if you got some other value, you could change Restricted with that value. The warning message will be displayed on the PowerShell window, type Y, and hit Enter.
Once you are done with the Powershell commands, check if Windows 10 search not working issue is resolved. If not, go for the final resort mentioned below.
17. Reset or Refresh Windows 10
If none of the above solutions worked for you, the final option is to reset or refresh your PC. Resetting Windows 10, don’t delete your personal files from the system; only the installed apps will be deleted. As reset fixes many issues related to Windows 10, it will fix the search bar-related issue.
You can note apps on your system before starting with the reset, as reset deletes the apps installed by you. The reset or refresh in Windows 10 is simple and straightforward; all you need to do is follow the screen’s instructions to complete the process successfully. Post the reset, your issue with the Windows 10 search bar will be fixed.
Conclusion
There is no specific reason for Windows 10 search bar failing to work as expected, and therefore there are many solutions to get it fixed. Windows search bar is a critical function added by Microsoft in Windows for the user’s convenience. We are so used to this functionality that accessing apps and files without it becomes a task.
If your Windows search bar is not functioning correctly, then the above list of solutions will fix it for you. The temporary glitch requires a simple restart, whereas if the cause of the issue is complicated, you may need to reset Windows search or Windows 10. However, in the end, Windows 10 search not working issue will be resolved.


